Pages

Friday, 28 January 2022

Mini Hama bead heart picture

I love crafting with mini Hama beads, they are a great grown up alternative to the larger Hama beads which are aimed at children. The beads are tiny and you can create some really intricate designs. I used some of the beads that I have left over from various mini Hama bead craft kits to create a simple, pop art style, colourful heart picture. 

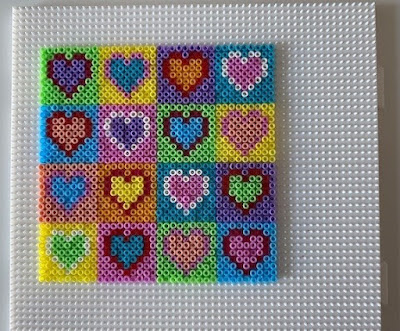
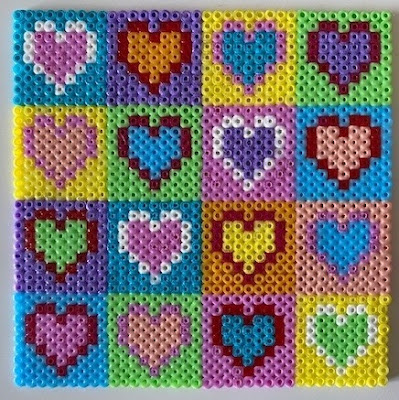
Mini Hama bead pop art style heart picture

For my design I used a basic heart outline. I was originally going to make each heart in a single colour but in the end I decided to make an outline so that I could use a wider range of colours. When it came to the colours I first set out the heart outlines in dark red, medium red, pink and white, trying to spread them out evenly. Then I added in the other colours as I went along, using a mix of colours without any repeated hearts.

It's a great design to use up odds and ends of beads that you might have leftover from a kit, or if you have a bag of beads in mixed colours.

Here is the pattern that I used - I've left it blank as it's very much an individual design depending on what coloured beads you have! But if you do want to use my colours you should be able to see them well in the photographs above and below.

Mini Hama bead or cross stitch heart design pattern

Below are my beads laid out on the large square mini Hama bead pegboard. This is the back of the design. 

Working with mini Hama beads is quite different to working with larger beads as they are very tiny, just 2mm in diameter. They are impossible to place on the board with fingers, so you need to work with tweezers. You also need to be very careful, I know from experience that it's very easy to knock the board and mess up your design!

If you are new to working with mini Hama beads you might find my guide useful - Mini Hama bead guide.

Mini Hama bead hearts on pegboard

When you are happy with your bead placement then it's time to iron your design.

I've written some - Ironing tips for Hama beads.

I must admit that even though I've used mini Hama beads many times I managed to royally mess this one up when it came to ironing! Sometimes the beads can be slightly different heights, so it can look as though they have been ironed when in fact some of the smaller beads are not fused properly. Be very careful when you remove it from the board that all the beads are fused together!

I iron my designs on a cork mat, then I place a second cork mat over the top and flip it over to release the beads from the board. When the design is still warm I place it between the mats with a pile of books on top to make sure that it cools flat. 

I managed to salvage my design with a bit of patience! 

Mini Hama bead pop art style heart picture design

This design uses 1296 mini Hama beads in total. Each heart outline requires 16 beads, the inside of the heart uses 18 and the square around the heart needs 47 beads.

If you like this design you might also like my Mini Hama beads Russian doll tiled picture which also uses beads in a variety of colours. It's made up of four individual pieces which I backed with cardboard and display above my desk on a small wooden easel.

Mini Hama bead Russian Dolls picture

Another design which is great for using up leftover beads is this Hama bead quilt style picture which I made using the larger midi size Hama beads. I mounted it in a square frame for display.

Hama bead quilt style picture

No comments:

Post a Comment

I love reading your comments!