Another month, and another unfinished craft project completed! In case you have missed my previous posts, one of my crafting goals for 2020 was to finish one of my in-progress craft projects every month. I'm well on track, helped by having a lot more time at home over the last few months! So here is my finished craft project for June - two Christmas felt kits.
I received these kits along with two others to review, and you can see my original review post here. I completed the owl as part of the review, and I finished the llama as a Christmas present for my brother, leaving me with a stocking and a polar bear.
This was one of those projects that has been lying about for ages, but was actually really quick to complete, each decoration only took an hour or so! So that left me plenty of time to work on my other projects this month.
I'm loving ticking each project off my list. In a few months I'll actually have finished working on the projects that are physically lying around unfinished, and be able to move onto projects in my head that I have most of the materials for but haven't actually begun!
I think that my next project is going to be my Smash Book. My Smash Book is a bit like a scrapbook, where I stick in ephemera like tickets and postcards, along with pictures of things that I like cut from magazines and so on. I have a big folder of things gathered that I want to add to it, so it's a case of sorting through and grouping similar items together, before gluing them in and adding journalling as necessary. I think that I probably have enough items to fill all the pages, but if not then in future I'll just be able to add to it as I go along.
Pages
▼
Tuesday, 30 June 2020
Wednesday, 24 June 2020
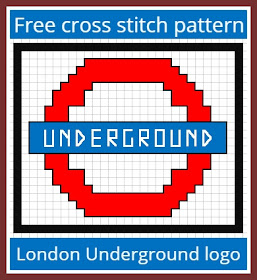
Free small London Underground logo cross stitch design pattern
I've been busy working on my cross stitch map over the last few weeks. Now that I've filled in all the countries that I've visited, I've been coming up with lots of individual designs to represent places that I've travelled to. Some of them are pictures of places around the world, and others are symbols which represent different countries or cities.
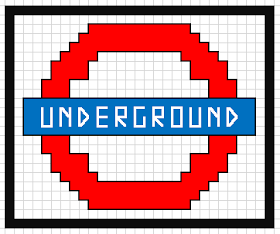
I've shared a couple of my designs already, and so today I'm sharing the design that I came up with for a mini cross stitch London Underground logo. This small version of the logo would be ideal to use on greetings cards, bookmarks or as part of a larger London or United Kingdom themed sampler.
This cross stitch design is very simple. The only colours of thread that you need are red, blue, white and black. I stitched the design with the strand numbers as follows:
Cross stitch - 2 strands
White lettering - 3 strands
Black outline - 1 strand
The cross stitch is done first, then the lettering and back stitch around the edges are added. I chose to complete the background in white but if you are working on white fabric then you might decide that it's not necessary.
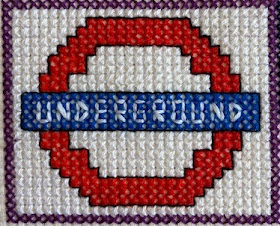
Here is the design as it looks stitched on my sampler. I'm really pleased with how my cross stitch map is building up, I'd love to have it finished by the end of the year but I still have a long way to go!
If you liked this pattern you might also like my other travel themed cross stitch designs:
Free mini Disney castle cross stitch pattern
Free cruise ship cross stitch pattern
Saturday, 20 June 2020
My 100 day project - the three quarter mark
I can't believe that I'm already three quarters of the way through this project! I'm still really enjoying working on my daily drawing or painting and I like to think that I've shown some improvement. I'm definitely beginning to find the style that I enjoy working in.
Here are my previous posts that have shared my progress so far:
My 100 day project - a quarter of the way through
My 100 day project - halfway through
When I first wrote about this project I mentioned that I had been very inspired by this lady's lovely drawings of her life in lockdown. I tried a few sketches of my children at the time but they weren't very good and so I moved on to drawing other things from around the house and garden, lots of leaves and flowers.
Then I recently decided that I would like to make a journal about these strange times. I've always wanted to make an illustrated journal, and this seemed like an ideal opportunity. So I started a Covid-19/Coronavirus/2020 illustrated journal and began attempting a few drawings to go with my writing, firstly some inanimate objects and then as my confidence increased I tried a few pictures of the children.
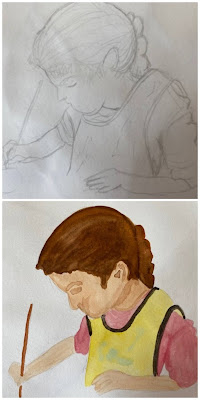
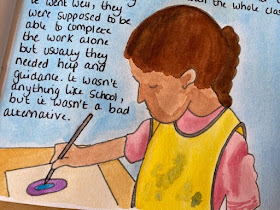
I discovered that my preferred style was quite simple and cartoon like. I draw the picture in pencil first, then use a pen for the key outlines before filling in with watercolours. So here are my first efforts (and I know I'm bad at faces so I avoid them if I can!)
I'm a bit shy about sharing them as I know they aren't great, but I hope that they capture a moment, which is really just what I was aiming for.
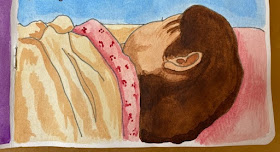
Mia sleeping in my bed to illustrate a page about sleeping difficulties during lockdown:
Mia on the swing where she spends ages each day playing by herself.
I had a few goes at the next picture, first trying in pencil, then adding watercolours, then finally in my preferred style for the actual journal.
I know they aren't the best but I'm hoping that as I keep practising and get more confident I'll get better.
I'm a bit shy about sharing the writing in my journal but when it's finished I might post a few pages. I've found it really helpful to write things down, and I'm hoping that it will be interesting to look back on over the years as this period in time becomes a distant memory!
Here are my previous posts that have shared my progress so far:
My 100 day project - a quarter of the way through
My 100 day project - halfway through
When I first wrote about this project I mentioned that I had been very inspired by this lady's lovely drawings of her life in lockdown. I tried a few sketches of my children at the time but they weren't very good and so I moved on to drawing other things from around the house and garden, lots of leaves and flowers.
Then I recently decided that I would like to make a journal about these strange times. I've always wanted to make an illustrated journal, and this seemed like an ideal opportunity. So I started a Covid-19/Coronavirus/2020 illustrated journal and began attempting a few drawings to go with my writing, firstly some inanimate objects and then as my confidence increased I tried a few pictures of the children.
I discovered that my preferred style was quite simple and cartoon like. I draw the picture in pencil first, then use a pen for the key outlines before filling in with watercolours. So here are my first efforts (and I know I'm bad at faces so I avoid them if I can!)
I'm a bit shy about sharing them as I know they aren't great, but I hope that they capture a moment, which is really just what I was aiming for.
Mia sleeping in my bed to illustrate a page about sleeping difficulties during lockdown:
Harry on his tablet, wearing his hoodie and clutching his Giraffe comforter.
I know they aren't the best but I'm hoping that as I keep practising and get more confident I'll get better.
I'm a bit shy about sharing the writing in my journal but when it's finished I might post a few pages. I've found it really helpful to write things down, and I'm hoping that it will be interesting to look back on over the years as this period in time becomes a distant memory!
Thursday, 18 June 2020
My garden and vegetable patch update
Over the last few months we have all spent so much time in the garden and it has been really lovely. I've really been enjoying pottering around and pulling out the weeds gradually, keeping up with the watering, and taking time to appreciate the things that I've planted and watching them grow.
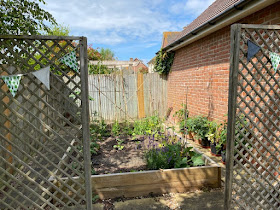
I'm very lucky to have a separate little vegetable patch area at the bottom of the garden which is tucked away behind the garage. We had the raised bed replaced last year so it's all looking nice and neat, although I don't keep things pristine, there are plenty of weeds growing! I made the bunting a couple of weeks ago. It's a lovely private and sunny area, my husband often talks about making it into his outdoor kitchen and hot tub area but I'm not letting it go without a fight!
Luckily the pole framework was built by my Dad last year as I wouldn't know where to start building it myself! I've got lots of sweet peas planted at the bottom. the plants were so tiny when I grew them from the seeds that I set three around the base of each pole, and now that they are getting bigger it has become a little chaotic and tangled!
The tomato plants in the bed are ones that I planted from actual tomatoes in the fridge when I couldn't get hold of any tomato seeds earlier this year. I didn't expect them to grow let alone produce tomatoes so I'm really pleased that they've started to produce flowers, I'm interested to see what happens with them! I have more tomato plants from the seeds that I managed to buy in pots up against the wall. They are doing really well, some of them already have tomatoes growing nicely.
This gorgeous lavender bush was planted by my parents last year. It took a little while to get going, but this year the purple flowers are stunning. I really like the extra colour that it adds to the vegetable patch, and I'll be harvesting some to make lavender bags later this year!
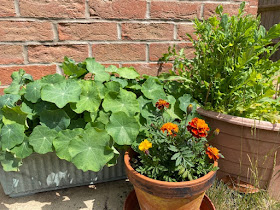
The only other colour that I have in the garden at the moment is my marigolds. The first batch that I planted from seeds are flowering beautifully. I have some from my Mum which will be flowering soon, and another batch still growing on the windowsill indoors which I'll put out when they are a bit bigger.
I have an old pallet in the garage and I have some vague plans about making some kind of planter with tin can planters on it but I'm not very handy when it comes to woodwork so I'm not really sure where to start!
I'm looking forward to when the flowers start appearing, hopefully I'll have a nice colourful garden this summer!
Tuesday, 16 June 2020
Review - Exploring the local area with Treasure Trails
We received a Treasure Trail for our local town in exchange for this review.
There are more than 1,200 Treasure Trails to choose from across the UK, you can find out more and choose your nearest trail here - Treasure Trails. A Treasure Trail costs £9.99 to download, or £11.48 if you choose to have it printed and sent to you. They are designed for all ages and for small groups of up to five people. It took us around 90 minutes to complete the trail.
This weekend we spent a fun afternoon trying out our local Treasure Trail. Treasure Trails are self-guided adventure trails, and are located all across the UK. They take you on a fun adventure, using local landmarks, signs, statues, monuments and all sorts of other eye-catching features to solve clues.
It is currently recommended to only complete a Treasure Trail which is local to you, so we chose the trail in our nearest small town - Littlehampton. You need to make sure that you respect the current social distancing rules, and follow the latest guidelines if you are meeting up with people from a different household.
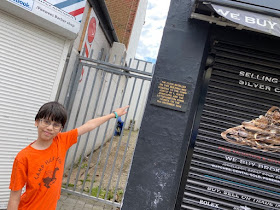
We go to Littlehampton quite often to walk along the promenade, and so we thought that we were fairly familiar with the town. However once we had left the seafront we were taken to some other really pretty areas of the town that we had never visited before, including some lovely gardens, and we saw lots of historical features that we had no idea existed!
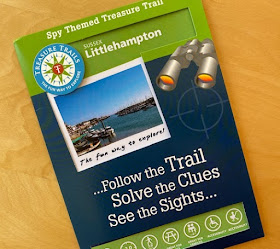
The Littlehampton Trail is a Spy Themed Treasure Trail. We had an answer grid to enter the solution to each clue, and then cross off a letter or two from a grid with each one. When we had completed the trail, the remaining letters and numbers were the secret code left behind by a secret agent. Our trail had 21 clues, which were found along a circular route starting from a cafe on the seafront.
When you purchase the trail you can choose to receive a link to download a copy, or you can have a printed copy posted to you. The Treasure Trail booklet contains an introduction to the challenge, along with full instructions and the list of clues that you need to solve.
The clues vary in style and complexity. Sometimes it's a case of writing down a word from a sign, other times you need to count objects and work out some sums. There was some Morse code to interpret and photographs of things that we needed to find. It was definitely a family effort, the children were brilliant at spotting things that we missed. And it was fun to visit an area that we thought we knew well and find things that we'd never noticed before, like pictures on the floor made out of the bricks! It's a really fun way to find out more about the history of an area.
The clues are interspersed with little snippets and facts about the area that you are exploring, and the directions that you need to take you to the next clue. The directions are quite clear as to where you need to go next. Many of the clues were quite easy, but some were more challenging and a couple did make us stop and think.
If you are really stuck with a clue you can text a special number and have the answer texted back to you, although this can only be used three times. Once we had answered all the clues we entered the solution code onto the website. Luckily we answered everything correctly and solved the case! Then you can download a certificate, and all correct answers are entered into a monthly prize draw to win £100.
If you are looking for a fun family activity then I'd really recommend having a go at a Treasure Trail. It would be fun to try one if you are visiting somewhere new, but they are equally good in a place that you know well in order to learn a bit more about the history of your local area. They'd make a great gift too!
Saturday, 13 June 2020
The Stuva loft bed from Ikea - an updated review
Since I published my review of the Ikea Stuva loft bed it has been one of my most popular blog posts, and I get plenty of questions about the loft bed from people interested in purchasing one. So I thought I'd share a few thoughts in an update post about the bed, now that my daughter has been using it happily for over two years.
If you are looking for information about assembling the Stuva loft bed along with a few more photos, you might want to check out my original review first, as well as reading through the comments which contain lots more helpful information and answered questions.
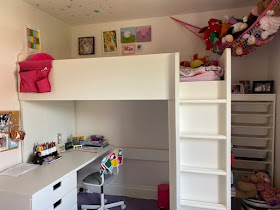
So here is a picture of the Ikea Stuva loft bed as it looks now in my daughter's bedroom!
The Stuva loft bed has stood up to the last two years really well. It remains in excellent and sturdy condition, and we've had no problems with the bed at all. It just has a few light scratches on it, but that's pretty normal for furniture in a child's bedroom.
The bed unit once assembled is very heavy and there is no way that it could be easily moved. It also won't fit out of a bedroom door, so will need to be built in the room where it will live. So although the loft bed is designed for a small space, there does need to be enough room to assemble it. You can get some sense of how much space will be needed from my time lapse assembly video below:
Because of the size of the bed, it would be next to impossible to move it anywhere once assembled. So there is very little chance of cleaning or replacing the carpet underneath! Before assembling the bed, it's worth having a good look at the different range of assembly options available. Spend some time thinking about the configuration that would fit your space and needs best, as it is a lot easier to assemble it as you want it from the beginning!
The wardrobe under the bed is quite small, and definitely designed for child sized clothes. We have a much larger Ikea wardrobe elsewhere in the room for her clothes, and this wardrobe is used only for dress up clothes and shoes.
The drawers in the desk are a very good size. We use them for some clothing as well as stationery items. We have some Ikea drawer dividers which are really useful but I can't find the ones that we bought, so if you want to buy some I'd recommend checking with Ikea to make sure that you get the same ones that fit.
Mia has plenty of headroom up in the bed. We have high ceilings (250cm) and there is room for me as a small adult to sit upright in the bed. I think that the height of your ceiling would make a big difference to whether this bed would be suitable for older children or adults.
Changing the sheets is pretty easy. I can throw down the pillow and duvet to change them separately, but you do need to be able to get up into the bed to remove and replace the fitted sheet. It gets quite dusty up in the bed so I go up from time to time with the handheld hoover to go around the edges. There is plenty of space around the edge of the mattress to store teddies and books, and unless you are very fussy there is no need to actually make the bed daily as you can't see it from the floor!
The additional Ikea products that we bought to go along with the Stuva loft bed are:
The ÖRFJÄLL children's desk chair in white and Vissle pink. This is a smaller sized desk chair which fits really nicely under the desk and would also suit a small adult, leaving plenty of headroom under the bed while sitting at the desk.
The MORGEDAL medium firm memory foam mattress. I've slept on this mattress a few times and found it very comfortable. You need to be careful with the mattress that you choose for this loft bed as it must be the correct height for safety.
The STICKAT bed pocket which is very handy for keeping the things you need at night close by. You can also see some alternative caddies below, and I'd definitely recommend something like this or else a small shelf above the bed.
Thursday, 11 June 2020
Top tips and tricks for crafting with Hama beads
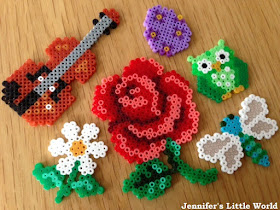
I've been crafting with Hama beads for a long time, and over the years I've shared many of the Hama bead projects that I've made, both with the children and for adults. I thought I'd share a quick guide to crafting with Hama beads, the essential supplies, and a few tips and tricks for new Hama bead crafters.
To create a Hama bead project you need some Hama beads and a pegboard to lay out your design. You will also need an iron and some ironing paper. There are many Hama bead kits available that contain everything you need along with themed inspiration and ideas, but personally I prefer to buy my supplies separately and use them to work on my own projects. This means that you can buy the extra colours that you need (I seem to use a lot of black and red!) and over time you can build up a collection of different shaped boards. As for the ironing paper, baking or parchment paper that you can use for baking both work perfectly.
Hama beads are available in three different sizes - Maxi, Midi and Mini. The Maxi beads have a diameter of 10 mm and are aimed at young children completing their first Hama bead projects. The Midi beads measure 5 mm in diameter and are the most common size of bead. These are the beads that I most often work with, and they are suitable for both children and adults to use. The smallest beads are the Mini beads, and with a diameter of 2.5 mm they really are very tiny. It's easiest to manipulate them with tweezers, and they are definitely more suited to teenagers and adults as they are very fiddly to use.
If you are new to Hama beads I would recommend starting with the Midi beads. You can buy these beads in large tubs of beads in a range of colours, and the tubs often include a few pegboards to get you started.
If you are looking to buy a pegboard or two I'd recommend starting with a square, hexagonal and circular board as these will allow you to create a wide range of designs. The pegboards can be used over and over again, as long as you are careful not to over iron your projects (see more ironing tips for Hama beads below)
You might also want to take a look at my Hama bead gift guide for some more Hama bead inspiration.
I used to buy most of my supplies in my local craft store until they discontinued the range. Since then I buy most of my beads on Amazon as I find that they are the most reasonably priced, especially for the larger boxes. It's definitely worth keeping an eye out as the prices can fluctuate widely.
Hama beads can be expensive and sometimes it's tempting to look at the cheaper non-branded alternatives. In general I'd advise steering clear of these imitations, as the quality is very poor and they can be difficult and disappointing to work with.
However an exception is the Picture Beads sold by Hobbycraft. I've used lots of these Hama style beads and found that they are nearly as good as branded Hama beads. Hobbycraft sell their beads in mixed bags of related colours, like blues and greens, and they are much cheaper, especially if you catch them on special offer. They are exactly the same size as branded Hama beads and can be used interchangeably with your Hama beads and Hama branded pegboards.
I have also bought Perler branded beads when on holiday in the US and found that these work very well, although they are slightly more brittle in texture once ironed. Perler beads are available in a wider range of unusual colours as well as striped beads, so they are good for adding a bit of interest to a piece.
If you don't want to commit to buying too many supplies, or you are buying a gift for someone as an introduction to Hama beads, you might want to think about starting with a kit. There are so many available, and I've put a selection below. Some of the kits have very specific theming, for example based around Disney characters, and others are more general. In my experience the kits contain far more beads that you will need for the projects suggested, so if you find a kit on sale then it can be a good value way of building up your Hama bead collection.
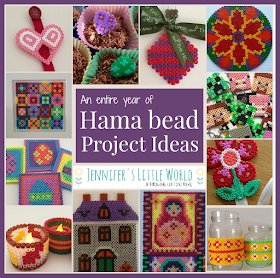
To create a Hama bead project you just position the beads on the pegboard in your design. There is plenty of inspiration online including lots of projects right here on this blog. For example my entire year of themed Hama bead crafts! If you are creating your own design, make sure that all the beads touch each other, and preferably on more than one side. This is particularly important if you want to create a more durable item like a keyring or coaster.
Then just lay a sheet of ironing or baking paper over the beads and press lightly with an iron to fuse the beads together.
I've shared some detailed tips for ironing Hama beads here - Ironing tips for Hama beads. In general you want to make sure that the iron is not too hot, that you keep the iron moving continously over the beads, and that you don't iron the design for too long - just a few seconds is enough before doing a quick check. When you can see the colour of the beads showing through the paper then that's a good indicator that it is ready.
It's a matter of personal preference as to how much you iron the beads. I like to leave the holes in the beads visible but some people like a smoother look. Just be careful not to over iron as this will make the beads impossible to remove from the board, and may warp and damage the board.
I like to iron my designs on both sides to make them more sturdy. Once I've ironed my design I place it underneath something heavy for a few minutes. This ensures that the finished design lays flat, which is particularly important for larger pieces.
I like to sort my Hama beads by colour, and I store them in segmented storage boxes. I like the ones that can vary the sizes of the compartments, depending on how many beads I have in that colour. You can find some more of my tips here - How to organise Hama beads. If you want to sort your beads by colour it can be quite a tedious task, albeit a satisfying one! I found a brilliant tutorial for a simple Hama bead sorter which definitely looks worth a try!
I store my Mini Hama beads in pill organiser boxes which I find are the perfect size and make it easy to remove the beads.
I store my pegboards upright in a shoebox so that I can easily flip through to find the one that I need.
I have loads of ideas for Hama bead projects right here on my blog! You can take a look at my dedicated Hama beads page for some inspiration.
You might like to make a start with some Hama bead mandala style patterns on a circular board, maybe experiment with some different Hama bead coaster projects or perhaps have a go at some Hama bead emoji magnets.
If you are an adult looking to craft with Hama beads you might be interested in taking a look at the Mini Hama beads. I've written a full guide on working with the Mini beads which you can read here - Mini Hama bead crafts - a guide
Because the Mini beads are so small they allow you to create some really detailed and intricate projects, and are a very satisfying craft to work on.
I hope that this article has been helpful if you need some help using Hama beads, or if you are thinking about trying them!
Hama bead supplies and equipment - what you need
To create a Hama bead project you need some Hama beads and a pegboard to lay out your design. You will also need an iron and some ironing paper. There are many Hama bead kits available that contain everything you need along with themed inspiration and ideas, but personally I prefer to buy my supplies separately and use them to work on my own projects. This means that you can buy the extra colours that you need (I seem to use a lot of black and red!) and over time you can build up a collection of different shaped boards. As for the ironing paper, baking or parchment paper that you can use for baking both work perfectly.
Hama beads are available in three different sizes - Maxi, Midi and Mini. The Maxi beads have a diameter of 10 mm and are aimed at young children completing their first Hama bead projects. The Midi beads measure 5 mm in diameter and are the most common size of bead. These are the beads that I most often work with, and they are suitable for both children and adults to use. The smallest beads are the Mini beads, and with a diameter of 2.5 mm they really are very tiny. It's easiest to manipulate them with tweezers, and they are definitely more suited to teenagers and adults as they are very fiddly to use.
If you are new to Hama beads I would recommend starting with the Midi beads. You can buy these beads in large tubs of beads in a range of colours, and the tubs often include a few pegboards to get you started.
If you are looking to buy a pegboard or two I'd recommend starting with a square, hexagonal and circular board as these will allow you to create a wide range of designs. The pegboards can be used over and over again, as long as you are careful not to over iron your projects (see more ironing tips for Hama beads below)
You might also want to take a look at my Hama bead gift guide for some more Hama bead inspiration.
Hama bead supplies and equipment - where to buy
I used to buy most of my supplies in my local craft store until they discontinued the range. Since then I buy most of my beads on Amazon as I find that they are the most reasonably priced, especially for the larger boxes. It's definitely worth keeping an eye out as the prices can fluctuate widely.
Hama beads can be expensive and sometimes it's tempting to look at the cheaper non-branded alternatives. In general I'd advise steering clear of these imitations, as the quality is very poor and they can be difficult and disappointing to work with.
However an exception is the Picture Beads sold by Hobbycraft. I've used lots of these Hama style beads and found that they are nearly as good as branded Hama beads. Hobbycraft sell their beads in mixed bags of related colours, like blues and greens, and they are much cheaper, especially if you catch them on special offer. They are exactly the same size as branded Hama beads and can be used interchangeably with your Hama beads and Hama branded pegboards.
I have also bought Perler branded beads when on holiday in the US and found that these work very well, although they are slightly more brittle in texture once ironed. Perler beads are available in a wider range of unusual colours as well as striped beads, so they are good for adding a bit of interest to a piece.
Hama bead kits
If you don't want to commit to buying too many supplies, or you are buying a gift for someone as an introduction to Hama beads, you might want to think about starting with a kit. There are so many available, and I've put a selection below. Some of the kits have very specific theming, for example based around Disney characters, and others are more general. In my experience the kits contain far more beads that you will need for the projects suggested, so if you find a kit on sale then it can be a good value way of building up your Hama bead collection.
Tips for working with and ironing Hama beads
To create a Hama bead project you just position the beads on the pegboard in your design. There is plenty of inspiration online including lots of projects right here on this blog. For example my entire year of themed Hama bead crafts! If you are creating your own design, make sure that all the beads touch each other, and preferably on more than one side. This is particularly important if you want to create a more durable item like a keyring or coaster.
Then just lay a sheet of ironing or baking paper over the beads and press lightly with an iron to fuse the beads together.
I've shared some detailed tips for ironing Hama beads here - Ironing tips for Hama beads. In general you want to make sure that the iron is not too hot, that you keep the iron moving continously over the beads, and that you don't iron the design for too long - just a few seconds is enough before doing a quick check. When you can see the colour of the beads showing through the paper then that's a good indicator that it is ready.
It's a matter of personal preference as to how much you iron the beads. I like to leave the holes in the beads visible but some people like a smoother look. Just be careful not to over iron as this will make the beads impossible to remove from the board, and may warp and damage the board.
I like to iron my designs on both sides to make them more sturdy. Once I've ironed my design I place it underneath something heavy for a few minutes. This ensures that the finished design lays flat, which is particularly important for larger pieces.
How to store your Hama bead supplies
I like to sort my Hama beads by colour, and I store them in segmented storage boxes. I like the ones that can vary the sizes of the compartments, depending on how many beads I have in that colour. You can find some more of my tips here - How to organise Hama beads. If you want to sort your beads by colour it can be quite a tedious task, albeit a satisfying one! I found a brilliant tutorial for a simple Hama bead sorter which definitely looks worth a try!
I store my Mini Hama beads in pill organiser boxes which I find are the perfect size and make it easy to remove the beads.
I store my pegboards upright in a shoebox so that I can easily flip through to find the one that I need.
Some simple Hama bead projects to start with
I have loads of ideas for Hama bead projects right here on my blog! You can take a look at my dedicated Hama beads page for some inspiration.
You might like to make a start with some Hama bead mandala style patterns on a circular board, maybe experiment with some different Hama bead coaster projects or perhaps have a go at some Hama bead emoji magnets.
Hama beads for adults - Mini Hama beads
If you are an adult looking to craft with Hama beads you might be interested in taking a look at the Mini Hama beads. I've written a full guide on working with the Mini beads which you can read here - Mini Hama bead crafts - a guide
Because the Mini beads are so small they allow you to create some really detailed and intricate projects, and are a very satisfying craft to work on.
I hope that this article has been helpful if you need some help using Hama beads, or if you are thinking about trying them!
Tuesday, 9 June 2020
Things I'll miss about lockdown as things start to re-open
Although as a family we are still choosing to spend most of our time at home, gradually the country is starting to re-open, and hopefully this will continue in a safe manner. Of course it's debatable as to whether we ever actually experienced a real lockdown, it certainly wasn't as strict as in many other countries. But we did have many disappointments with cancelled activities, and my anxiety has quite often been through the roof. However we stuck to the rules and in the end, for us as a family at least, it hasn't been too bad.
As life hopefully begins to return to normal, here are some of the things that I'll miss from the last few months:
The quiet roads. We go out most days for our daily exercise and it was so lovely to be able to run along deserted pavements, with the option to run out into the empty road to avoid someone coming in the opposite direction. We have been out on our bikes for the first time in ages, with our on-road confidence boosted by the lack of traffic.
The extra hours that I've had in my day. My children go to school in the next town, and although my husband often helps with the drop off on his way to work, there are many days when I can easily spend two to two and a half hours in the car. I've really noticed that extra time in my day.
Spending time with my children during their happier periods of the day, not just when they are home from school, tired and grumpy.
I'll miss having the children around. It is hard work of course, and I seem to be constantly preparing food and clearing up after them, but it has been lovely to have us all at home together.
Helping the children with their school work. It has been hard at times I'll admit. They are kept busy with plenty to do, and my heart sinks in particular when I see the maths tasks come in. But it's been lovely to have a little bit of an insight into what they have been studying, and I've learned things about the children too. For example Harry doesn't like open-ended questions that require him to give his personal opinion on things, and Mia gets frustrated very quickly when she doesn't understand a concept.
The lack of laundry. I'm down by at least three loads per week - the white wash for shirts and the uniform and PE kit washes. Now there are lots of days where I don't have any washing to do!
The last few months have been really surreal, and although sometimes the days have felt slow, time really does seem to have passed very quickly. I am nervous about what happens next, and I know that life won't like it used to be for a long time yet, if ever. I think in a few months I might be looking back fondly at this enforced period of isolation.
Friday, 5 June 2020
The last normal photo on my phone
I really enjoyed reading this article on the BBC the other week - The last 'normal' photo on your phone - and so I thought I'd share mine!
This photo was taken on Saturday 14th March at Goring Beach. Ram was very ill from mid February onwards (with all the Covid-19 signs and symptoms, although unable to be tested as he hadn't been to China!) and so we hadn't been out as a family for a while. As the number of cases increased in the UK he stayed at home as much as he could. He is higher risk with asthma and as he was still recovering we wanted to keep him as safe as possible.
The beach was busy that afternoon, but people were starting to become aware of keeping their distance. This was our last visit to the beach for a long time! We walked to a closer stretch once during lockdown for our daily exercise, but it was a long way and the children complained. It's only been over the last week or so that we've been returning to the beach in the car. Even then we only go during the evening as we don't want to face the crowds during the day.
That evening I went to the theatre to watch Jane Eyre. It was a strange performance because one of the actresses was ill (we were told not to worry, it was unrelated to the virus!) and was replaced by a last minute stand in. She did a brilliant job, reading from a script on stage. But looking back I wonder if the company were desperate to give what became on of their last performances. It was becoming clear that theatres would be closing very soon and that their tour (which should currently be in China) would be forced to stop.
We received an e-mail a couple of days before reassuring us that the theatre was safe to visit, and there were signs to remind us to wash our hands. With Ram's health in mind I did feel anxious sitting down in such close proximity to others. There was definitely a hushed atmosphere on the night, but when I came out of the auditorium I didn't see anyone else using the provided hand sanitiser.
I went to the theatre with a friend that I normally meet every week for a hot drink and cake. I dropped her home at the the end of the evening, and I told her that I couldn't meet that week as we'd decided as a family not to go out for a little while unless it was necessary. I honestly only believed it would be for a few weeks, and that seemed long enough. In the end it was well over two months before I saw her again, sitting on a picnic blanket at the beach and keeping 2 metres apart! I can't imagine when we'll be able to meet in a cafe again.
Looking back, it's hard to believe how quickly everything shut down. The signs of impending doom were there for a few weeks (I have photos on my phone prior to this one showing empty shelves in the supermarket) but I think even at this point we were in total denial about how long this was really going to go on for. I definitely thought that the children would be back in school and back to normal after the Easter holidays, and now I can't believe how naive I was!
Tuesday, 2 June 2020
My completed diamond painting - Starry Night by Van Gogh
This post contains Amazon affiliate links.
As a crafting challenge for 2020, I decided that each month I would aim to complete one of my unfinished projects. So far so good, and I present my finished craft project for May - my diamond painting of Starry Night by Van Gogh.
I bought this kit last year while we were on holiday in Florida. I'd been wanting to try a larger diamond painting for a while, and when I spotted this one on special offer I couldn't resist. I've always loved the painting, the blues and purples along with the contrasting yellows and oranges really appeal to me. The kit is available over here on Amazon and at Hobbycraft (see the link at the bottom of this post).
It's a fairly large diamond painting piece, the final design measures about 50 x 40 cm, and it's full drill which means that the entire area is covered with the sparkly plastic pieces. Diamond painting is very simple, all you need to do is place tiny pieces of coloured plastic into the correct place on a pre-printed, adhesive canvas. It's a great craft to do if you are looking for something relaxing that doesn't require too much concentration.
I must admit that this project wasn't on my list of planned projects for the year. I wasn't even anticipating starting it until next year, once I'd cleared my backlog of projects. But with the lockdown leaving me with some extra time for crafting, especially a simple craft that can be worked on around the needs of the family, I decided to make a start. It didn't take too long to complete and I enjoyed every minute!
I've ordered a frame which should be here in a week or two, then I just need to decide where to hang it.
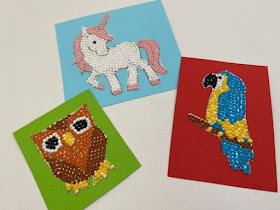
Now I have an even larger collection of leftover diamond dotz, and I need to find a crafty way to use them up! Mia and I came up with this simple craft for using leftover diamond painting drills, I'm thinking that I might try something similar for myself.
For my June project I'm thinking ahead to Christmas again with some little felt Christmas kits that have been sitting around for far too long!


