This post contains Amazon affiliate links
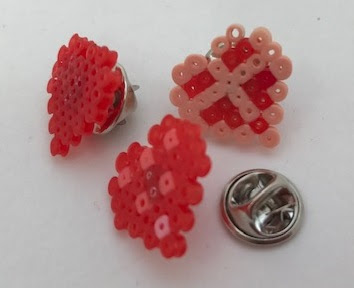
A little while ago I made some mini Hama bead hearts using tiny mini Hama beads, and this week I finally decided what to use them for - some heart pin badges!
Here's how I made them:
To make the mini Hama bead hearts
Mini Hama beads are tiny, and can be a bit daunting to work with at first. I used the beads in a selection of red and pinks on the square board as below and placed them on the board using tweezers. You can see a video of my technique below.
When ironing the beads you need to be very careful as they don't require as much ironing as the larger beads, just a few seconds on each side.
Here's a video showing how they were made:
To assemble the badges
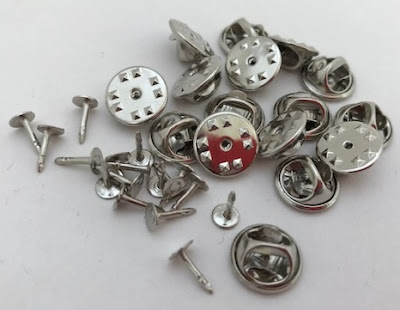
To make the badges you will need some pin badge backing pieces. They come in two parts - a pin which is affixed to the back of the heart, and a backing piece which clips on when you are ready to wear or display the badge.
You need to use a strong glue to fix the backing pins to the Hama bead hearts, any kind of strong superglue will work well. Hama beads can sometimes be tricky to glue as the plastic they are made from can be a little soft, but the smaller beads seem to be firmer once ironed and stick better.
Depending on the glue that you use you may need to wait for it to dry, and then your pins are ready to wear!
These little badges would make a lovely Valentine's gift for children to give out to their friends. And now I've discovered how easy these pin badge backs are to use I'm thinking of lots of other crafts that I can use them for!
I've used Hama beads to make lots of other Valentine's Day themed crafts, and you can find them all here - Hama bead crafts for Valentine's Day.
They include:
Hama bead heart hanging decoration
Hama bead heart spinning decoration
Hama bead heart photo frames
Mini Hama bead heart pins
Mini Hama bead hearts


No comments:
Post a Comment
I love reading your comments!