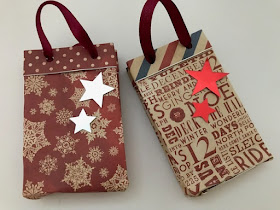
Have you started Christmas shopping yet? I must admit that I've barely thought about it! But I'm definitely starting to feel Christmassy, and so today I'm sharing my latest craft, how to make some simple mini Christmas gift bags. These little bags are ideal for gifting small items like jewellery or sweets and you can customise them to make any size that you want.
You need:
Christmas paper or wrapping paper
Bostik Fast Tak Spray Glue
Tape
A small box to use as a template
Sequins or other embellishments
Bostik Glu Dots
Ribbon
A hole punch
Instructions:
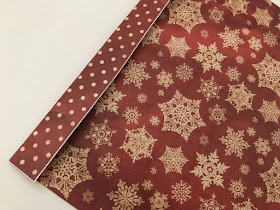
First prepare your paper. My Christmas paper is not double sided, so I used Bostik Fast Tak Spray Glue to glue two pieces together back to back. This glue is very sticky and will stick almost any surface. It's easy to use, although do make sure that all nearby surfaces are covered! You just need to spray both sides of the paper to coat with glue from a distance of about 15 to 20 cm, leave to dry slightly for a couple of minutes until it is tacky, then press both pieces together firmly and leave to dry.
Decide which side of your paper is going to be on the outside of the bag, and fold over the top so that a strip of the inside paper will show on the outside.
Next find a small box that you can use as your template. I used a matchbox, but something like a pack of cards would also work well. This helps you to make the shape for your bag. Wrap the paper around the outside of your template box and tape firmly in place. If your paper is quite thick you can remove from the box and press down the sides to make sure that you have a crisp fold line.
Fold the paper around the bottom of the box in the same way that you would if you were wrapping a parcel, starting about 1 cm from the bottom of the box. Secure in place with tape. You can also push in the paper down the sides of the bag.
Use a hole punch to make two holes in the top on each side of the bag. Cut two lengths of ribbon and tie a knot in one end of each. Thread them through the holes on each side from the inside of the bag so that the ribbon is held in place by the knot, then thread them back through the bag and tie another knot so that the ribbon forms handles for the bags with the knots hidden inside the bag.
Finally decorate the bag using sequins or other embellishments. I used Bostik Glu Dots to hold my large star sequins firmly in place. The Glu Dots are easy to apply and very sticky, and you can use them for all sorts of decorations. You just peel off one side of the plastic covering, apply the glue dot to one of the surfaces, peel off the second side of plastic and press the surfaces together firmly.
Your gift bags are ready to use!
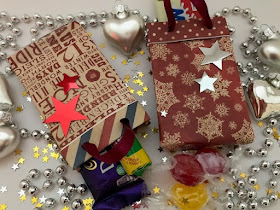
These simple gift bags would also make lovely decorations for the Christmas tree, filled with sweets or small presents.
This is a collaborative post in association with Bostik.


These are so cute! Tempted to try making a bigger one :)
ReplyDelete