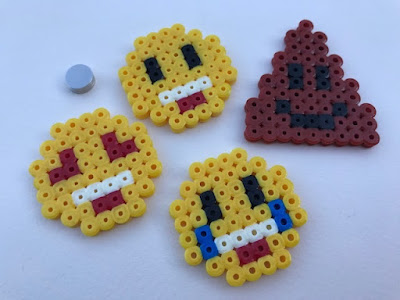
These Hama bead Emoji magnets are really easy for children to make and you can have lots of fun coming up with your own designs to represent your favourite Emojis!
All my Emoji designs are created on the square pegboard. Once you've made a basic circle you can adapt it for other face Emojis, or you can come up with your own designs based on different Emojis.
Then I ironed the beads on both sides. Make sure that you iron the magnets well, especially in areas where you have beads that aren't attached to other beads on all sides.
Related article - Ironing tips for Hama beads
Then you need to stick a magnet to the back of each design. I used these magnets - Very strong disc magnets
I found the Gorilla Glue really easy to apply, there's no smell, and no stickiness when it ended up on my fingers. The glue dries clear and the magnets really are stuck very firmly, they aren't going to be coming off!
I'm really pleased that I've found an adhesive that works well with the Hama beads and now I'm a little bit addicted to making magnets! They'd be great for party bags or for children to give to their friends.
The children loved the Emoji magnets that I made so much that they went on to make a whole selection of them using their own designs!
You can find lots of ideas for Hama bead projects over on my dedicated Hama beads page! Click the link below:


No comments:
Post a Comment
I love reading your comments!