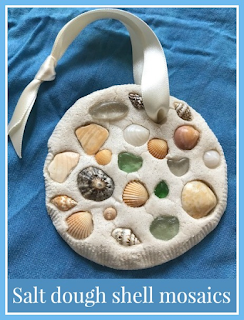
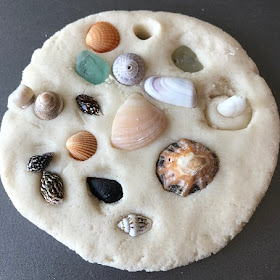
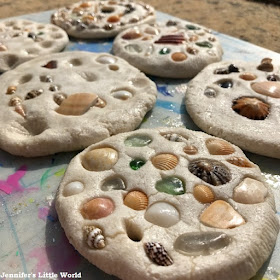
I'm always collecting shells when I go to the beach, and instead of just leaving them lying around the house in boxes and jars I decided that we could do a craft together to enable us to keep our beach treasures on display. We made these simple salt dough mosaics - it was a really fun process and produced some lovely keepsakes.
Many of these shells are ones that I have collected on various beach holidays over the years. I chose a selection of smaller sizes, and also some little bits of sea glass. If you don't have enough shells you can also buy them quite reasonably - for example a pack like this Assortment of Mini Shells
To make the salt dough I just mixed together a cup of salt, two cups of plain flour, and enough water to mix into a stiff dough (I find usually just under a cup of water is needed). The dough shouldn't be sticky, but it should be soft enough to knead and shape without cracking. This amount made enough for six circles, each approximately 10 cm in diameter.
Shape the dough into a ball and press flat to form a circle. You want it to be about 1 cm thick - deep enough to hold the shells firmly but not so thick that it will be difficult to dry thoroughly. Place your circles on a clean baking tray, and you can start to decorate.
First make a hole in the top of the circle if you want to be able to hang them. The easiest way is to use a drinking straw to press out the hole, and wiggle it around a little bit to make the hole nice and large so it won't close up as the salt dough dries. Then press the shells firmly into the dough. This should be enough to make sure that they won't fall out. Think about the placement - you can make patterns, a picture, or just stick them in randomly.
Related post - Sea glass and glass pebble coaster tutorial
Harry came up with the idea of using the pattern from a larger shell to press into the salt dough to leave an imprint - similar to the salt dough dinosaur fossils that we made a few years back. This worked really well, and I used the technique myself to make a border for my mosaic.
You shouldn't need to grease the tray in any way, but it's worth moving the salt dough around from time to time while it is baking, especially if you are using an older baking tray, to make sure that it doesn't stick.
Bake the salt dough in the oven on the lowest setting. I've managed to burn salt dough in the past so I'm very careful now and don't cook it for more than 45 minutes in total, checking it every 5 minutes and moving it slightly so it doesn't stick to the tray. Because the circles are quite thick they will need longer than that to dry completely, so I usually finish off drying my salt dough by leaving it on top of a hot radiator for a couple of days, turning it over from time to time. In the summer you can leave them outside in the sun to dry, or on a sunny windowsill.
When dry, do a quick check to make sure that all the shells are still firmly in place, and if necessary secure with a dollop of glue. Then when the circles are completely dry you can varnish them. Varnishing adds a layer of protection, and also really brings out the colours and texture of the shells and other bits and pieces. I applied a couple of coats, layering it generously and making sure that it seeped into all the gaps where the shells are embedded, to make sure that they were firmly held in place. Then I took advantage of the sunshine to dry them outside.
The salt dough mosaics were finished off with some ribbon for hanging. They are quite heavy but a nail in the wall should be enough to hold them, and I think they will look lovely on display!
The salt dough mosaics aren't suitable for outside use, so I might have a think about ways I can use the shells for some outdoor decorations, maybe using them in some stepping stones for the garden.
If you enjoyed this post you might also like:


I love these, they are so pretty and simple x
ReplyDeleteDo you think these would air dry eventually in the summer? I would like to make for VBS and baking isn't an easy option
ReplyDeleteI'm not sure, but very possibly if you live somewhere that is hot and sunny and didn't make them too thick.
Delete