You need:
Coloured cardboard
Weather themed and other decorations - weather stickers, buttons, artificial leaves, stick on gems, pom poms and so on
Long piece of ribbon
Hole punch
Glue - we used Bostik Fine & Wide Glu Pen
To make:
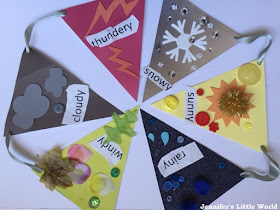
First decide what types of weather you want to include - we went for snowy, sunny, cloudy, rainy, thundery and windy. Choose which coloured cardboard you want to use to represent each type of weather and cut out your bunting triangle shapes - we used a bunting template from Activity Village and cut it down slightly.
Sort out your decorations so you know what you will be using for each triangle. Then type out and print your different weather types so that they can be glued to the top of each bunting piece. Mia is getting on really well with her reading and writing so I helped her to type the words out herself.
When decorating the triangles make sure to use plenty of glue for the heavier items such as buttons. We used the Bostik Fine & Wide Glu Pen which is brilliant, the sides are easily squeezed so Mia can use it herself easily, it dries clear, and it sticks everything down firmly. I've also found Blu Tac Glu Dots to be excellent for sticking down pom poms.
Leave the decorated triangles to dry thoroughly, then punch a hole in the corner of each one for hanging. Thread the length of ribbon through the holes, making sure to leave plenty at each end to make it easier to hang. Decide on the distance that you want to leave between each flag, make sure that the ribbon is lying flat and neat, then use a piece of tape to attach the ribbon to the back of the flag firmly so that it won't slide about.
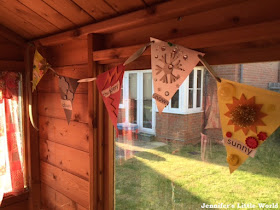
Then decide where to hang your bunting! Ours looks fab in the summerhouse, and it's really easy to hang as I just stick drawing pins into the wood.
This box of craft materials was provided to me free of charge by Bostik as part of the Tots100/Bostik Craft Bloggers Club.


Aww! That is so cute and very educational too. What a great idea x
ReplyDelete