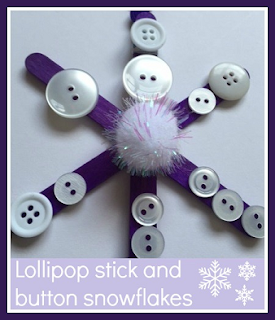
Button snowflake decoration
This craft was very simple to make. I used three lollipop sticks, glued together in the centre to form a star shape using Blu Tack White Glu. I did this myself in advance so that the lollipop sticks had plenty of time to dry. I also cut a loop from coloured ric rac which I taped in place at the top.
Then I gave Mia a pile of white buttons and sparkly pom poms, coated the front of the snowflake in white glue and let her position the embellishments. The White Glu was perfect for this craft - it driesdslowly so the decorations are re-positionable but when dry they were firmly stuck in place.
So simple and it will look lovely on the Christmas tree!
Sparkly framed snow scenes
Then I used some sparkly cardboard to cut out a couple of picture frames. I cut out a piece of tracing paper to fit inside the frame, and Mia and I drew some snowy scenes.
We taped them inside the picture frames and decorated them with snowflake stickers and ric rac with a sprinkling of star sequins. Again, the White Glu was ideal for this craft, holding the ric rac in place beautifully. We had a lot of fun making these as it was something that we could sit down and do together! I'm not sure that Mia really understood the concept of drawing a snowy scene, but that doesn't matter, I love her picture!
The box of craft materials was provided to me free of charge by Bostik as part of the Tots100/Bostik Craft Bloggers Club.


I love the snowflakes and would be great to add to paper snowflakes too
ReplyDeleteThose are so lovely, especially the button decorations. I love making things with buttons, they looks so effective.
ReplyDeleteI saw your decorations on Instagram and thought they are really nice. Good job, Mich x
ReplyDeleteaaaw what a lovely craft - my 13 year old loves buttons so I bet she's make this x
ReplyDelete