Monday, 31 August 2015

Memories of Venice

The other day I wrote about my holiday scrapbooks, and how I'd recently enjoyed reading back through them. To be honest they are mostly not that interesting. They are just a factual record of the places that we visited and what we did there, and although they are fun for me to read back through they wouldn't mean much to anyone else.

One of the places that we visited was Venice, for a few days back in February 2005.

View of Venice

I have some very vivid memories of Venice, and it was no surprise to me to find that the only time I ventured away from my usual fact based style was when I wrote a couple of pages about walking through the narrow streets.

Handwritten holiday vacation journal

So I thought I'd reproduce it here!

The streets of Venice are laid out like a labyrinth, or a drawing by Escher. The streets run in random directions. You are always seeing out of the corner of your eye - a crooked bridge or a tempting alleyway or passage. When faced with a choice of directions, you want to go both ways. When you pass something interesting - like a shop selling writing boxes and stationary all covered with the same beautiful matching paper, or a set of masks labelled with the names of their characters, or a tiny glass Christmas tree, complete with miniature, removable ornaments - you want to make sure that you stop and drink it all in, because you might never be able to find it again. And although in places deserted, it never feels threatening, even with all the dark alleyways.

At night it becomes even more mysterious. It is illuminated, but faintly. Half glimpsed passages, fading away into the darkness. Silence, apart from the lapping of the water. Footsteps in the distance, a few notes of music, laughter, a dog barking - signs of life when it seems deserted. Lanterns on the bridges. Gondolas tied up and covered with tarpaulins. 

Finally, below you can see me on our Venice holiday. It was obviously cold, because I am very rarely seen wearing any kind of hat!

Me standing on a bridge in Venice

I'd love to go back to Venice one day, although maybe when the children are a little older. I'm not sure I could handle the stress of there being so much water around...

Saturday, 29 August 2015

How Pinterest has changed my life

Okay, I'm sure that overall my life wouldn't be that much different without Pinterest, but it's true that it has had a massive influence on me over the last few years! I first heard of Pinterest on some US craft message boards that I used to lurk in, way back in 2011 when it was invite only, shortly after I started blogging. My sister had got there first, and it was thanks to her invitation that I was able to set up an account. At the time, it wasn't really heard of over here in the UK, and bloggers hadn't yet cottoned on to how important it would become as a social media network.

In May 2013 I was really excited when I was invited to join in with many other bloggers to host the #PinItForward campaign to help introduce Pinterest to potential users in the UK.

Then, a short while back, Pinterest chose to make me a featured pinner, meaning that new users that selected certain areas of interest would follow me automatically. That has come to an end now unfortunately, as it did wonders for my follower count! I'm not sure why they chose me, but it probably had something to do with the fact that I use Pinterest pretty much daily and I pin a variety of content. I don't spam it with links to my blog, in fact I'm not very good at all at using it to promote my blog, instead I use it naturally for my own interests.


My use of Pinterest brought me to the attention of BritMums, and I was invited to speak in the session "Winning Ideas from Leading Pinners" along with Helen Neale and Jen Stanbrook. I was so far out of my comfort zone and found it pretty terrifying, but luckily the other two ladies were brilliant and I think that the session went well. And it was an amazing feeling of confidence when I'd done it! I am also currently running the BritMums Pinterest account which I love doing, it's a great excuse to browse for fun things to pin in some different categories to the ones on my boards.

I mainly use Pinterest for inspiration for my own projects. My new interest in sewing is due to all the gorgeous sewing related pins that I've been seeing over the last few years. I've also been introduced to new ideas like sensory play and simple science experiments for children which I wouldn't have come across otherwise.

Pinterest has also made me think more carefully about the content that I produce for my blog, from trying to make more of an effort with my photography (still working on that one!) to being clearer and adding more detail to my tutorials.

Finally Pinterest is a great way to spend a few minutes on my phone just browsing and pinning pretty things, even if there is no expectation that I'll actually do any of them! I also have several boards that are there purely for me to look through when I want to spend a few minutes looking at nice pictures!

Visit Jennifer Jain's profile on Pinterest.

Are you on Pinterest? Leave a link to your profile in the comments and I'll make sure that I'm following you!

Thursday, 27 August 2015

My holiday scrapbooks

I've always loved documenting things. It's one of the reasons that I've kept up with this blog for so long! I enjoy writing about things that I've done, preserving memories, and if possible presenting them in an attractive way. For some reason though, the more popular hobby of scrapbooking has never appealed to me. Instead of using actual photographs I always preferred to use other types of memorabilia - tickets, postcards, pictures cut from leaflets and so on - to illustrate my writing.

I have great memories from my early camping holidays in France, sitting in the tent and filling up exercise books with cut out pictures and notes. I still have them, and they are great to look back on, I can definitely recall places that we visited and things we did that I would otherwise have forgotten. It was such a fun part of my childhood holidays that I've been encouraging my children to do the same, and I've blogged about how to create a holiday scrapbook with young children

Here are a couple of pages from my French scrapbooks, dating back to 1991 and 1992.

Old holiday vacation diaries and scrapbooks

Since Ram and I got together we've been lucky enough to travel widely, and from the very beginning of our adventures together I wrote them up when we returned home. I would take an exercise book with me to write in at the end of each day, as well as a small plastic folder to collect various bits and pieces. I often even took a small pair or scissors along so that I could cut pictures out and save space in the suitcase.

The notes were written up in A5 sketchbooks using gel pens. To begin with I used a rainbow of colours but I eventually settled on black. Copying everything out again did take time of course, but back in those pre-children days I had all the time in the world! There was almost a disaster when towards the end of our five week long around the world trip I left my holiday notebook behind on the plane - fortunately it was waiting for me in the lost property but it caused me a lot of stress at the time!

Old holiday vacation diaries and scrapbooks

I don't keep these scrapbooks any more, partly because I don't have as much time as I once did, but mainly because this blog has replaced them. I write about many more of our activities on the blog now, in particular days out, which I never had a record of before. It's also so easy to pop photographs into a blog post, and I use my smash book for storing the odd little bits and pieces of paper.

I love reading through my old holiday scrapbooks, and I really do need to think about preserving them digitally. These days it would be easy enough to at least snap a photograph of each page and back them up somewhere securely, definitely something that I need to get around to! I was looking through them recently which inspired me to write this post, and Harry enjoyed reading through them too. I'm afraid that they are mainly factual and quite boring to anyone that wasn't there, although I did find a couple of pages where I had gone all poetical about Venice which was quite fun to read back. I'm planning on sharing that in a separate post!

How do you preserve the memories of things that you've done?

Monday, 24 August 2015

Behind the scenes of my blog

I thought I'd share a little bit about where I blog and how I blog. I hope that it's interesting!

A few months ago I wrote about my blogging area, when we had just bought a new desk. It's where I do all my blogging, because I need a full size keyboard when I'm typing. It does mean that I'm limited to writing blog posts from one particular spot in the house, but I think that it also helps with my productivity because if I'm sitting down at the desk I know that I'm here to work.

I rarely get the chance to sit down here when there are small children in the house, and if I do I'm constantly interrupted, so I'm to be found here on my child free mornings and some evenings. I do social media catching up from my phone at various points throughout the day. This is how the desk looks at the moment - not quite as tidy as in the original pictures!

Behind the scenes of my blog

To the right of my desk on the floor you can usually find a small stack of books and jiffy bags which are things waiting to be reviewed. On this occasion the jiffy bag contains fabric. As hard as I try I can never seem to be without it, as soon as I've got through the pile another jiffy bag, often full of books, will appear! Please don't think that I'm complaining at all though, receiving things to review is a fantastic reward for all the time that I spend on my blog.

Behind the scenes of my blog

I recently decided that I wanted a decent white background for some of my posts, especially the crafty ones. So my photo studio is a piece of white cardboard, folded over, which I store folded up next to my desk. I take most of my photos on my iPhone in my study, below the window. It's starting to look a little scruffy now so I should probably replace it. I'd really like to improve my photography, it's definitely something that I need to work on!

Behind the scenes of my blog

I have a bullet journal style notebook which I use to plan my week, both for blogging and for other things that need to be done. I try to plan my blog posts a week in advance, leaving spaces for posts that come up, for example if we've been on a brilliant day trip or something has happened that I want to remember. I also have a longer term editorial calendar which I use for a rough plan of posts about a month in advance, and various lists of craft ideas and blog posts that I want to write. I have a vague yearly schedule too with ideas for upcoming months based around the seasons and celebrations.

I love seeing behind the scenes posts from other bloggers and so I'm sharing some others that I've come across. Helen from The Crazy Kitchen has shared her budget friendly food photography studio, and there are some ideas there that I'm definitely thinking about implementing. Amanda from The Ana Mum Diary has a lovely desk for writing which fits neatly into the corner.

If you are a blogger and have written a 'behind the scenes' post I'd love to see it, please leave a link in the comments!

Friday, 21 August 2015

On buying some new books

A couple of weeks ago I was lucky enough to have a weekend away with some girl friends. We had a lovely time, and one of the highlights was a visit to a real bookshop, some time to browse, and an opportunity to treat myself to some real, actual books!

It has been ages since I bought myself any books, these days it feels a bit extravagent. I do love my Kindle, and I do buy and download e-books (although free ones whenever I can!), but there is definitely something different about reading a real, paper book. We have decided that we are going to form a relaxed book group, where we each read the same book and then meet up to discuss it. We spent ages browsing for our first book and we chose The Bone Clocks by David Mitchell. I remember reading his book Cloud Atlas a few years back and enjoying it. I've made a start on it already and I'm enjoying it very much!

The books were Buy One Get One Half Price so it seemed a shame not to take advantage of the offer. I'd eyed up The Miniaturist by Jessie Burton a few weeks before and it looked like a good read, so we decided to go with that as a second book. They are both lovely thick books with a nice cover, and although you shouldn't of course judge a book by its cover it is hard not to!

Buying myself some new books

Finally I managed to accumulate some credit on Amazon in the Kindle store so I was able to download The Gospel of Loki by Joanne Harris for free. I've always enjoyed Joanne Harris's books, I think that I've read them all, and so I'm confident that it will be a good read.

We are off on holiday shortly and as we are going with family I'm hoping that I might get the opportunity to actually sit down and read by myself for a bit, that would be lovely!

Have you read any of these? What have you been reading this summer?

Wednesday, 19 August 2015

How to make a papier mache volcano

How to make a papier mache volcano with children

I'd been thinking of making a papier mache volcano with the children for some time now, and the summer holidays are the perfect opportunity for a long term craft project. It took us a couple of weeks to make our volcanoes, what with waiting for all the layers of paper mache and paint to dry, but the finished project is pretty cool and the perfect backdrop for Harry's dinosaur scenes!

You need:

A thick piece of cardboard for the base
A cardboard tube
Lots of newspaper
Lots of plain tissue paper
Glue (we used homemade flour glue - mix one part flour to five parts water and boil for three or four minutes until it's thickened, stirring continously, wait for it to cool before use)
Paint
Coloured tissue paper

How to make the volcano:

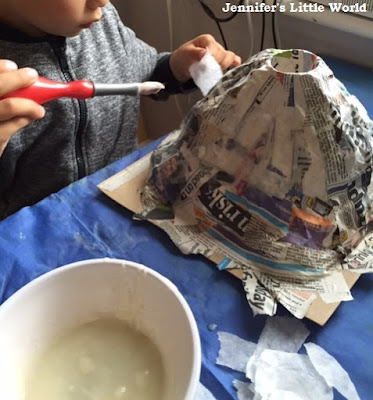
Begin by glueing a cardboard tube to the centre of a square of cardboard to form the middle of the volcano. Scrumple newspaper up into balls and use it to build up around the shape of the volcano. Using lots of glue, wrap strips of newspaper around your structure and mould with your fingers until you have a smooth shape. This step can be a little fiddly, and you might also want to use tape to secure your newspaper balls. Then leave to dry.

How to make a papier mache volcano with children

Then add a second layer of newspaper. This time use smaller squares of newspaper and think about where you can add some smaller scrumpled up balls of paper to build up the texture a little bit, especially around the base. Make sure that you use plenty of glue and smooth it all down with either a brush or fingers.

How to make a papier mache volcano with children

When the second layer of newspaper has dried you can move on to a couple of tissue paper layers. The tissue paper becomes softer with the glue on it, so you can mould it to fit any gaps. We also used it to make extra lumps and texture which we covered with more tissue paper. By the time our two layers of tissue paper had been completed our volcanoes were looking pretty good. I wanted to make sure that they were completely dry before we began paining, so I left them for a few days, outside in the sunshine when I could.

How to make a papier mache volcano with children

When the volcanoes were completely dry we began painting. We used bright poster paint, and I found that it covered really well. I had in mind that they would both make realistic looking volcano models, but Mia had other ideas, and I really liked her vision of a pink and purple 'fairy volcano' so I let her go along with it! Harry painted a base coat of brown with green around the base, and Mia went with a mixture of pink and purple, finished with a layer of glitter glue embedded with sequins.

How to make a papier mache volcano with children

When the paint was dry they added another coat of paint for some more details. Mia mixed up some grey with glitter for the base of her volcano and Harry used grey to paint in some rocky areas and added plenty of red paint for lava running down the edges. It looks really effective where he put the paint on thickly so it could form a natural dribble down the sides. I think he did a great job, and he took it really seriously!

How to make a papier mache volcano with children

Finally, the volcanoes were finished with some coloured tissue paper. Because Harry's volcano already had lava flowing down the sides, we just used a ball of scrumpled up red paper to stick out of the top before taking it outside for some dinosaur play fun.

How to make a papier mache volcano with children

Mia chose pink tissue paper lava for her fairy volcano, and she decorated it with some of her Playmobil fairies, although she couldn't resist adding a dinosaur or two as well!

How to make a papier mache volcano with children

They are both so pleased with them, it was such fun making them together and I know that they are going to be well played with!

How to make a papier mache volcano with children

Tuesday, 18 August 2015

Review - Stitch markers from Charmed Knitting

Today I'm sharing some gorgeous stitch markers that I was sent to review by Charmed Knitting. Charmed Knitting is a small, family business, aiming to provide unique and beautiful collections to knitters and crocheters across the globe. They sell stitch markers in different sizes to cater to different styles and sizes of knitting, ranging from simple inexpensive charms to luxury charms, as well as seasonal and limited edition sets.

My stitch markers arrived beautifully packaged in tissue paper, wrapped with ribbon and secured with a little heart charm. Each set of stitch markers also comes with a little drawstring bag for storage. I received a set of gorgeous enamel Blue Daisies (£4.99), which are a good size and have a clip so you can clip them over the needles without moving the stitches about.

Stitch markers from Charmed Knitting

Here is one marking the beginning of the round in my current sock knitting project, it's just the right size!

Stitch markers from Charmed Knitting

I also received a set of Owl Family (£3.99) bronze stitch markers which are really lovely, and I really like the matching large safety pin to keep them all together when not in use!

Stitch markers from Charmed Knitting

Charmed Knitting are currently offering a free gift with all orders - a sweet The Happy Knitter set with five stitch markers. You can find more information here and the voucher code here -
Free Gift.

Stitch markers from Charmed Knitting

I was sent a bundle of stitch markers in exchange for this review.

Monday, 17 August 2015

Why I'm so glad that I started my blog

I love my little blog. I've been writing Jennifer's Little World for over four years now and it takes up a fair amount of my time, but I'm so glad that I started it.

The entire reason that I started blogging was as a way to record our memories and to share them with other members of the family. Now when I look back I'm so grateful for those early posts. Mia was just 6 weeks old when I started the blog, and now she's almost ready to start school. It's wonderful to be able to look back on those difficult, yet rewarding, early years with two young children. I can reflect upon when the children were just getting to know each other, remember the fun that we've always had making and icing biscuits, and bring back little moments that would otherwise be forgotten, like this post about the things that Harry learned at nursery.
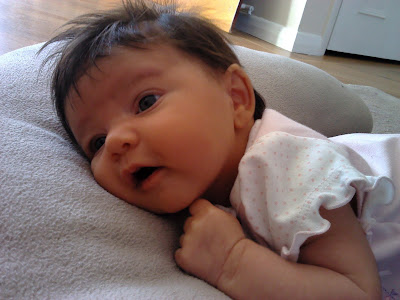
Baby on a cushion
Mia on the weekend that I started this blog!

Over time of course the blog has evolved, and I love sharing some of the crafts and activities that we get up to. I also know that there are many crafts that we simply wouldn't have done if it weren't for the blog. In particular I love being a Bostik Blogger, and receiving a fantastic box of crafting goodies each month, coming up with crafty ideas to share based around what is inside.

I find challenges a great way to keep myself motivated, as well as helping to retain a little bit of 'me' instead of just being 'Mummy'. Through the blog I've taken part in many. There is the Day Zero Project, and I had a lot of fun taking part in the Great Bloggers Bake Off, where for ten weeks I managed to bake something new each week. I also joined in with the #pinaddicts challenge for several months, where I made projects inspired by those I'd seen on Pinterest.

Talking of Pinterest, without a doubt it is because of the blog that I'm such an avid user. In fact it was a huge inspiration to me when I discovered so many wonderful bloggers out there that were already sharing their crafts and ideas. I was chosen as a featured pinner last year which was amazing for my follower count, and my use of Pinterest led to being asked to speak at BritMums Live 2015 and the chance to contribute to the BritMums Pinterest boards, both awesome opportunities.

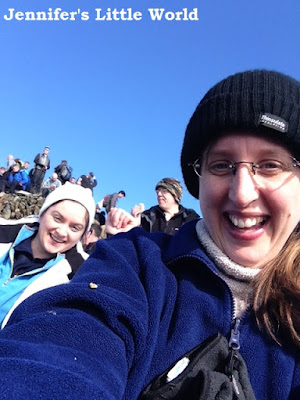
Speaking at BritMums was something that took me way out of my comfort zone, as was when I was part of the team that climbed Snowdon for Comic Relief as part of Team Honk. At the time I'd not been to any blogging conferences and I didn't know any other bloggers in person, it was a huge thing for introverted me to commit to spending a couple of days away with people I'd never met! I was so glad that I did it though, it was brilliant and such an achievement for us all.

Bloggers climbing Snowdon

I love making lists and planning, and so writing the blog allows me to indulge my organised side. Whether it's brainstorming ideas for blog posts, making lists of things that need to be done, creating spreadsheets to keep track of posts that I've written (yes, really!) it all helps to keep my mind active. It's a bit like being at work, with the added challenge of having to fit it all in around the demands of small people, but I enjoy it all.

I won't deny that it's nice to receive review products. I won't call them freebies, because it takes a lot of time to photograph and write up a review post. But to be honest I enjoy writing the posts, so it doesn't feel at all like work. I pick and choose the things that we review on this blog and I don't go for the highest value items. Instead I'm happy to review low value bits and pieces if I feel that they are offering a fun challenge or experience for the children. For example, the children both love using the bug hunting kit that we received a couple of years ago, and recently we had a lot of fun making some space food, both little things that we wouldn't have done if it weren't for my blog.

I might never become a "pro-blogger", but I do manage to make a small amount of money from my blog which helps us to afford a few extras while I'm a stay at home Mum. I've also been lucky enough to receive press tickets to various events and attractions which have saved us some money and given us some fun experiences.

But finally, one of the huge and unexpected rewards for starting my blog has been the community that I've discovered. Not only the lovely people that I have met in person after attending several different blogging conferences, but also the online support. I've found that people are much more honest online about their struggles with babies and young children, and I've had lots of sympathy when I've moaned on Twitter about little ones that won't go to sleep, and won't stay asleep once they are in bed!

Britmums speaker badge and itinerary

It might sound a bit soppy to say it, but starting this blog definitely did change my life for the better. If you are thinking of starting a blog I'd wholeheartedly recommend it!

Saturday, 15 August 2015

Hatton Adventure World, Warwickshire

Review - we received complimentary press tickets for this attraction

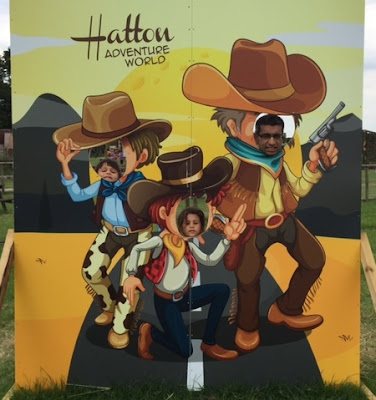
At the weekend we were visiting family in Warwickshire and we decided to pay a visit to a local attraction which has caught our eye on previous trips - Hatton Adventure World.

Hatton Adventure World, Warwickshire

Hatton Adventure World is situated just outside Warwick, a few minutes drive from the M40. It's a fantastic day out for the family, with all sorts of things to see and do and a programme of events that changes seasonally. We visited during the first half of the Summer Spectacular for the Wild West Carnival, and from now until the 6th September 2015 Hatton is celebrating a Pirate Festival.

We arrived as the park opened at 10am, and we found that although clearly popular it was never too crowded. There was so much to do that we didn't know where to start! One of our first stops was the Gold Rush to do some panning for gold. I was very impressed that this was included in the ticket price, as I've visited similar attractions that charge extra and so it's something that the children haven't done before!

Hatton Adventure World, Warwickshire

They had a great time splashing about looking for little gold pieces, even though Harry managed to empty one of the pans of water down himself, and they were thrilled that they could exchange their gold for a medal to take home.

Hatton Adventure World, Warwickshire

Then we moved on to the inflatables, with a choice of a bouncy slide, inflatable pyramid to climb and a traditional bouncy castle. There were also trampolines and plenty of outdoor play equipment for them to run about on.

Hatton Adventure World, Warwickshire

I think all children love a sandpit, and ours spent lots of time in the construction area digging around. There was a smaller sand pit area too where Mia spent ages building a volcano in the sand while Harry surprised us by voluntarily going on an aerial runway ride for the very first time!

Hatton Adventure World, Warwickshire

There were plenty of opportunities to get close to animals, and we paid 50p each to buy a cup of animal food which you can post to the animals through tubes in the fence (and watch as they open their mouths around the tube to gobble it all down!)

Hatton Adventure World, Warwickshire

Another highlight was the Guinea Pig Village where you can visit 250 resident guinea pigs in their own miniature setting. There were opportunities to stroke and hold the guinea pigs, and children can sit with them on their laps. We also saw children having the opportunity to handle a snake, although ours were far too timid! There were plenty of knowledgeable staff around to answer questions about the animals.

Hatton Adventure World, Warwickshire

We had a lot of fun in the Jungle Maze which has some challenges for the children to complete as they go around and also animal shapes for them to spot. It took us a couple of attempts to find the way out!

Hatton Adventure World, Warwickshire

Throughout the day there was a full programme of shows. We managed to see the Magic Show and the Puppet Show which were very good, as well as the Sheep Racing which was a lot of fun to watch. Other shows that we didn't get to included Falconry Shows and a Wild West Show - we just couldn't fit everything in! Older children can also take part in a game of Laser Combat which is included in the ticket price.

Hatton Adventure World, Warwickshire

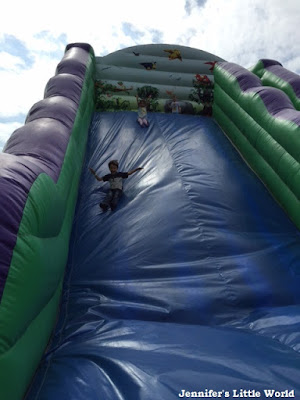
We spent quite a bit of time in the indoor play centre Superslide Mania. Around the edges are some soft play areas and then in the centre are some pretty scary looking slides, including some very steep drop slides. Our children won't go anywhere near those, but they did love the coloured wavy slide and were quite happy to go down it over and over again. There was no objection to adults going on the slides too!

Hatton Adventure World, Warwickshire

Finally, just as we were leaving the children spotted the pony rides, and as they had been so good all day we treated them to a ride for £2.50 each. They have never ridden on a horse before so we weren't sure what they'd make of it, but they both loved it and delight was etched onto their little faces. In the background of the photograph you can see the Tractor Safari which we didn't manage to get to but it also looked like a lot of fun!

Hatton Adventure World, Warwickshire

We had a great day out. I think that the entrance price is very realistic for a full day of entertainment, we were busy all day and we didn't manage to see everything - I would fully recommend a visit if you are in the area.

We were provided with complimentary tickets to Hatton Adventure World in exchange for a review. On the day gate admission to Hatton Adventure World is £13.95 per person, with free entry for children aged under 2. Discounts are available if you book online in advance, and if you book online a minimum of five full days in advance for a named date you can receive a free adult entry with two other paying visitors. 

Friday, 14 August 2015

The launch of Project MC2 at the Science Museum

At the weekend, we were invited to the Science Museum for the launch of Project MC2.

The launch of Project MC2 at the Science Museum

Project MC2 is a Netflix original series aimed at tween girls, offering a 'geek chic' lifestyle approach through smart and savvy science-inspired play. In the world of Project MC2, science meets style and everyone knows that it's cool to be smart. The series follows the adventures of four main characters, each with their own distinctive personality, style and interests. McKeyla McAlister is an undercover spy, Adrienne Atoms is a culinary chemist, Bryden Bandweth loves all things tech and Camryn Cole has a high IQ and can build anything.

The launch of Project MC2 at the Science Museum

There is a range of merchandise to accompany the series, including a fashion doll for each character. One line of the dolls includes a different science experiment for each that you can perform yourself at home using just a few basic household ingredients, for example building your own lava lamp or erupting volcano. At the launch party, Mad Science were in attendance to carry out a few simple experiments with the children to spark their imagination and interest.

The launch of Project MC2 at the Science Museum

Then we were treated to a screening of the first episode in the Project MC2 series, where we are introduced to the main characters and the scene is set for their first mission. The show tries to show young girls that they can succeed in the traditionally male-dominated fields of science and technology, and in the first series the girls use their skills and intelligence to rescue not a damsel in distress, but a prince.

While I love the idea of the show and I think that including simple science activities along with the dolls is a great idea, I do think it's unfortunate that there is nothing ground breaking about the design of the dolls - like all fashion dolls they are skinny with perfect hair, tight fitting clothes, and unrealistic figures that are far too womanly for the tweens that they are supposed to represent.

Having said that, the children were delighted with them, in particular the long hair which can be styled with little hairbrushes in the shape of conical flasks, and they have been eagerly watching all the episodes of the show.

The launch of Project MC2 at the Science Museum

As well as having fun at the event, the children each received a goody bag containing a basic Project MC2 doll. 

Thursday, 13 August 2015

The toy kitchen, one of our top toys

I recently wrote a post about our love affair with Duplo, highlighting a toy that we've had so much play value from, and it made me think about some of the other toys which have been particularly popular with my children. Another firm favourite has been their toy kitchen and all the play food and accessories that go along with it.

I was a bit reluctant to have a proper play kitchen for the children at first, as they take up a lot of space. But when Ram spotted a great deal on a lovely wooden toy kitchen it was impossible to refuse, and we asked my parents if they'd like to buy it for the children one Christmas a few years back. This is the one that we have from John Lewis (it's not usually this tidy!)

Toy kitchen from John Lewis

One of the nice things about this particular toy kitchen is that it has plenty of storage space inside for all the other bits and pieces. When we moved into our house a few years back the previous owner was emigrating, and she left behind lots of plastic play food and toy kitchenware. Along with some bits that we'd already collected, and pieces that we've accumulated since, there's plenty to keep them busy (and to store). Quite a lot of our play food is home made, like my realistic play food, the felt sandwich set and the very popular salt dough and felt pizza.

Realistic play food for the toy kitchen

I bought some of the extra kitchenware from Ikea which does some lovely bits. I was very tempted recently to replace the plastic stuff with some gorgeous china plates and cups but I'm glad that I didn't in the end because the plastic ones are constantly being carried about the house and transported in Mia's little handbags, and I don't think they'd last very long!

I'm always coming across little picnics that Mia has set up around the house, and I leave them there for as long as I can because I love seeing them, they are so sweet! Even if I am usually the one that ends up having to sort out all the bits and pieces into their correct boxes and put them away.

Toy picnic set up by a child

In fact, the only problem that I do have with the toy kitchen is that sometimes I seem to spend as long cleaning it up as I do my full size kitchen!

Wednesday, 12 August 2015

A drawstring backpack - My first real sewing project

After enjoying the Craft Lounge so much at BritMums Live 2015, I was delighted to be invited to become a Coats Crafts UK Ambassador. As I have mentioned, my interest in patchwork and sewing has been reignited, and I recently made a little patchwork mobile phone case using fabric from my goody bag which I was really pleased with.

Simple sewing project - drawstring rucksack

I was asked to choose a project to have a go at, and after browsing the Make it Coats website I chose this Drawstring Backpack, a free pattern (unfortunately no longer available). The Drawstring Backpack is a beginner pattern, and although I was a little daunted at first (I had never followed a sewing pattern before) I managed to work my way through it without too much trouble.

Simple sewing project - drawstring rucksack

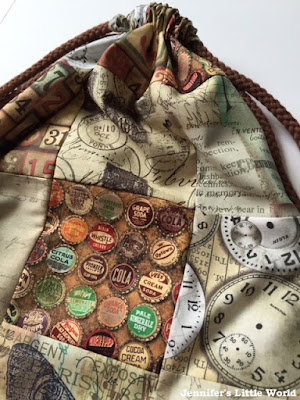
The bag itself is quite simple, but what makes it special I think is the patchwork sides, made using some gorgeous fabric by Tim Holtz in the Eclectic Elements range. Each side has twelve squares, and I had six different fabrics to choose from. Although the individual fabrics are quite different, they complement each other beautifully.

I began by cutting out my patchwork squares and coming up with the perfect layout. This was actually quite difficult, I spent ages deciding how to position the pieces! Then I sewed the squares together to make the two sides of the bag. It was the first time I'd done any patchwork sewing on the sewing machine, and I was really pleased by how good it looked, most of the squares actually line up perfectly!

Simple sewing project - drawstring rucksack

For the lining of the bag I used fabric from a new, cheap pillowcase in a muted green. I'm not very good at visualising how a finished product will look from a pattern, but I followed the instructions and it actually worked, I even managed to sew the tabs for the cord on the right way! I can't really describe how pleased I am with the finished bag, it has turned out so much better than I thought it would and it was such a satisfying and useful project. Now that I know what I'm doing, I can see myself making loads more bags in different colours and patterns!

Now I just need to decide what I'd like to make next!

Simple sewing project - drawstring rucksack

As a Coats Crafts UK Ambassador I was provided with the fabric, cord and other haberdashery items to help me complete this project.