Pages

Thursday, 30 July 2015

Day Zero Project Update July 2015

A few months back it became clear to me that I probably wasn't going to finish my Day Zero Project List, and now with less than a month to go I know it's not going to happen. I started the list on the 21st November 2012, which seems such a long time ago now. The first thing that I did was to write a letter to myself to be opened when the challenge was completed. I have the letter in my bedside drawer and I've not opened it yet, but I remember writing that when the date came round it wouldn't be long before Mia started school. At the time that event seemed impossibly far in the future, but of course it crept up slowly and now those final weeks are rushing by.

I was heavily influenced by Pinterest when I made the list, and it led to some fantastic first baking attempts - I made a rainbow cake, attempted my first gingerbread house which became a tradition that I intend to continue every year, baked a chocolate brownie cheesecake from my brother's recipe which I'd been meaning to try for ages, and had a reasonably successful first go at cake pops.

A slice of my first rainbow cake

I was also encouraged to get out and about with the children, spending a great day out with Harry, taking both children camping, and taking the two of them up to London.

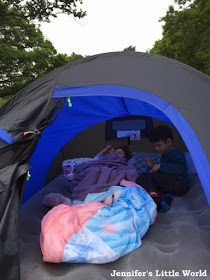
Children sleeping in a tent

One of my favourite challenges was to ask twenty friends to suggest a book and read them all, I discovered some fantastic new books and authors. Like many of the things on my list, it's something that I wouldn't have done otherwise and was really enjoyable.

I don't regret at all that I didn't manage to complete the list, instead I'm really proud of the things that I did do! I completed 66 of the 101 things. It's perhaps not as many as I had hoped, but I'm still pleased with how I got on. You can see my full list, with links to the challenges that I blogged about, on my Day Zero Project page.

Wednesday, 29 July 2015

Tips for getting children interested in DIY and gardening

Topps Tiles asked me to share some of my tips for getting children to help around the garden and home to help them learn some key life skills, and to start us off they sent us a lovely bundle of DIY goodies.

So here are my top tips:

In the garden....


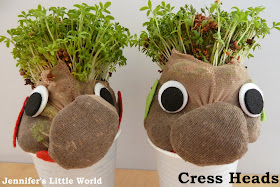
* Start by growing something simple that will give quick results. We've made cress heads in the past and I loved the little grass head been kit that we were sent - the children love coming down each morning to see how he is getting on. You don't need a kit, you can easily make your own cress heads or you can simply grow cress on a paper towel. The seeds start to germinate within a day or two, and in a couple of weeks you'll have a lovely crop.

* If you are planting vegetables outdoors in the vegetable patch, choose something that your children will eat. We've had a lot of success with tomatoes and carrots, and strawberries are brilliant because they will give you a continuous crop over the space of a few weeks. You don't need to grow from seed, garden centres sell plants which you can re-pot or plant in your garden.

* Use the process of growing something as a learning opportunity for children. A classic example is the bean in a jam jar where children can watch as the seed germinates and sends out roots, and you can help children to keep a bean diary as it grows.

Growing plants on the windowsill

* Provide children with child sized accessories like gardening gloves, trowel and a trug or wheelbarrow. I have a post on my other blog suggesting some essential supplies for gardening with toddlers. Mia loves the gorgeous gardening gloves we were sent and they make her feel really grown up!

* Bird feeders are a brilliant way to encourage birds to your garden and for children to learn about the different types of bird that they can see. We built this awesome bird feeder that attaches to the outside of your window. I've put it at the front of our house because the back garden is frequented by cats, hopefully we'll get some feathered visitors!

Putting a bird feeder in the window

Around the house...


* Children can be a great help when you are assembling flat pack furniture. They can count out the fixtures and fittings and match them to the inventory to make sure that you're not missing anything, then they can hand them to you as you need them. They'll love playing with all those big cardboard boxes too!

* Give children their own set of little toy tools so that they can play along, the more realistic the better. You can make a toy workbench from a sturdy box like a shoe box and let children hammer pretend nails into it.

* If you are working on something that is too dangerous for children to help with, for example putting up a curtain rail or bookshelf, allow children to watch (supervised and from a safe distance!) so that they become familiar with the process and see how everything fits together.

* Children love helping out if you are painting. It's probably best to have them help with the undercoat rather than the final coat, but they will love being allowed to paint with real paint on the actual walls. Make sure that they are wearing old clothes and that all the surfaces are well covered!

Do you involve your children in DIY? What tips would you add?

I was sent a bundle of goodies from Topps Tiles in exchange for this post, with some lovely projects for us to get stuck into as a family.

Monday, 27 July 2015

Cheerful garden crafts for the summer

A selection of pretty crafts for the garden


Over the years we've shared many crafts on the blog, and lots of them have had an outdoors or garden theme, intended to both add a bit of fun to the garden and also ways to bring the garden inside. Here are some of my favourites to inspire you this summer.

The lollipop stick bird feeder is really easy to put together and it looks so bright and colourful when it's hanging up in the garden. Unfortunately we have a lot of cats in our garden which does rather limit the birds that come to it, but it's so pretty to look at I think it's still worth having!

A selection of pretty crafts for the garden

Both children love making fairy gardens, and the slightly different yet very similar mermaid gardens. You just need a shallow saucer or similar container, a bit of soil, and then any little bits and pieces that you can find around the garden to decorate. If you want you can add coloured glass pebbles, artificial flowers, fairy figures and so on. They don't last for very long, but if you can keep them in a sheltered spot you can continue adding to them over time.

A selection of pretty crafts for the garden

These easy cress heads are simple to make to display on a windowsill, and because cress grows so quickly they are a very satisfying crop to grow with young children. All you need is an old pair of tights, some soil and some cress seeds, and you can see how we made ours here - simple cress heads.

A selection of pretty crafts for the garden

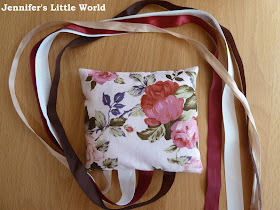
The bean bag comet is a really simple first sewing project, and it's really quick to sew one up from an odd bit of fabric. It's just a beanbag with a long tail of ribbons, and it's great fun for children to throw around the garden. They can use the ribbons to catch it, to twirl it around so that it will fly further, and to admire them streaming through the air as it flies.

A selection of pretty crafts for the garden

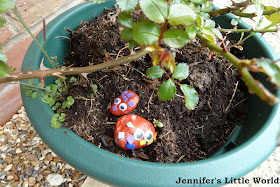
My children had a lot of fun collecting pebbles at the beach and then bringing them home to paint and turn into pebble monsters. They are displayed in pots all over the house and garden, and despite being a few years old now they've lasted really well!

A selection of pretty crafts for the garden

The children also helped me to make these salt dough fairy wands, and even though they are just as much fun inside the house they've been particularly popular for fairy role play in the garden, because they are great fun to run around with and watch the ric rac streamers chasing around in the breeze.

A selection of pretty crafts for the garden

Finally, if the weather just isn't good enough to get outside, why not do a bit of gardening themed sensory play! This gardening Tuff spot inspired activity was a lot of fun, and kept both children entertained for several days. You just need some coloured rice or similar sensory base and a few little gardening themed bits and pieces to inspire all sorts of role play.

A selection of pretty crafts for the garden

Saturday, 25 July 2015

Our "temporary" cardboard box space rocket

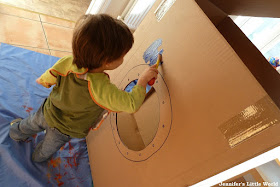
We moved into our new house back in January 2012, and shortly after that we bought ourselves some dining room furniture which came in lovely large boxes. "Brilliant!" I thought "Big cardboard boxes are so much fun, let's make something cool!".

Harry and I spent a really fun afternoon making a space rocket. I even took a few photos with the vague idea that I'd blog about it someday, certainly not expecting it to take this long!

Cardboard box spaceship craft

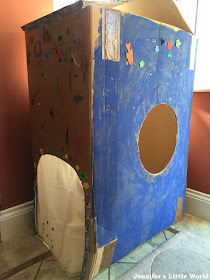
I made a pointed roof and cut a large circle in the side for the window, then we painted the whole thing blue. It had a door that opened and shut, and for the inside we made a control panel with raised stickers and moving steering wheel. I found him a hat that he could use for a space helmet, and he loved it.

Cardboard box spaceship craft

It was pretty awesome if I say so myself. Mia was crawling at this stage, and so she would get inside it too and they played in it beautifully. We found a temporary spot for it in the corner of our new dining room, and there it stayed.

And so we fast forward three and a half years and yes, the space rocket is still there. It is as much a part of our dining room as the new table and chairs. Over the years it has been modified somewhat, various play dates have involved decorating it with stickers, the roof and sides have been reinforced with patterned Duck tape and after the door fell off I replaced it with a piece of cheap fabric to make a curtain. The control panel, steering wheel and original stickers are long gone.

Cardboard box spaceship craft

It has become so much a part of the room that we barely notice it any more, and it wasn't until I took this photo (for which I had to move the table and chairs out the way) that I really realised just how scruffy it looks, especially in our dining room where in theory we entertain our guests! But the thing is, this space rocket is probably the most played with toy in the entire house, and I'm not lying to say that it is in play daily. Many of the other toys we had at that time are long gone. Even the Duplo isn't played with as much as the space rocket. It's not used as much for blasting into space now, it has become a den, a hidey hole, a place to store little toys and a hiding place for teddies. If something is missing, it's the first place that I look. Several times the rocket has come very close to the recycling bin, and yet when it comes to it I just can't do it. 

It takes up so much space, and yet I can't imagine the dining room without it. I really think it'll be here until they leave home! Would you have put up with it for this long?

Thursday, 23 July 2015

The summer holidays have started!

Finally! It has felt like such a long time coming, especially when everyone else in the country seems to have started their summer holidays ages ago! I have really fond memories of last summer (I wrote about it here), it passed in a haze of Hama beads, barbecues, loom bands and sunny days out.

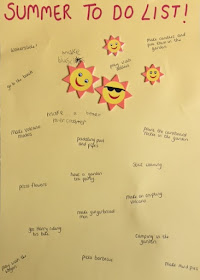
I made a big list of things that I wanted to do last summer, and we didn't even come close to finishing it, but it gave us a good starting point for activities that we wanted to do, and we came up with even more fun ways of spending time. This year I had a few more ideas of my own, and I invited the children to contribute to the list with their own suggestions. It's not as fancy as the many that I've seen on-line, but we'll add to it as we go along.

Family summer to do list

One thing that I do really want to do this summer is to get Harry riding his bike without stabilisers. Poor thing, his bike is a little too small for him but we are reluctant to get him another just yet because it feels as though he has hardly ridden it, we just don't seem to get the chance.

The idea is to get him riding confidently, then for Christmas or his birthday we will buy him a new bike and Mia can have his old one. He has such skinny little legs that he struggles to get it moving sometimes, so I'm hoping that if I can get him out on it most days it will build up his muscles a little bit, and then we can work on taking off the stabilisers. It's definitely a skill that he needs to have! I've also signed him up for a week of intensive swimming lessons, something else that he should really be doing by now. As you might guess, I spend more time with him concentrating on indoor, crafty activities rather than the outdoor, more physical ones!

Hopefully we'll get away camping again a couple of times, even if it's only in the back garden. Harry is well into learning about space at the moment, so I might even get him up for the Perseid meteor shower in August if the sky is clear. We bought some new garden furniture recently, perhaps I'll get the chance to relax in the garden for a little bit while the children play (that is probably just a fantasy) and I'm sure we'll have plenty of barbecues whenever the weather is nice.

What do you have planned for the summer, do you make a list or do you just take each day as it comes?

Wednesday, 22 July 2015

Lots of Lasts

We seem to be a little behind the rest of the country, in that today is our last day of term before the summer holidays. These last few days have really dragged, I can't wait for the summer to really start! But I've also been feeling a bit sad, because come September both children are going to be at school and everything will change once again.

Over the last couple of years since Harry started school, Mia and I have built up our little routines, and it will be sad to see them go. Of course it's not always been easy, Mia misses Harry when he's at school and it's a lot easier to entertain them when they are both at home. I've also not much enjoyed all the running around on the days that Mia goes to nursery in the morning.

But we've had our special times, like Tuesday afternoons when I picked her up from nursery and we walked home slowly so that we could wait for the buses from Harry's school to pass us, and wave to him on his way to swimming lessons. Or dawdling on the walk home so that she could add to her collection of pinecones and feathers. I'll miss our weekly Thursday morning play date with her friends, and I'll even miss taking her along to the supermarket with me for our weekly top up shop and buying her a gingerbread man.

Mia will continue her two mornings a week at the nursery over the summer, which will be nice as it will give me a little bit of time with just Harry. Although I'm expecting us to be quite flexible, and she may not make it in for every session if we have something else planned.

She's very excited about starting school, we have some of her uniform sorted already and she doesn't seem to have any worries or concerns. Harry is also looking forward to having Mia at school with him. In just a few short weeks it's going to feel like a very long day until I collect them both from school at 3pm. Or at least it will at first, I'm sure that I'll get used to it!

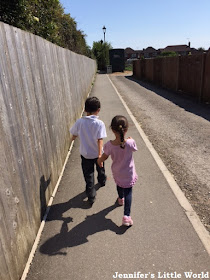
Children walking down footpath together

Tuesday, 21 July 2015

Review - Tiggly smart learning toys - Tiggly Math and Tiggly Words

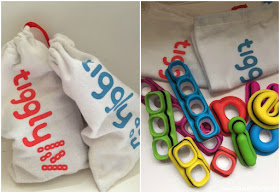
Tiggly is a set of physical smart toys that interact with a series of learning apps. The system combines physical and digital play, and will be launched in the UK on QVC on July 24th, 2015.

Ahead of the UK launch we were sent two Tiggly products to try out - Tiggly Words and Tiggly Math. There is also a third Tiggly set available which is aimed at slightly younger children - Tiggly Shapes.

Review - Tiggly smart learning products, Math and Words

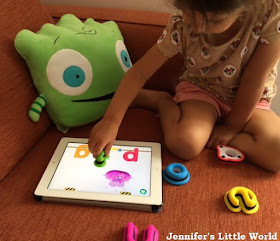
Each set comes with five plastic smart shapes which are used to interact with the apps. Tiggly Words comes with a set of five vowels, and Tiggly Math comes with five number rods. The shapes are sturdy plastic, and the app was very responsive to them. You then just need to download the apps to your tablet, and it's a very simple process.

Review - Tiggly smart learning products, Math and Words

Tiggly Math


Mia and I started playing together with Tiggly Math. There are three apps available - Tiggly Addventure, Tiggly Chef and Tiggly Cardtoons and the set is aimed at children aged 3-7 years. We first spent a couple of minutes looking at the number rods and counting the holes, then we started with the games.

Tiggly Chef - Tiggly Chef was the first game that we tried and her favourite. You need to make meals by collecting a certain number of ingredients as they appear on the screen. Different combinations of numbers and ingredient appear in turn, and when you find spot the ingredients that you need, for example three tomatoes, you touch the appropriate number rod against the screen to add it to the saucepan. In this case you would use the number three rod, or you could also use the number two and then the number one rod in turn. The game starts off very simply with only up to five ingredients at a time, then as you progress through the rounds you need to use more than one number rod and add them together, to collect, for example, seven mushrooms. By the third round children are adding numbers up to twenty, and you can use any combination of the rods to make the total.

I've not done a lot of maths with Mia, and so she needed help, particularly when it came to understanding how to add the rods together to make the larger numbers. What surprised me though was how quickly she picked up what she needed to do. We'd only been playing it for a short while and she was already getting pretty confident at learning how the smaller numbers added up. I can see that once she's been playing it for a bit longer it's really going to get her going with some basic maths skills. Each meal is completed quickly, and she loved seeing the finished product once all her ingredients had been added, it was a perfect game for her short attention span.

Review - Tiggly smart learning products, Math and Words


Tiggly Cardtoons - Then we moved on to Tiggly Cardtoons. You touch one of the number rods on the screen and the same number of coins will appear. You can count them and move them around, then the corresponding number of pieces of cardboard will arrange themselves into a little animated scene which Mia loved watching. This app was a little too simple for Mia as it is aimed more at younger children, but it would be perfect for children that are just getting started with learning to count.  

Tiggly Adventure - Finally we tried out Tiggly Adventure. In this game you need to help the Tiggly character on an adventure by building bridges and ladders to help him negotiate his way around obstacles. This game teaches the concepts of horizontal and vertical number lines, and also introduces skip counting. Again Mia did need help at the beginning, but she picked up the skills very quickly which I was impressed with, particularly the skip counting which is another concept that she's not had any introduction to. 

Tiggly Words


Next it was time to try out the second product - Tiggly Words. Tiggly Words is aimed at children aged 4-8 years old, so having just turned four Mia is very much at the beginning stage. Although she can recognise a few letters, she hasn't yet learned about putting them together to make words. Harry on the other hand is a confident reader. Again, there are three apps available - Tiggly Submarine, Tiggly Doctor and Tiggly Tales.

Review - Tiggly smart learning products, Math and Words

Tiggly Tales - This was a very good basic game to start with. On the screen you have two consonants, and you can use your vowel shape to make CVC (consonant, vowel, consonant) words. Of course not every combination makes a word, and in that case your 'word' will ping away, but every time a real word is made a picture will appear on screen and these elements will then interact with each other. You can touch the top of the screen to easily change your consonants and then experiment with the different vowels. It's a lot of fun even if they don't really understand yet what they are doing, and it's a great introduction to the sounds that different letters make.

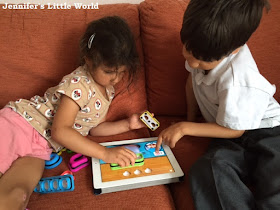
Tiggly Doctor - Both children very much enjoyed playing Tiggly Doctor. You need to treat different patients by carrying out various procedures which are spelled out on screen, for example 'check' and 'cut', with the child needing to select a matching vowel to complete the word. Mia wasn't able to read the words, but she could easily find the matching letter and over time she'll understand more about what she's doing. It was lovely watching her play the game with Harry because he was reading the words out to her and they were learning together.

Tiggly Submarine - The final game, Tiggly Submarine, was a little more complex to get started with and I needed to help show both children what to do. You pilot a submarine around the ocean and use your letters to carry out different tasks, for example rescuing trapped animals and learning about sea animal sounds. They still need to have a good go at this game, but it looks like a lot of fun.

Review - Tiggly smart learning products, Math and Words

I was really impressed with the Tiggly learning games, both by how long they held their attention, and by how quickly Mia in particular was picking up new concepts. Harry was quite happy to play these games by himself but Mia still needed a lot of help and to be honest that is how I'd prefer her to play these games, because then I can talk it all through with her while she is still learning. I really like that there is a range of apps for each set of shapes, and they are so different that they are suited to the interests of different children and their stages of development.

Review - Tiggly smart learning products, Math and Words

We received Tiggly Words, Tiggly Math and a Tiggly plush toy in exchange for this review and the giveaway. Amazon links are affiliate.

Saturday, 18 July 2015

Review - Palace Pets Mini Collectible toys

Disney Palace Pets are a group of royal pets that live with the Disney Princesses. They each have a vague resemblance to their Princess, and they also inhabit their own secret kingdom called Whisker Haven, which the princesses cannot enter. The television series Whisker Haven Tales follows their adventures in this magical world.

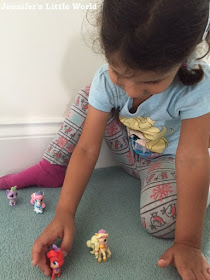
Despite a fairly good all round knowledge of Disney Princesses I wasn't familiar myself with the Palace Pets, although both children knew what I was talking about immediately when I mentioned them, as they love watching toy videos online! They were very excited when we were sent four mini Palace Pets to review - Bibiddy, Treasure, Blondie and Lily.

Disney Palace Pets review

Each Palace Pet has a back story to explain how they met their Princess. Bibiddy is Cinderella's pony, a wedding present from the Fairy Godmother. Treasure is Ariel's kitten, that she met on Prince Eric's ship. Blondie the pony met Rapunzel during a parade to celebrate the princess' return and Tiana met her kitten Lily while working in her restaurant. Most of the princesses do have more than one pet, although they aren't all available as figurines.

Disney Palace Pets review

There are twelve figures in this series to collect, and they are available in packs of two, with a larger set containing nine of the pets also available. These toys are smaller (4-5cm in height) collectible versions of the original Palace Pets.

The little animals are very sweet. They are quite small, but the perfect size to go along with the 12 inch character princess dolls, of which Mia has several. She loves carrying them about with her, especially when we go out in the car, and they fit nicely into her little handbags. Although I thought that they'd appeal more to Mia, she immediately chose two of them to give to Harry, and they've actually been playing with them together. Mia's favourite Princess is Ariel and she loves cats, so she was particularly delighted with Treasure.

Disney Palace Pets review

I think that they make very sweet little toys for children that are fans of the Disney Princesses.

We received two packs of mini Palace Pets to review - Bibiddy/Treasure and Blondie/Lily.

Thursday, 16 July 2015

Making a fairy garden play set

This month my Bostik Bloggers craft box had an Outdoors theme. When I saw the little wooden peg shapes I instantly thought of a craft that I've been meaning to try for some time - decorating peg dolls - and with all the garden themed bits and pieces I decided that we would make a fairy garden play  set for them to live in.

How to make a fairy garden play set with children

Making homemade toys with children is brilliant because they have just as much fun with the crafting as they do with the actual playing. Mia and I made this together and she really loved the whole process. 

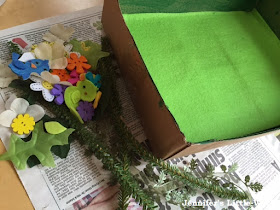
To make the play scene we used the cardboard box that the craft materials came in. I cut off the flaps and Mia painted the inside of the box green, then we lined it with a sheet of green felt, glued down firmly.
How to make a fairy garden play set with children

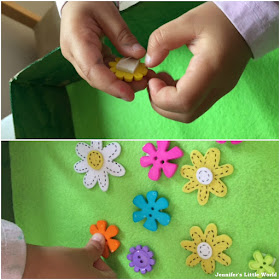
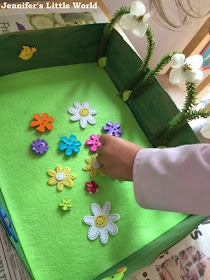
To decorate the inside of the box we used fake leaves, button flowers, flower stickers and some small artificial tree branches. To stick the different embellishments inside the box we mainly used Bostik foam pads. These are small double sided sticky pads and they were brilliant, Mia could easily peel off the backing herself and they are so sticky that they stayed firmly in place. They are great because they adhere instantly, and you don't need to hang around waiting for the glue to dry. I also used them to secure the bottom of the artificial branches to the box and they have remained firmly stuck.


How to make a fairy garden play set with children

Mia had a lovely time sticking down all her flowers to decorate the garden.

How to make a fairy garden play set with children

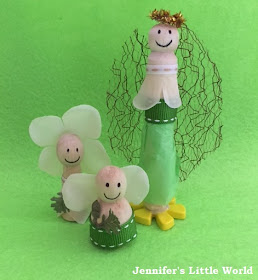
While she was doing that, I made the fairies. I decorated the wooden pegs with scraps of tissue paper, ribbon, and artificial petals.

How to make a fairy garden play set with children

Everything was glued down with the Bostik Glu Pen which has a fine nib so it's really good for detailed glueing. Like all liquid glue it takes a few minutes to dry, but once it was dry everything was held firmly in place.

How to make a fairy garden play set with children

Mia really loves her fairy garden, she is so proud of it and she's been playing happily with it for ages!


How to make a fairy garden play set with children

The box of craft materials was provided to me free of charge by Bostik as part of the Tots100/Bostik Craft Bloggers Club.

Tuesday, 14 July 2015

A new sewing machine, and prettying up our garden summerhouse

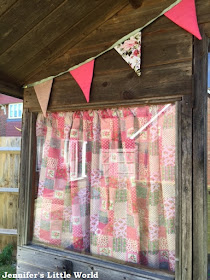
A few days ago I completed a project which I'd been meaning to get to for quite a while (years in fact...) - I finally made some little curtains and fabric bunting to decorate our summerhouse! I wrote earlier in the year about my plans for this summerhouse, and I'm so pleased with how it is looking now.

Making simple fabric bunting for the summer house

I was recently very kindly given a sewing machine by a friend's Mum, and a quick lesson in how to use it. I've always been a bit terrified of sewing machines, despite gaining my "Sewing Machine Driving Licence" back in secondary school. I don't understand at all how they work, and they worry me when they go too fast, as if they are going to speed off out of control.

I knew that I wanted to get to grips with it though, and I decided that some simple bunting and curtains would be good practice for sewing lots of straight lines. I started with the fabric bunting, and used a template and tutorial that I found here - How to Make Reversible Fabric Bunting. Although I didn't attempt bias binding to attach the flags, I just sewed them straight onto a piece of ribbon - baby steps! They are attached to the summerhouse with cup hooks at the top and drawing pins at the ends.

Making simple fabric bunting for the summer house

I know that they will fade as they are exposed to the elements, but they were so easy to make that I can see myself making many more sets over the years! I hope that the fact they are double sided will mean that they last a bit longer than if they were just cut from the fabric. The fabric that I used came from some fat quarters that I received to review a little while back and a cheap bright pink pillowcase from Asda!

Making simple fabric bunting for the summer house

For the curtains I purchased some new fabric in Hobbycraft. I spent ages choosing, not wanting to spend too much and yet not really liking the cheaper fabrics. The fabric that I chose cost £6 per metre, I bought two metres and had plenty left over, and I'm really pleased with it. To hang the curtains I used cheap net rods at 99p each from Dunelm, with holders that screw directly into the insides of the window frames.

Again, I know that the curtains will fade over time, but they were so easy to make that I don't mind making more in a couple of years!

Making simple fabric bunting for the summer house

I was so pleased with how well I got on with the sewing machine. With the help of the instruction manual I was able to change the thread on the top spool and rethread the machine, wind some new bobbins, and insert and thread those up as well. My seams were even reasonably straight. It's definitely given me the confidence to try out some more simple sewing projects!

Monday, 13 July 2015

Educational arts and crafts for the summer from Baker Ross

The summer holidays are fast approaching, and along with them several weeks that need to be filled with fun activities for the children. I do love spending time at home with the children, but I know that I need to be organised and plan activities in advance, and it's always good to have something on hand for those "I'm bored!" moments. I received a lovely box of crafty bits from Baker Ross to help keep the children entertained, and we had a lot of fun crafting.

I really love the pack of Weather Foam Stickers and I can think of loads of ways to use them. There are pleny of different designs in a variety of sizes, representing all types of weather. I helped Mia to make a weather dial which is similar to one that Harry has in his classroom at school. She loves running over to it every morning to set it to the correct weather for the day, and changing it throughout the day as necessary.

Baker Ross weather dial for children craft

One of the things that I love about the Baker Ross craft kits is that they are brilliant for play dates. It's great to have a simple, reasonably non messy activity on hand when friends are visiting, and we had a lot of fun decorating these Music Shaker Kits. They are a simple cardboard tube filled with beads that you can decorate with paint, pens, stickers and so on, with a fun finished product.

We also had a lot of fun with some Solar System Scratch Art decorations. We've received similar kits in the past and with 12 in a pack they are great for entertaining a larger group of children. Each design comes with a stick to scratch off the black layer and reveal the colours underneath. They are fab for all ages, younger children are happy to scratch away until most of the black is gone, older children can scratch out more complex designs.

Also in the box were some Fruit and Vegetable Card Shapes which Mia in particular loved. There are ten different designs in the pack, all simple fruits and vegetables that she could identify straight away. I realised that as well as having fun decorating them we could turn them into a display poster for her room, with the names to help her as she begins to learn to read.

Baker Ross different types of fruit poster craft

We started by painting the shapes with poster paints. The fruit shaped card does have a slightly shiny surface so the paint didn't cover that well, and with hindsight acrylic paint would have been better. It didn't matter though as I was intending to decorate them on top of the paint. We used all sorts of different collage materials - pom poms, sequins, pipe cleaners, feathers, fabric petals and so on, and we were really pleased with our finished poster, it's so bright and cheerful!

Finally we received some great painting supplies which are going to be a big help as we do a lot of painting in this house! A nice big Super Value Spash Mat which I am saving until our current one has fallen apart and some brilliant Painting Water Pots. These are great because you can fill them with paint or water and if they are tipped over the liquid doesn't spill out.

I was also impressed with the Paint Pot Tray which could also be used to hold glue or small decorations like sequins or pom poms. The individual pots fit nicely into a larger tray to keep them together, or you could share them out amongst a group. Previously I've just used old margarine tub lids for holding paint, which is fine for when they are little but as they get older and take more pride in their painting they want the colours to be kept separate. Here Mia is busy painting her shoebox which she needs to decorate and fill with personal bits and pieces ready for when she starts school in September, eek!

Baker Ross arts and crafts materials for educational crafts

I received these products as a member of the Baker Ross Bloggers Network.

Friday, 10 July 2015

My patchwork mobile phone case

I blogged recently about how I'd been inspired by BritMums Live to try my hand at patchwork again, and I'm so proud of myself now for finishing my patchwork mobile phone case!

Hexagon patchwork mobile phone case

I'm afraid that I can't really offer a tutorial for the phone case as I made it up as I went along. I started by creating my piece of patchwork, made using the English paper piecing technique where you tack the fabric around paper hexagons before sewing them together along the edges, then remove the paper pieces. You can find a good introduction and tutorial for the technique here.
Each of my hexagons measures one inch across, and I made a long strip four hexagons across which was long enough to go around the length of the phone twice with some left over for a flap at the end. It was pure luck that the pattern worked out allowing me to match the hexagons over the flap!

Hexagon patchwork mobile phone case

I backed the patchwork piece with some lining fabric (actually a cheap pillowcase) and sewed up the sides using my sewing machine. I was recently very kindly given the sewing machine by my friend's Mum and I'm still learning how to use it so it was a great opportunity to have some practice and become more familiar with it. The flap is closed with a piece of velcro. I toyed with the idea of adding some padding inside but I'm glad that I didn't as I think it would have made the case far too bulky, it's quite soft enough as it is.

The case isn't finished to a particularly high standard, the stitches are probably way too visible and the inside of the flap is a little bit of a mess (not to mention the wonky sewing machine seams), but I made it all by myself and I'm very proud of it!

The dark green flowered fabric is Nel Whatmore Sketch Book and was in my BritMums Live goody bag from Lady Sew and Sew. 

Tuesday, 7 July 2015

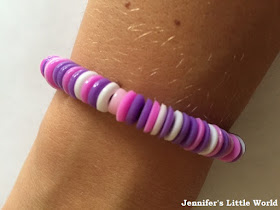
How to make a melted Hama bead bracelet

As an avid crafter with Hama beads, I've blogged before about my frustration with the cheap, imitation beads that you can buy. They can be super cheap, but they are pretty rubbish when it comes to using them for making Hama bead patterns in the usual way. However I have found a few ways that you can use the beads slightly differently to produce some fun crafts, and one of these is making beads for a melted Hama bead bracelet.

Melted Hama bead bracelet


You can use Hama beads to make bracelets with as they are of course, and there are some lovely, creative ways that people thread the beads to make different designs. But I recently tried melting the Hama beads individually first, and I was really pleased with the result.

Firstly it’s a good idea to decide on a colour scheme for your bracelet. Hama beads come in all different shades, and if you have a mixed box of beads it can be a bit overwhelming to have all the colours included. For my bracelet I used a mixture of pinks and purples, along with a few white beads.

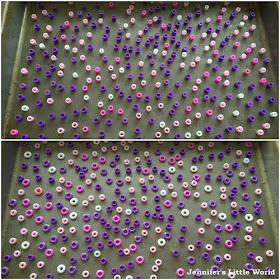
How to melt Hama beads

Take an ovenproof tray and grease lightly or line with baking paper. Place the beads upright on the tray, making sure that they are not too close together or touching. Place the tray in the oven at 200C for approximately 2-3 minutes. Keep a close eye on the beads while they are in the oven. You will see them start to melt, and you need to remove them before the holes in the centre of the beads are too small. You don’t need to worry about melting the plastic as long as you are watching the beads closely, it’s quite safe!

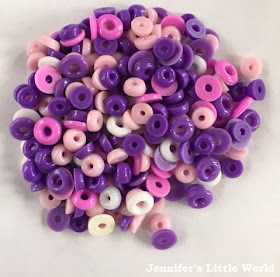
The beads will go all shiny and smooth as they melt, and the finished beads have a really nice shape to them. Wait until they have cooled before removing them from the tray, as when they are hot they will be a bit sticky and might lose their shape. You'll probably want to give the beads a quick wash when they have cooled if you used oil to grease the tray.

Melted Hama bead craft

Then thread the beads onto some elastic or similar to make the bracelet. You can either make a design or place randomly. I was really pleased with how mine turned out and I think it looks pretty cool!

Friday, 3 July 2015

Inspired to rediscover patchwork by the Craft Lounge at #britmumslive

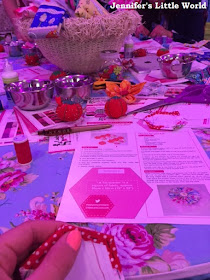
One of the things that I loved about BritMums Live this year was the Craft Lounge, hosted by Lady Sew and Sew and Make it Coats. I didn't get there until the second day, and I really wish that I'd spent more time inside. It was a great place to chill out, chat, and concentrate on something creative.

I've always loved the look of patchwork, and I remember my Mum teaching me with paper hexagons when I was little, although I didn't stick at it for long. My Mum made me a gorgeous patchwork quilt, and we also have a few other little baby quilts that she made around the house, Mia uses them when she's playing with her dolls. I did attempt some patchwork a couple of years ago which unfortunately turned into a bit of a patchwork fail, but when I saw a sewing table in the Craft Lounge with help to make a couple of simple paper pieced hexagons I thought that I would give it another try.

Mini patchwork hexagons phone case

It was much quicker than I remembered to sew a couple of hexagons together, and I really enjoyed the process - tacking the fabric around the paper hexagons and then sewing the pieces together.

Mini patchwork hexagons phone case

So I was really pleased to get home and find a fat quarter from Lady Sew and Sew in my goody bag. It's a lovely green flowery fabric and I knew that attempting some patchwork would be a great use for it. I found some other bits of fabric in my stash that I thought matched well and chose to stick with just three different fabrics. I wanted to start small, and so I decided to make a little case for my phone.

Mini patchwork hexagons phone case

I was quite surprised by how easy I found it! Once I'd got the hang of the pattern I was flying, busily cutting up paper hexagons, fabric hexagons, tacking around and sewing them together.

Mini patchwork hexagons phone case

This is where I'm at so far, and I think that I'm over halfway there:

Mini patchwork hexagons phone case

I must admit that I'm not entirely sure where it will go from here. I have made a paper template and I'm intending to make a long strip that I can fold over to make the case, insert some wadding for protection, and then back it with some lining fabric and perhaps some velcro to close. I'm pretty much making it up as I go along, so we'll see how it turns out!