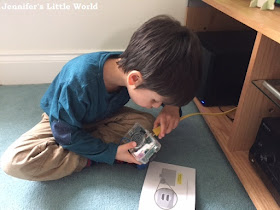
Familiarity with technology is very important these days, and with the new school curriculum involving the teaching of coding to children as early as Key Stage 1 (5-7 year olds) Harry is the perfect age to begin his computing education.
Ram is continuously upgrading our home computers, and a few weekends ago Harry was watching with interest while he built a new home server. So when we were offered the chance to review a Kano kit he was delighted. It was the opportunity to work on something similar together that was especially designed to appeal to and be appropriate for young children Harry's age.
Kano Computer Kit is a computer that you build yourself. The kit contains everything that you need to build a fully functional computer that can be completely customised, and allows children to develop their coding and programming skills at a level that suits them.
Harry is only just 6, but he's very good at following instructions for construction kits like Lego, and we found that the instruction booklet was very clear and geared to children that age. What I really liked about the instructions is that they don't just focus on how to connect certain pieces together, it explains what they are and their purpose. This is good because the key purpose of this kit is not just to be able to put it together but also to learn how it works.
Building the Raspberry Pi within its case and connecting the speaker to it was not tricky for him. The Raspberry Pi is not like a PC - it's a chip which effectively has its on-board memory, the CPU, already on the motherboard, so it's simply a case of putting it into a study case and locking it.
Attaching the speaker was a little more tricky as you have to connect the power for the speakers to the motherboard with some small pins that need to go in the right order in the correct place. Once this is done, you simply insert a standard SD card which contains the operating software, exactly like you would in a phone.
The Raspberry Pi is connected to a screen via the HDMI lead. To start with we have the Kano connected up to the television in our living room, but in the longer term we are going to use it with a PC monitor as that will be easier to operate. The Kano comes with a handy WiFi dongle to connect it to the Internet, as well as an Ethernet port. As we had a internet Ethernet socket nearby we used that instead.
The wireless keyboard comes with a USB WiFi adaptor, which plugs into the device so that you can use your keyboard nearby. I like the fact the keyboard doesn't need batteries and can be charged via a connected USB lead. I also like that it is Bluetooth enabled - this means it's also possible to use it with modern day TVs, iPads, phones and so on, which is a great added benefit.
Finally you can connect the power cable to the device, and turn it on. It takes a while to get to the actual interface. First you go through some boot-up and pages to connect to the Internet and learn how to use the keyboard. After this it connects to the Internet and updates the software - which did take 15-20 minutes to do.
Once you get into the interface, first impressions are that it has some good basic games, access to YouTube, as well as the ability to install apps such as XBMC. However navigating around the interface and loading up items can be a little slow - which is to be expected as the Raspbery Pi is not a high powered PC.
We've not had the chance yet to explore all the further features that the Kano can offer, so I'll be writing an updated post when Harry has had the chance to really get his teeth into it and look at the second book that came with it around coding.
We received the Kano kit in exchange for a review.


We have been using the Kano too and love it.....My eldest has really got into coding and now wants to do it when leaving school....lol x
ReplyDeleteThis looks like something my son would love as he loves building Lego. I have noticed they are doing more at school this year and it would be great to learn something together. Thanks
ReplyDeleteThis looks fab
ReplyDelete