Saturday, 28 March 2015

Getting our summerhouse ready for Spring

I have to admit that I'm not a particularly outdoorsy person. I know that it's very important for children to get outside everyday, and I do honestly try my best, but on a grey, cold, winter's day, I'd much rather be tucked up at home with a hot chocolate. Luckily, each of the children enjoy outdoor time in pre-school and at school so I don't feel that I have to worry too much about it!

Getting the summer house ready for Spring

We are fortunate to have a nice garden with a big vegetable patch and a lovely summerhouse that we inherited when we moved in. I had big plans for our summerhouse, and although it has taken a while to get things going I'm determined that this will be the year that I really make something of it. My Dad replaced the roof last year, so it's a nice, dry outside room.

I never tidied it up properly at the end of last summer, so it has spent the winter as a tip, with discarded garden toys chucked in and ignored. Over the last week or two I've had a massive clear out, with one bin bag of rubbish gone and one bin bag of extra toys given away on Freecycle. I've also given away a rickety chest of drawers, replaced some old children's garden furniture with our newer set from Harry's bedroom, and gone around with the hoover getting rid of cobwebs and dead woodlice.

Now I'm focusing on making it a bit more homely and more of a play space. I was recently gifted a sewing machine which I was thrilled about, and I'm planning to make some proper little curtains for the windows and some bunting to string outside. I might even manage a cushion! I've also been scouring Twinkl for fun and educational signs and posters to laminate and stick up inside - these are the Animal Groups Display Posters (Twinkl subscriber resource).

Getting the summer house ready for Spring

I have a beautiful butterfly light fitting that was rescued from Mia's room in the old house, but unfortunately the light part broke when we took it down. I've finally upcycled it into a mobile and I think it looks lovely along with my denim and felt butterfly bunting that I made a few years ago now.

Getting the summer house ready for Spring

I'm going to move some of our older toys out there in the hope that they will get played with again in a different environment, like our car garage, a box of cars, and some of the Happyland bits. It won't be long before I'll be setting up our big outdoor sandpit, which is still in pretty good condition despite being a few years old now. We've also put the swings out, and it looks as though Mia will move on from her baby swing this year onto a proper adult swing.

Getting the summer house ready for Spring

Now I just need to hope that we have a nice warm summer again for plenty of outdoor play!

Thursday, 26 March 2015

Review - Kano - the computer that you build yourself

Familiarity with technology is very important these days, and with the new school curriculum involving the teaching of coding to children as early as Key Stage 1 (5-7 year olds) Harry is the perfect age to begin his computing education.

Ram is continuously upgrading our home computers, and a few weekends ago Harry was watching with interest while he built a new home server. So when we were offered the chance to review a Kano kit he was delighted. It was the opportunity to work on something similar together that was especially designed to appeal to and be appropriate for young children Harry's age.

Kano Computer Kit is a computer that you build yourself. The kit contains everything that you need to build a fully functional computer that can be completely customised, and allows children to develop their coding and programming skills at a level that suits them. 

Review - Kano, the computer that you build yourself

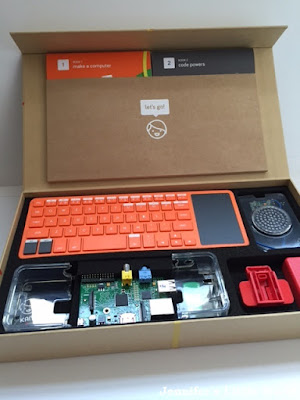
The Kano comes in a really sturdy well designed box - more akin to a luxury gift item. Inside the box - a Raspberry Pi Model B chip (the original Raspberry Pi, not the newer faster one released over the last 6 months), instruction books for the basic build and coding, a speaker, a wireless keyboard which is also Bluetooth enabled, the Kano operating system, an SD Card, a case with stickers to customise it, HDMI cable, Charger  + USB charging cable and a WiFi dongle. You just need to supply a screen with HDMI input.

Harry is only just 6, but he's very good at following instructions for construction kits like Lego, and we found that the instruction booklet was very clear and geared to children that age. What I really liked about the instructions is that they don't just focus on how to connect certain pieces together, it explains what they are and their purpose. This is good because the key purpose of this kit is not just to be able to put it together but also to learn how it works.

Review - Kano, the computer that you build yourself

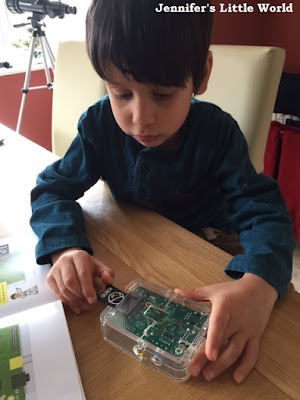
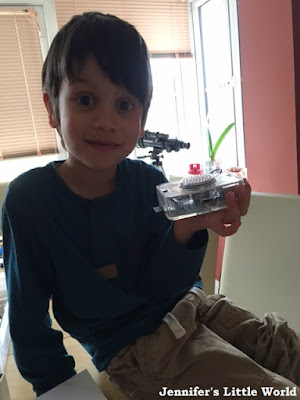
Building the Raspberry Pi within its case and connecting the speaker to it was not tricky for him. The Raspberry Pi is not like a PC - it's a chip which effectively has its on-board memory, the CPU, already on the motherboard, so it's simply a case of putting it into a study case and locking it.

Attaching the speaker was a little more tricky as you have to connect the power for the speakers to the motherboard with some small pins that need to go in the right order in the correct place. Once this is done, you simply insert a standard SD card which contains the operating software, exactly like you would in a phone.

Review - Kano, the computer that you build yourself

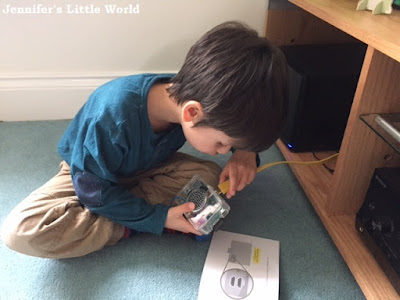
The Raspberry Pi is connected to a screen via the HDMI lead. To start with we have the Kano connected up to the television in our living room, but in the longer term we are going to use it with a PC monitor as that will be easier to operate. The Kano comes with a handy WiFi dongle to connect it to the Internet, as well as an Ethernet port. As we had a internet Ethernet socket nearby we used that instead.

The wireless keyboard comes with a USB WiFi adaptor, which plugs into the device so that you can use your keyboard nearby. I like the fact the keyboard doesn't need batteries and can be charged via a connected USB lead. I also like that it is Bluetooth enabled - this means it's also possible to use it with modern day TVs, iPads, phones and so on, which is a great added benefit.

Review - Kano, the computer that you build yourself

Finally you can connect the power cable to the device, and turn it on. It takes a while to get to the actual interface. First you go through some boot-up and pages to connect to the Internet and learn how to use the keyboard. After this it connects to the Internet and updates the software - which did take 15-20 minutes to do.

Once you get into the interface, first impressions are that it has some good basic games, access to YouTube, as well as the ability to install apps such as XBMC. However navigating around the interface and loading up items can be a little slow - which is to be expected as the Raspbery Pi is not a high powered PC.

We've not had the chance yet to explore all the further features that the Kano can offer, so I'll be writing an updated post when Harry has had the chance to really get his teeth into it and look at the second book that came with it around coding.

We received the Kano kit in exchange for a review.

Tuesday, 24 March 2015

The Weald and Downland Open Air Museum at Singleton, West Sussex

Ram has been quite busy at weekends lately with his marathon training, and then this weekend he was out to watch the rugby with friends. So instead of sitting around at home like we often do, I decided to be brave and take both the children out on a day trip. We spent the day at the Weald and Downland Open Air Museum near Chichester in West Sussex.

The Weald and Downland Museum, West Sussex

The museum is a collection of traditional buildings arranged over a 40 acre site. Most of the houses are furnished to recreate their historic interiors, and there are also a few farm animals.

The Weald and Downland Museum, West Sussex

I have very many fond memories of visiting the museum as a child. The photograph above has a particular significance - we have several photographs taken at this spot over the years so have added another to the collection with the next generation!

The Weald and Downland Museum, West Sussex

Visiting on a grey day near the beginning of the season I wasn't expecting there to be a great deal going on, but I was pleasantly surprised. Even though the site wasn't too busy, there were so many staff and volunteers doing everything they could to really enhance our visit.

In the Tudor kitchen we watched the ladies make bread from scratch, kneading the ingredients together and then cooking it on a griddle in the fire, where they were also making soup. We were able to try the cooked bread too and it was lovely, and all the while they were making it they were telling us what they were doing along with lots of other facts about cooking in Tudor times.

In another house the children learned how to dip candles in the traditional way, each taking turns to dip their wick into the wax which had been heated on the fire. They were completely fascinated by the process, and as I have a few candle making bits at home we'll be trying it again.

The Weald and Downland Museum, West Sussex

I had optimistically brought along the picnic mat for lunch, and so although it was pretty chilly we enjoyed our first picnic of the year, albeit with frequent interruptions from some curious chickens! Later in the day I spotted an indoor picnic area, which I shall remember for next time! The leftover crusts were used to feed the ducks down by the mill pond.

The Weald and Downland Museum, West Sussex

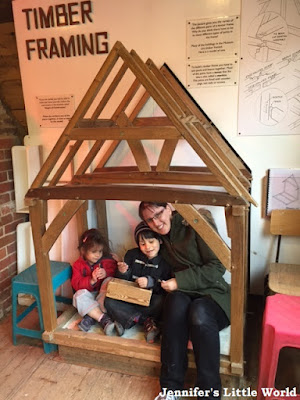
The highlight of our visit was the time that we spent in the Joiner's Shop, which was filled with building activities for children. A really friendly lady helped us with the exhibits, with Harry's favourite activity being building a little house using traditional wooden joining techniques. The lady even entertained Mia with some brick laying while Harry and I followed the instructions to put the different pieces together and pegged them in place.

The Weald and Downland Museum, West Sussex

Mia came along and helped us with some of the pegging, and they were both so proud of their construction. As soon as we had left the building Harry wanted to go back inside and build it again, and he keeps asking if we can have one of our own at home.

The Weald and Downland Museum, West Sussex

They then both copied some different brickwork designs using real little bricks, and then Harry learned how to peg tiles on a roof. It was all absolutely fascinating and they both learned so much. 

The Weald and Downland Museum, West Sussex

The Weald and Downland Museum, West Sussex

Both children also loved exploring all the different houses, climbing up stairs and peering out of windows. You are invited to explore the houses yourself and touch the things that you find inside, and we learned all about chamber pots and outdoor toilets. I've been reading Little House in the Big Woods with Harry recently,and it was nice for him to be able see real items like butter churns that we've been reading about.

Many of the houses are in their own grounds with little kitchen gardens, and so much care has been taken to recreate them faithfully. Inside the larger houses there was usually a volunteer who was happy to talk to us about who might have lived in the house and what life would have been like. Harry takes everything in and it's lovely to watch him learning.

The Weald and Downland Museum, West Sussex

I'd really recommend a visit to the museum, we had a brilliant day out!

Saturday, 21 March 2015

Simple Easter decorations and cards

I'm a member of the #BostikBloggers crafting team, and each month I receive a gorgeous box of crafty goodies to have fun with. This month the theme was Easter, and having just finished making a lovely new Easter tree I was inspired to use to box to make up some hanging decorations for it.

Simple Easter decorations and crafts for children

While the children were out at pre-school and school I set up three crafts - first a more complicated one for Harry, then a simpler one for Mia, and another that they could both do together. I felt very organised when they got home and I could present them with their trays of activities!

This is what we made:

Sewn fabric Easter Egg hanging decoration

Harry is rather good at sewing, and he loves simple sewing projects. I cut out two Easter Egg shapes for him to stitch together and he chose a bright orange thread. He sewed neatly around the edges and pushed in a small amount of stuffing, then I stitched the opening up firmly and added a ribbon for hanging.

To decorate he used some pretty flower stickers and more ribbon. We found that the Bostik glu pen worked really well for attaching the ribbon even though it's really designed for paper and card!

Simple Easter decorations and crafts for children

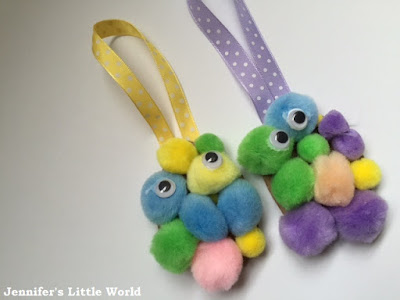
Easter egg hanging creatures

This was a super simple craft for Mia while Harry was occupied with his sewing. I cut out two small Easter Egg shapes from thick cardboard, and she covered them in a thick layer of PVA white glue and positioned the pom poms on top. When they were dry we added some googly eyes.

I used a couple of tape discs to stick some ribbon to the back of the decoration which worked very well on such a light object.

Simple Easter decorations and crafts for children

Easter cards with washi tape and foam stickers

Finally both children made some Easter cards for friends and family. They were very simple and quick, but I think they look lovely and cheerful, and both children really thought about how they were going to design and make their cards.

They used a piece of A4 pastel card folded over, and decorated with various flower stickers, strips of patterned paper and washi tape, with the glu pen coming in very handy again.

Simple Easter decorations and crafts for children

I do love Easter and Spring crafting, I'm ready for some warmth after the cold months!

The box of craft materials was provided to me free of charge by Bostik as part of the Tots100/Bostik Craft Bloggers Club.

Thursday, 19 March 2015

How to make a simple Easter tree using wire and tissue paper

I've been eyeing up Easter trees for a couple of years now. Something that I've only come across recently (with Pinterest to blame once again!), Easter trees are a way of displaying hanging Easter decorations, and usually take the form of a painted white branch, or wires formed into the shape of a simple tree. This year I almost considered poppping down to Hobbycraft and purchasing one, but when I discovered that prices started at £20 I thought that there had to be a way that I could make one myself.

Homemade Easter tree tutorial

The obvious Easter Tree DIY is to just find a suitable branch and paint it white, but I feel a bit uncomfortable at the idea of wandering around in woodland armed with a saw, so I decided to use some thick wire that I had on hand to fashion my own tree branches.

How to make a simple Easter tree with wire

Here's how I made my tree:

Materials:

Small flowerpot and a saucer, terracotta works best as it's heavy and will be sturdier
Thick wire - I used thick florist aluminium wire which is very soft and easy to bend and cut. You could also use the wire from wire coat hangers
Play doh or florist foam
Tape
White or cream tissue paper
Plenty of PVA white glue
White paint
Raffia, shredded paper, ribbon and so on to decorate the flowerpot
Decorations to hang from the branches

Instructions:

Cut about twelve lengths of wire, I cut four each of three slightly different lengths. My longest length was about five times the height of the flower pot. Tape all the lengths together firmly at the bottom.

How to make a simple Easter tree with wire

Fill the flowerpot up with old play dough or florist foam and push the taped together end of the wire bundle in firmly. I discovered that it's a good idea to use a neutral coloured play dough if you can! Glue the flowerpot into the saucer with plenty of glue.

Then shape the branches of your tree. You might need to play around with the design for a while until you achieve something that you are happy with. My tree has three main branches coming up from the centre, and I've twisted the wires around to make shorter and longer branches which hang at different heights. I've also made the Easter tree with the plan of hanging small ornaments in mind, so the branches are looped with shallow hooks to hang things from.

How to make a simple Easter tree with wire

Then cover the wire branches with tissue paper. I cut long strips of tissue paper, covered them in white PVA glue, and wrapped them around the wires, making sure to completely cover the sharp ends at the top of the branches. When the tree was all covered I added an extra layer of glue and also some glue on top of the play dough, just to make sure that it all held in place.

How to make a simple Easter tree with wire

Then paint the tree white. I used white gloss paint and it needed two coats. Make sure to cover your work surface while painting and drying to protect from drips, and keep an eye on the tree as it dries to make sure that there aren't any drips hanging down from the branches.

How to make a simple Easter tree with wire

When it was all dry I decorated the flower pot. I put plenty of glue into the top of the flowerpot and filled it up with cut up pieces of raffia. Then I found some pretty ribbon to glue around the rim. I tried to keep it neutral so that it doesn't detract from the decorations, and I can use it with different colour schemes. I was so pleased that I was able to make this tree entirely with materials that I already had on hand, and I'm really proud of it!

How to make a simple Easter tree with wire

The decorations currently on the tree were ones that I received as part of an Easter crafting project from The Works, and I have plenty of ideas for making our own decorations now that we have somewhere nice to display them.

If you don't want your Easter Tree to sit in a cupboard for the rest of the year, you can easily re-theme it. I turned ours into a Halloween Tree, and you could also use it at Christmas, perhaps as an Advent calendar with hanging pockets.

How to make a simple Easter tree with wire

Tuesday, 17 March 2015

Gardening Tuff Spot sensory play

Recently, Emma from Adventures and Play invited me to join in with her Tuff Spot A-Z Challenge. During March and April 2015, every weekday a blogger shared a blog post on either their own site or as a guest blog on the Adventures of Adam featuring sensory play based around a different letter of the alphabet. If you're not familiar with Tuff Spots here's an example -Tuff Spot (affiliate link) - it's basically a large mixing tray which you can use for all sorts of messy play and activities.

Gardening themed sensory play activity for children

For our Tuff Spot play I chose G for Gardening. Of course, indoor gardening play isn't a substitute for real gardening, but while it's still too early in the season to start actual planting outdoors, we've been doing the next best thing!

Gardening themed sensory play activity for children

I'm bending the rules of the challenge a little bit, as we don't actually have a real Tuff Spot. Instead, for our large scale sensory play I use a big tray, which is the lid from our outdoor sand and water table. It has a nice rim around the edge to keep everything reasonably contained, and it's the perfect shape for two children to use at once. I usually place it on the floor on top of an old table cloth, or else I have an old shower curtain that I use if we are playing with wet materials. You can also see it in action as Dinosaur Island.

Gardening themed sensory play activity for children

The base material for our sensory play was cheap rice which I dyed black. It's very easy to dye rice, just mix it all up with some food colouring and leave to dry for a very short while. Dyed rice keeps for years and you can always reuse it - even if lots of different colours get mixed together the children don't mind at all!

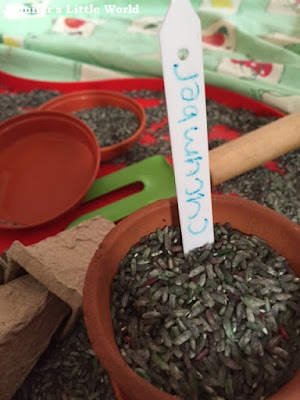
One thing I've learned about sensory play is how much little children enjoy spooning and mixing different materials. So I provided plenty of plant pots for them to fill. There's a little terracotta one (obviously keep breakable ones for older children to use!), a few plastic ones and lots of new cardboard seedling pots. I put in a couple of our child-sized garden tools, and I also added some spoons for easier filling. I also added some seed markers and some different sizes of coloured pom poms.

Gardening themed sensory play activity for children

Then I gathered together some old pumpkin seeds still going strong from my Halloween sensory tub and made some little seed packets to present them in. For the seed packets I used this fab printable from Twinkl - Create your own Seed Packets (free download). There are several different packets to choose from, and they have a blank front so you can add your own pictures. I found some pumpkin pictures in this Twinkl resource Editable Halloween Pumpkins (free download), and I printed off a couple of pumpkins to glue to the front of the seed packet.

Gardening themed sensory play activity for children

Finally I once again turned to Twinkl to make some simple cards to use for matching game. I created this resource myself using the Twinkl Create function which is available to Premium users. I chose a selection of garden themed pictures, printed them out to make pairs and laminated them. 

I used the cards with Mia to play a memory matching game, and we hid them in the rice to hunt for pairs which she really enjoyed. 

Both children were so excited to see the gardening play all set up, and it reminded me that I should do this sort of play much more often! They both dug straight in, quite literally, and were soon completely absorbed. 

Gardening themed sensory play activity for children

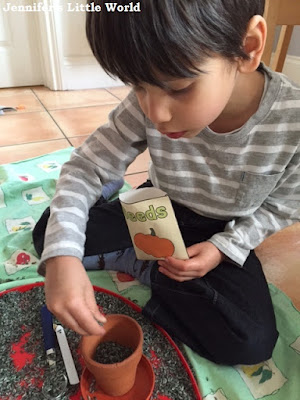
Harry was very interested in the seed packets and he took his play very seriously, filling up his plant pot and planting his pumpkin seeds. 

Gardening themed sensory play activity for children

He wanted to know how we would remember what had been planted, so I gave him a pen to write the names of the plants on the seed markers. A great way to sneak in some writing practice, and his writing was so neat that he'll definitely be helping me when it comes to writing out the real ones!

Gardening themed sensory play activity for children

On the other hand, Mia's first reaction upon seeing the cardboard plant pots was 'ice creams'! She busied herself with filling the pots up with the rice and popping a pom pom on top to make ice cream cones. Perhaps not quite the play that I had imagined, but I loved seeing her little thought processes at work and she had such fun! She also caught on that the pom poms could represent flowers that had grown, and was busy filling up flower pots. She came home this week from nursery with a real bulb planted in a flower pot and is most annoyed that it hasn't started growing yet, so at least this was some instant planting gratification for her!

Gardening themed sensory play activity for children

I must admit that I had worried that at 6 Harry was getting a bit old for sensory play, but I was wrong. Both children played beautifully together for ages, even though they tended to play their own games independently with the shared materials! They both sat their narrating their own play, yet enjoying the other's company. 

Saturday, 14 March 2015

Making an Spring Picnic Easter bonnet

For Easter 2015 I was challenged by The Works to use some of their products to create an amazing Easter bonnet and inspire entries into their Easter Bonnet Competition. We had never actually made an Easter bonnet before so it was a really fun challenge for us, and luckily we received a lovely hamper full of crafty goodies from The Works to help us. Our starting point was this basic Easter hat, which cost just £1.

How to make an Easter bonnet with chicks

And below is our finished Easter bonnet - an Easter chick Spring picnic hat! Harry, Mia and I worked on it together and we are so proud of it!

How to make an Easter bonnet with chicks

The Works has loads of Easter crafting products in store, and you can see a selection of the products from this year below. With quite a lot of fluffy yellow Easter chicks in our hamper we came up with the idea of a Spring picnic for them.

Our first step was to cover the entire hat in green tissue paper so that it would look like a grassy green hill. I removed the ribbon from the hat, and first cut a large square of tissue paper. I used long strips of double sided tape to cover the bowl of the hat, and then we smoothed down the tissue paper before trimming neatly around the edges.

To cover around the brim I cut two long lengths of tissue paper about 10cm wide. I squeezed out a thick line of white PVA glue around the base of the bowl on top of the tissue paper and then we stuck the strips around the brim of the hat. I used lots of glue and we all pressed it down firmly before leaving it to dry. Then I folded the edges of the tissue paper underneath the brim and again used the PVA glue to stick it firmly.
How to make an Easter bonnet with chicks

We used a wide strip of Easter egg paper ribbon from the Easter Bonnet Decorating Kit to make a hat band. While the hat was drying Harry made a cheerful gingham style tablecloth from a piece of white paper and red pen, and we made the cake for the top of the hat.

How to make an Easter bonnet with chicks

To make the cake we used the end of a cardboard tube that had contained sweets. Harry tore up squares of tissue paper to make balls and glued them over the entire tube, with a red one on top for a cherry. We added some pretty Easter ribbon around the sides. Then we glued it on top of the table cloth.

We finished off the decoration of the Easter bonnet with some larger yellow chicks enjoying the cake, and plenty of smaller chicks having fun around the brim of the hat.

How to make an Easter bonnet with chicks

Finally we used some pretty decorative artificial flowers. I pulled them apart so that we could use the flower heads at the base of the brim, and we tucked the long leaves into the hat band so that they looked like grass growing up around the picnic spot.

How to make an Easter bonnet with chicks

Here is Harry proudly wearing his creation. We had such fun making this bonnet together, I think that a yearly Easter bonnet is definitely going to become a family tradition!

How to make an Easter bonnet with chicks

I received a hamper of craft supplies from The Works in exchange for this post.

Thursday, 12 March 2015

Hama bead photo frames

As I mentioned earlier in the week, as a part of my recent decluttering I've been sorting through some old photos. I keep them all in boxes, and it seemed a shame when they made me so happy to look through them, so I thought that I'd make some frames so that I can keep a few favourites on display. Of course it had to be Hama beads!

How to make some Hama bead photo frames

To make a frame large enough to display a standard photo I found that it was best to use two large square pegboards, which are designed to slot together so that you can make a design across both boards. You could use a single square board but you'd only be able to display smaller photographs. For more complicated designs I map them out on graph paper beforehand. Be warned, these frames use up a lot of Hama beads!

Assemble the frame on the boards as usual and iron. After ironing, it's important to place the frame underneath something heavy for a few minutes while it cools, to prevent it from warping. I always iron the design more on the side that will be at the back to keep it sturdy, as I like the look of the beads when they aren't ironed too much.

I made a back for the frames using thin cardboard which I taped to the back of the frame at the top and bottom, leaving the sides open to insert the photograph. I used white cardboard, in case I want to frame a photograph that isn't large enough to fill the frame. I've been propping them up on the mantlepiece, but they are light enough to stick easily to a wall, or you could make a flap from a second piece of cardboard so that they can stand up.

Hama beads are available in a huge range of colours so you can pick out those that match your decor, they don't need to be garish, there are some lovely subtle shades available.

Pastel Hama bead frame

This frame is displaying my current favourite picture that I found while sorting out, my sister and I bathing dollies in the garden. I showed the photo to Mia and she wouldn't stop going on about it until I let her take her dolly in the bath with her that night!

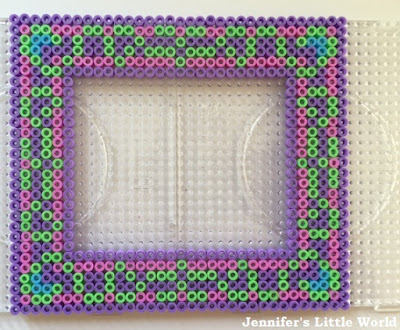
Hama bead photo frame purple and green


This is the template for the design.

Hama bead photo frame purple and green

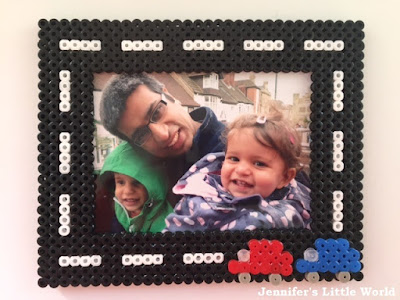
Cars Hama bead frame

You can see this in my Transport post. This photograph was taken on the top of a bus, so it's the perfect subject matter for a road themed frame! Harry has his eye on this one.

The basic Cars Hama bead frame is just made to look like a simple road, then it incorporates some little cars that are glued onto the bottom of the frame to make them stand out. It's hard to show in a photo, but it looks pretty cool! I just used white PVA glue to stick the small designs to the frame.

Hama bead transport themed frame


This is the template for the design - super simple!

Hama bead transport themed frame

Stripy Heart Hama bead frame

This is a really simple frame, made more interesting with a striped heart in the corner. For the heart I used a basic cross stitch heart design. Some of the beads in this frame are my stripy Perler beads which I bought on holiday in the US. Perler beads are almost identical to Hama beads, the only difference I've found is that they seem harder somehow, but they are fine to mix with branded Hama beads. I'm not sure where you can easily buy them from in the UK, I'll definitely be keeping my eyes open because I do love the stripy beads. I completed the frame with one of my old baby photos!

Hama bead frame with stripy beads

Here is the design for the frame. You could add another heart on the opposite side or corner, and use all sorts of different colours.

Hama bead frame with stripy beads


I hope that you liked my Hama bead frame ideas! I've also made Hama bead frames previously. You might like my Hama bead frames inspired by Roman mosaic designs or my Hama bead heart frames.

For all my Hama bead designs visit my Hama bead page.