Pages

Wednesday, 25 February 2015

What to do with old diaries?

I'm currently decluttering. I'm coming to the end of a February decluttering challenge (more on that to come!) and I'm also following a year long organisational programme - Declutter 365. I've always thought that I was quite good at getting rid of things, but I'm amazed with some of the things I've been keeping that I'd forgotten all about.

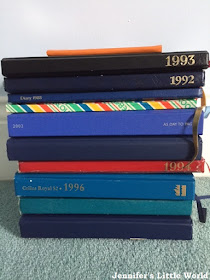
One thing that I unearthed recently was a big box of my old diaries. I did know that they were there, but the box had been pushed to the back of the wardrobe and I'd not seen it for a while. This is just a few of them...

Collection of old diaries

I started keeping a diary around 1990, in my final year at primary school, and carried on pretty much until I went to University in 1998. There is a 2002 diary in the box, but I gave up around March that year. I always used A5 hardback diaries, beginning with two days to a page and working up to each day being an entire A5 page. I usually filled the page, and I stuck in various tickets, free stickers from magazines, and ephemera as well.

The diaries themselves are mainly pretty boring to be honest. They contain detailed descriptions of what I got up to in each lesson at school that day, along with plenty of teenage angst which makes me cringe when I read it back. It's like reading something written by a different person, and I can't believe that I got myself so worked up over such little things.

My instant reaction was to bin them, as I find them very difficult to read back. But when I asked for opinions on Instagram, almost everyone said I should keep them! I would hate for anyone else to read them though, so a note to family and friends - when I'm gone, burn them!

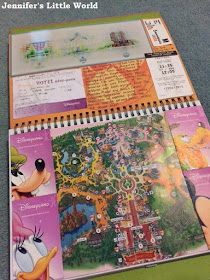
Although I stopped keeping such detailed diaries, I still kept a holiday journal with long accounts of our travels. But on my birthday last year I began keeping a diary again. I have a Five-Year Memory Book where I write just a few sentences each night about what I've been up to that day. In years to come I can bore Ram before bed with details of what we were up to on that day in previous years. I also have my Smash Book, which I've started to use as a way to keep a few notes about memorable days and holidays, as well as a place to stick in tickets and other daily life ephemera. This is a really quick double page spread that I did the other day for our recent holiday to Disneyland Paris:

Disneyland Paris smash book page

Do you have an embarrassing box of old diaries? I'd love to know what other people do with them! I can't help feeling that I'd feel much happier if I just binned the whole lot, but I don't want to regret it!

Tuesday, 24 February 2015

Review - Hot Wheels Track Builder Spiral Stack Up set

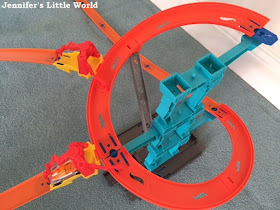
The Hot Wheels Track Builder Spiral Stack Up set is a part of the Hot Wheels Track Builder system. The Spiral Stack Up allows you to build and rebuild in all directions. It's a smaller set, so it's quite compact to store, and it also doesn't require any batteries which is a big plus.

Hot Wheels Spiral Stack Up set review

I started with the basic layout, and assembly was fairly straightforward. I do sometimes find the instructions difficult to follow, but along with the help of the picture on the box and my previous Hot Wheels assembly experience I managed to put it together quite quickly without too much trouble.

Hot Wheels Spiral Stack Up set review

To play with the set, you position two cars on the launchers part way down the track, then launch a car from the top of the track. As the car passes the launchers it will fire the other two cars off down their separate tracks. So it's a great way to begin a more complex Hot Wheels layout, and you can add your own tracks and layouts onto the ends of the three different tracks, as well as adding more track to the base piece. It's a shame that like all Hot Wheels set only one car is included, as it works a lot better with several cars, although we found that our other cars did work well in this set.

The two separate launchers can be slid up and down the track to change their positions. We had to fiddle a bit with the positions sometimes, for example if they were too close to the curve then they didn't work, but they also needed to be near the supports for stability. Once in position though they worked fine.

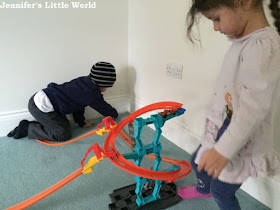
You need quite a lot of floor space so that you have room for the cars to fly off in different directions and space to extend the track. It does mean that several children can play at once though, as they can each build and take control of a different section. My two played with it really nicely together. I left them to it for a short while, and they had soon filled the living room with Hot Wheels track, building a massive Hot Wheels city!

Hot Wheels Spiral Stack Up set review

I've found that the Hot Wheels sets are much more fun if you have more than one set that you can combine together, or if you do as we have done and purchase some extra pieces of track. This set in particular works much better in conjunction with other sets, rather than having it as a standalone set. We've also had much more fun making up our own layouts using the different pieces rather than sticking to the instructions. It really is so customisable that you can do all sorts of fun things with it.

I have also reviewed these other Hot Wheels sets, which all form part of the same Hot Wheels Track Builder system. Click the links to read my reviews:

Hot Wheels Super Looper Track Set
Hot Wheels Total Turbo Takeover Track Set

I received this set in exchange for a review.

Saturday, 21 February 2015

A half-term break to Disneyland Paris

Ram keeps a pretty good eye on holiday prices, and last year he spotted a great deal on Disneyland Paris this February half-term. We hesitated for a while, after all we've only just enjoyed a fantastic trip to Disneyworld in Orlando, but in the end we just couldn't resist and booked ourselves a four night stay at the Sequoia Lodge Disney hotel.

Family break to Disneyland Paris

We last visited Disneyland Paris by train for Harry's second birthday back in 2011, staying at the Santa Fe hotel. This time we drove all the way from home, using our accumulated Tesco points to cover the Eurotunnel fare. 

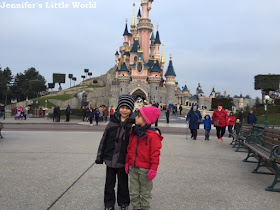
Children at Disneyland Paris

The Sequoia Lodge was a great choice. We had a good sized room with two double beds, and it's just a 15 minute walk from the parks with continental breakfast included. Most of the walk is through the Disney Village, past a variety of shops and restaurants. Both Disney parks (Disneyland Park and Walt Disney Studios Park) have their entrances almost next door to each other, with the station just a few minutes away. Because the parks are adjacent you can easily pop in and out between the two, and having the station so close means that central Paris is less than an hour away by train.

When you stay at a Disney hotel your park passes are included, even for your arrival and departure days. We left home after lunch the day before and stayed an extra night beforehand at a local Novotel so that we could enjoy a full day in the park on our arrival day, then we travelled back in the evening of our final day.

The parks were very busy during this half-term week. Although as a Disney hotel guest you can enter the park two hours early, we didn't find that this really helped, especially as only a few rides were actually open at that time. It was pretty cold too, although we were well wrapped up.

Disneyland Paris with small children

Harry is pretty timid when it comes to going on rides, but he's more worried about the movement of a ride rather than what he's going to see. So he loves the Phantom Manor and Blanche-Neige et les Sept Nains (Snow White) but doesn't like Pirates of the Caribbean because it has two gentle hills. Mia on the other hand loves the faster rides but found some of the dark rides scary, in particular Snow White where she was terrified of the witch and had to ride with her hands over her eyes.

Both children loved the new Ratatouille ride which is an innovative 3D adventure ride through the Paris restaurant from the film. It was very popular, and we only managed to ride it by queueing up first thing in the morning for Fastpass tickets later in the day. This was a pretty stressful experience to be honest as the queues weren't very well managed, but it was worth doing.  

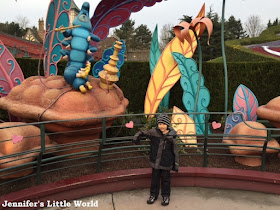
Another favourite attraction was Alice's Curious Labyrinth, and the children enjoyed Peter Pan's Flight, It's a Small World and Le Pays des Contes de Fées (a boat ride through fairytale scenes). Disneyland Paris park has several walk through attractions, like Le Passage Enchanté d'Aladdin, as well as the Pocahontas Indian Village playground and Adventure Isle play areas, and underneath the castle is a dark cave occupied by a very realistic dragon. It's nice to have these areas to explore without the need to queue.

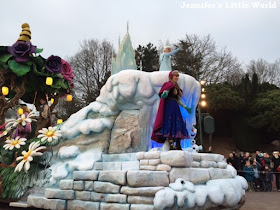
The parade took place at 5.30pm every day and was very popular, to get a space at the front you needed to be in position well over half an hour beforehand. It was pretty good, some lovely floats and of course the Frozen sisters.

Frozen float in the parade at Disneyland Paris

Every evening just before the park closed there was a performance of Disney Dreams! - a fantastic show around the castle with lasers, fireworks, music and projections onto the castle. It was very very good, probably the best evening show that we've ever seen at any of the Disney parks. Although the view was better if you were nearer the castle, you could still get a pretty good view from anywhere on Main Street, only arriving just a few minutes before it started. 

Disneyland Paris castle by night

One morning we ventured into central Paris with the children by train. Knowing that the Paris Metro is not at all pushchair friendly we left it at the hotel and found a route that avoided too much walking to save little legs. We popped up at the Arc de Triomphe, the Eiffel Tower, and finished at La Défense where we ate lunch. I'm really glad that we took the chance to do it, as the children really enjoyed it.
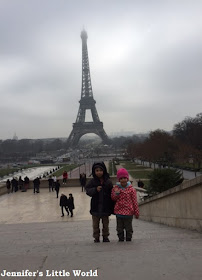
Children by the Eiffel Tower in the mist

One downside to Disneyland Paris is that eating out can be expensive, and unless you want to travel away from the parks your options are limited. We found that the food in the parks was very over-priced and not that good. We paid nearly 47 euros for a buffet meal at Buzz Lightyear's Pizza Planet and the food was not great with a poorly designed layout, although there was a good play area there for the children so we could eat in peace. We had a nice meal one evening at the Rainforest Cafe in the Disney Village, but again it wasn't cheap. There is a McDonald's if you need something quick and more budget friendly, and we took plenty of snacks with us to avoid buying lunch.

I must admit that we all felt a little Disneyed out by the end of the holiday, and it will probably be a few years until our next visit. But we had a brilliant holiday, with lots to see and do, and plenty of Disney magic. 

Wednesday, 18 February 2015

Colouring books for grown ups

Over the last few years, I've spent a lot of time colouring in. Although I've always enjoyed it, having children was a great excuse to stock up on crayons and pens, and invest in a colouring book or two. Fortunately both children love it too, and while they received plenty of gifts for Christmas, the runaway favourite gift was a Frozen colouring book. It was given to Mia, Harry loved it too, I joined in, and it was completed in a week or two.

Colouring books for grown ups

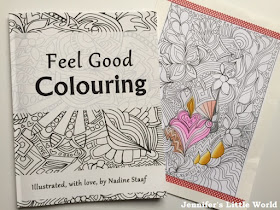
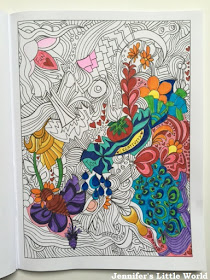
I really enjoy colouring in, it's so relaxing, and because the children love it too it's a great way for us to spend some quiet time together. On my various social media channels I had spotted references to grown up colouring books, so I decided to investigate further and was really surprised and excited to see that there are so many colouring books around that are aimed at adults! I didn't know where to start, so I chose one that looked cheerful and fun - Feel Good Colouring: Illustrated with Love (affiliate link) by Nadine Staaf.

Colouring books for grown ups

This book doesn't have many recognisable images in it, much of the book is swirly and geometric patterns, interspersed with positive words and phrases. Sometimes though you can pick out your own pictures from the patterns. One page clearly depicts a boat sailing in the sea, and there are flowers and insects. It has loads of pages, and I feel like I've barely started, it's going to keep me busy for ages!

Colouring books for grown ups

It is of course much nicer to do the colouring if you have your own set of decent felt tip pens. But as I tend to do my colouring while I'm sitting with the children I just use theirs, and they love that I'm sitting down doing colouring with them.

There are loads of grown up colouring books around! Here are some of the ones that I have my eye on! Do you enjoy colouring?

You might also like these lovely free colouring pages for grown ups - Mystical Patterns

Monday, 16 February 2015

Easter crafting with Baker Ross

I blogged recently about some lovely Mother's Day crafts made using items from Baker Ross, and with this post I'm going to share some Easter crafts.

We started with these Easter Egg House Kits. I must admit that they were pretty fiddly to put together and needed reinforcing with glue and tape. If you are making these with young children I'd strongly recommend assembling the house first at your leisure and then passing on to the child to decorate! The children loved sticking the stickers on to personalise their houses, and the finished creations are really bright and cheerful. I can see them coming out again at Easter for years to come!

Baker Ross crafts for Easter

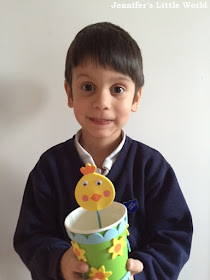
The we made some Chick and Bunny Pop-up Puppet Kits. All the pieces are included, and the chick or rabbit puppet is made by pushing a stick up through a decorated paper cup. This was a great craft to make when we had friends over for a play date. Because all the pieces are self-adhesive it's not messy, and it made a satisfying finished product that the children had a lot of fun playing with afterwards.

Baker Ross crafts for Easter

Finally we decorated some 3D Wooden Bunnies. They are a simple plain bunny shape, with slot in pieces so that they can stand up. First we painted the wooden shapes with poster paints, then when they were dry I put out a selection of different bits and pieces for decorating - ric rac, ribbon, googly eyes, egg shaped sequins, pom poms and so on.

Harry wanted to use some white acrylic paint to add some extra features, unfortunately Mia got a bit carried away with her white paint and hers ended up as albino bunnies! The finished bunnies stand up really nicely, and they look lovely on the mantelpiece as Easter decorations.

I think that these craft kits are such good value. They'd be great if you were entertaining a group of children, perhaps for a party, especially as many of the kits are available to purchase in larger quantities and they often come with everything that you need to do the craft. The smaller packs are also fantastic to keep on hand for play dates if you need to quieten things down a little, and it's something nice for the guests to take home. Many people like to avoid giving too much chocolate or sweets for Easter, and craft kits like this would make fantastic alternative gifts.

I received these products as a member of the Baker Ross Bloggers Network.

Thursday, 12 February 2015

Springy Valentine's Day Cards

Harry and Mia both have a particular sweetheart, and when we received our latest Valentine's themed box as part of the #bostikbloggers group, making Valentine's cards seemed like the obvious craft. We were provided with two blank cards, and a variety of stickers and decorations. To make the cards a bit more fun, I showed the children how to use a strip of card to make a simple spring so that a heart could pop out from the inside of the card.

How to make a springy Valentine's Day card

Here's how we made them:

Materials:

Card blanks
Coloured card
Heart decorations and jewels to stick on
Bostik glitter pens
Bostik micro dots

Instructions:

First you need to make your folded springs for the inside of the cards.

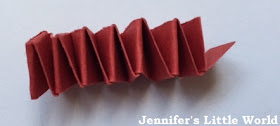
How to make a cardboard spring

Your finished spring will look like this, and you will glue one end to the inside of the card and the other end to the back of a decorated cardboard heart or similar. You want it to be about 2-3cm in length. I tried to describe how to make it with a series of step by step photos:

How to make a cardboard spring

But in the end I realised it would be easier to just make a quick video to show how its done! My strips of cardboard measure about 1cm by 30cm.


Then the children each cut out and decorated a large heart from red cardboard to stick inside the card, and decorated the fronts of their cards with a variety of heart stickers and decorations, kept in place with the handy Bostik micro dots. They both finished off their cards with the Bostik glue pens which went on really smoothly and dried to a nice sparkly finish.

We also used the materials from this box to make a lovely jewellery box for Mia.

The box of craft materials was provided to me free of charge by Bostik as part of the Tots100/Bostik Craft Bloggers Club.

Tuesday, 10 February 2015

Review - The Red Box jigsaw from Ravensburger

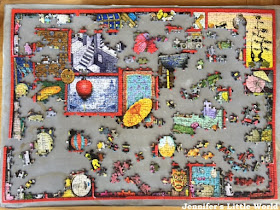
The Red Box is a beautiful 1000 piece jigsaw puzzle from Ravensburger. It's a gorgeous Chinese themed jigsaw, like an oriental puzzle box with many different compartments, each filled with a different, fascinating picture to complete.

The Red Box jigsaw from Ravensburger review

The design looks complicated, but I found this puzzle really enjoyable to complete. Because all the sections are so distinctive, it's quite easy to sort out the pieces for the different areas. Once I'd been working on the puzzle for a little while I found that I could take a piece from the box and slot it roughly where it needed to go almost immediately, which was very satisfying. There is a huge amount of detail to discover in the picture, with some strange creatures tucked away, and many different styles of artwork to keep it interesting.

The Red Box jigsaw from Ravensburger review

Like all the Ravensburger puzzles that I've reviewed, this is another high quality jigsaw. The sturdy pieces fit together beautifully, and I know that I'm going to be doing this puzzle again and again.

I received this jigsaw in exchange for a review.

Friday, 6 February 2015

A Valentine's themed jewellery box

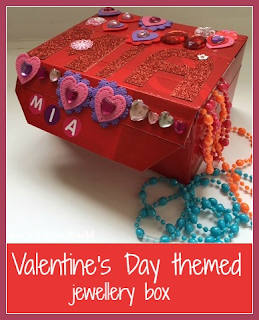
Lots of children enjoy collecting little treasures, and they love the idea of making a little storage box to keep everything safe. With Valentine's Day on the way, I decided that together we would make her a simple heart themed jewellery box to store some of her bits and pieces prettily. 

Valentine's Day themed jewellery box craft

The jewellery box is really simple to make and is a great way to corral tiny bits and pieces together. You can customise it with the child's name, and they can take pride in adding their own individual touches.

Valentine's Day themed jewellery box craft

Here is how we made it:

Materials:

Small, sturdy cardboard box
Something to cover it with - for example coloured duct tape, paint or wrapping paper
Decorations - for example stickers, plastic jewels, foam stickers, coloured paper and cardboard, washi tape
Adhesive for your decorations - we used Bostik micro dots

Instructions:

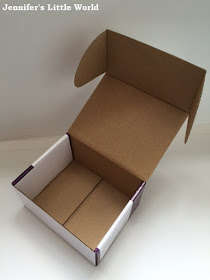
The most important thing is to find a suitable box. It needs to be sturdy and easy for a small child to open and close.

Valentine's Day themed jewellery box craft

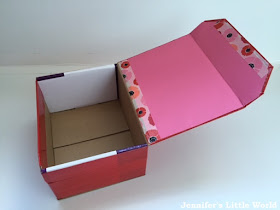
My box originally held a bathroom accessory. I modified it by removing the side flaps on the lid and cutting the front hinge down so that it easily opens and shuts. Then I used coloured duct tape to cover the entire box. I hid the messy edges under the lid with some pink cardboard, and used some pretty washi tape around the top and bottom.

Valentine's Day themed jewellery box craft

Then I let Mia loose with the decorating. She was very eager to use the large plastic gems that she found in our pack, and I found that the Bostik micro dots were brilliant for sticking them firmly. I'd not used them before and they were fantastic, a sheet of tiny sticky dots which you just press something against to give it a sticky backing. It also worked really well for the foam heart stickers. I cut the letters of her name out from glittery red cardboard and she also found some letter stickers to spell her name.

Valentine's Day themed jewellery box craft

She was so pleased with it, and showed it off to Harry as soon as he was home from school. This meant of course that we then had to sit down and make him one as well! It's so nice for her to have her own place to keep little things that are important to her (although I'm not sure it will stop her leaving them lying around the house!)

You can find more Valentine's Day crafts for toddlers here - Valentine's Crafts for toddlers


The box of craft materials was provided to me free of charge by Bostik as part of the Tots100/Bostik Craft Bloggers Club.

Tuesday, 3 February 2015

Dealing with our threenager

Harry was a difficult baby, but we were very lucky with him as a toddler. I used to scoff at articles about threenagers, because life with Harry improved immensely when he turned three. He finally began sleeping through the night (at least most of the time), he was dry night and day, and was interested in everything. You could always keep him busy by talking to him about what was going on around him and sharing interesting facts. Of course he had his moments, but I don't remember him ever lying on the floor kicking and screaming.

Mia however became a bit of a tempestuous toddler, and I find myself having to deal with her in a completely different way. They are both so different personality wise. Harry is sensitive, needs time to himself, and takes things very much to heart. Mia is more unpredictable, if she is upset she explodes with anger, hitting and screaming, but then a few minutes later it is all completely forgotten, as though you've flipped a switch. Harry has never really done anything naughty, Mia is a little more contrary - for example if you tell her not to touch something she will immediately try to touch it, and then look at you to see your reaction. She is never sitting still, even if I try to sit them on the sofa in front of the television she is jumping and climbing about.

It has taken me a while to realise that I need to deal with them differently and to cater to their different personalities. When Harry is feeling tired and emotional especially he needs time to himself, perhaps to be set up and left alone with a Lego set to build. Mia needs someone to play with her, either to play a board game or to engage in some role play with her dolls. This leads to frustration from them both if Harry wants some space and Mia wants him to play.

Child pretending to be angry

It's hard work and when it's just me and Mia I do feel like I'm constantly on the go, with no time to get on with anything by myself. But when I do play with her it's a lot of fun. I enjoy playing board games and I love seeing her little imagination come alive, even if she does get cross with me when I don't play out her role play the way that she wants me to, and at least I do have three mornings to myself when she's at nursery so that I can recover a bit!

I'm just hoping that she calms down a little bit before she starts school in September, although at least then it will be down to the teachers to deal with her tantrums and not me!

Monday, 2 February 2015

Review - Weekend Box, a fortnightly craft and activity box

This week we've been having a lot of fun reviewing a Weekend Box. The Weekend Box aims to be a fun and educational box of crafts, recipes and activities, all aimed at children aged 3-6 years old. The activities are neatly packaged inside a handy box which fits easily through a letter box, and each box costs £7.50, delivered monthly or fortnightly. There is no commitment, and you can pause your boxes at any time.

Weekend Box subscription box review

Each box has a theme, and our theme was the Aztecs, with a box containing three craft activities and a recipe. Not all the ingredients for the cooking activity were included, and customers will receive an e-mail with details of the extra ingredients required when the box is dispatched.

I loved how everything fitted so neatly into the compact cardboard box, with each activity clearly separated into a coloured paper bag with corresponding coloured activity card. There is a sheet of stickers to stick on the cards when the activity has been completed and the base of the box forms a certificate to complete when the activities in the box are finished.

The activities in our box were:

Aztec Hot Chocolate

This was definitely the one to start with! The box included some special Aztec spices, to which we needed to add 50g dark chocolate, 50g milk chocolate, 200ml milk and 1/4 teaspoon vanilla essence. Luckily after Christmas we still have plenty of chocolate in the house which we could use up! The Aztec Hot Chocolate was pretty easy to make, and there was enough for four delicious mugs.

Weekend Box subscription box review

Aztec Mosaic Coaster

To make the Aztec coaster we were provided with two sheets of sticky backed foam and two sheets of thin cardboard, along with some pattern inspiration. We cut the foam sheet up into simple mosaic shapes, which were stuck down to decorate the coaster.

Weekend Box subscription box review

I really liked that this activity was suitable for a range of ages - older children can help to cut out the foam shapes and think about copying some Aztec patterns, and younger children can arrange the pieces however they like, but still be involved in thinking about how to fit the pieces together.

Aztec Parrot

We always keep quite a collection of old toilet roll tubes around, and Mia loved the opportunity to up-cycle them into some colourful parrots, inspired by the Aztec people's sacred bird, the Quetzal. The Weekend Box included enough lovely bright poster paint, googly eyes and feathers to make two birds, and we have since gone on to make a few more with our own materials as they look so good!

Weekend Box subscription box review

Aztec Pattern Prints

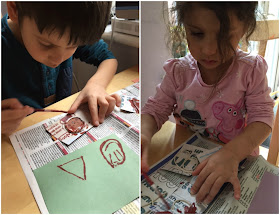
Making the Aztec pattern prints was a two step process. First we glued string down to cardboard to make the stamps, then we mixed up paint and printed our designs onto coloured paper. We've not done this before, and the children loved it. They each made several different stamps, and I loved watching their concentration while they painted the string and pressed it down to print. They were so proud of their work! This idea has certainly inspired me, we'll be returning to this painting technique I'm sure.

Weekend Box subscription box review

I found that the Weekend Box contained just about enough materials to carry out each craft twice, and indeed could probably be stretched to include more children too, if you were able to supplement with your own materials. You can also add a sibling to your account for an additional £4 per box to make sure that you'll have enough.

We received a Weekend Box in exchange for a review.

Sunday, 1 February 2015

Pom pom frame craft for Mother's Day with Baker Ross

I think that most Mums would love to receive a hand crafted gift from their children. Baker Ross sells a whole range of crafting kits and materials that allow children to make some lovely gifts and keepsakes for their Mum, and we tried out a few of their craft kits. My favourite was these pom pom frames.

I used some Pastel Pom Poms to make some sweet little frames to display some suitable Mother's Day type quotations. I've always found pom poms quite difficult to craft with, as I can never get them to stick very well. I've discovered that you need to use plenty of PVA (white) glue and allow them plenty of time to dry, and this time they stayed beautifully stuck.


Pom pom frames as a gift for Mother's Day

I searched online for some suitable quotations to use. There are lots out there but I quite liked the list that I found here - 100 Inspiring Quotes about Moms - from which I chose my favourite two and printed them out. Then I made a frame using strong cardboard. You don't need to be too neat, as the edges will be covered by the pom poms anyway. Then, with plenty of PVA glue at the ready, Mia and I made a frame each.

Pom pom frames as a gift for Mother's Day

I mounted the printed quotes onto thin cardboard for strength and taped them firmly onto the back of the frames. They will look lovely and cheerful on my desk! They would also make a lovely gift if you used them to frame a photograph of the children, or perhaps to frame a picture which they have drawn.

Pom pom frames as a gift for Mother's Day

I received these products as a member of the Baker Ross Bloggers Network.