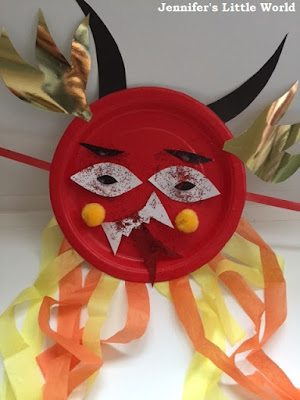
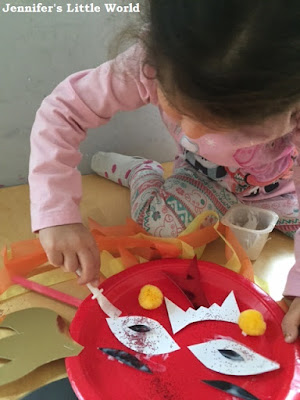
I made the mask with Mia, and we had a really fun time!
Materials:
Bostik foam pads (small)
Red paper plate (or you can use a plain white one, or paint it)
Strips of yellow tissue paper
Strips of orange tissue paper
Card - black, red, gold and white
Two yellow pom poms
Lollipop sticks
Glue and tape
Glitter
I found it easier to prepare all the pieces for the mask in advance. I used gold card to cut two flames, the red card to cut a pointy tongue, the black card to make two horns, eye brows and the pupils for the eyes and the white card to make eyes and teeth. You could use coloured paper instead of card, or you could just draw the elements on white paper and colour them in. There are so many different ways that you can make a dragon mask - I used Google images for some inspiration.
I opted to make a mask that can be held in front of the face, but of course you could cut out eye holes so that it can be worn as a mask, with some elastic across the back to hold it across the face.
Then I sat down with Mia and we put the mask together. To stick the pieces on we used Bostik foam pads. These are small enough that they remain hidden, but because they are quite thick they make the stuck on parts of the mask really pop out. I found it easiest to place the sticky pads where she wanted the pieces to go, then she could stick them on. It worked particularly well for the flames at the bottom of the paper plate - I stuck on a row of little sticky pads and Mia stuck down the strips of tissue paper, it was a good opportunity for her to practice patterning as she alternated the colours.
Using the sticky pads was great as it meant that we didn't need to wait for any glue to dry. However the glue did come in generous amounts so that she could add plenty of glitter!
We finished the mask with a lollipop stick taped on either side. This means that the mask can both be held in front of the face, and also 'flown' around the room to scare people!
You can find more Chinese New Year crafts for toddlers here:
The box of craft materials was provided to me free of charge by Bostik as part of the Tots100/Bostik Craft Bloggers Club.


No comments:
Post a Comment
I love reading your comments!