Pages

Friday, 30 January 2015

Chinese New Year paper cup lanterns

As a Bostik Craft Blogger I recently received some Bostik products along with some crafty goodies and the challenge to come up with a craft for Chinese New Year. I've already shared my paper plate dragon mask and as promised here is a second craft using some of the other things that I received - home made paper cup lanterns.

Chinese New Year simple paper cup lanterns craft

Here's how we made them:

Materials:

Bostik glu dots
Paper cup - a gold one would be perfect
Pipecleaner
Beads (about four per lantern)
Foam strips
Gold ric rac
Star stickers
Assortment of coloured sequins
White glue and tape
(Tissue paper strips)

Chinese New Year simple paper cup lanterns craft

Instructions:

First decorate the paper cups using stickers and sequins. The foam star stickers are self adhesive, and we used white glue to stick down the sequins.

Chinese New Year simple paper cup lanterns craft

Then add the extra trimmings by wrapping the ric rac and foam strips around the cup and securing in place with a glu dot. The glu dots are really sticky and because the pieces were stuck instantly I didn't need to worry about them sliding down the cup while I waited for glue to dry.

Then thread a few beads onto a pipecleaner and make two holes with scissors in the base of the cup to post the pipecleaner through to form the handle. Fold over and secure inside the cup firmly with tape.

Chinese New Year simple paper cup lanterns craft

If you wanted to make your lantern even prettier you could decorate with some strips of tissue paper stuck around the inside of the paper cup to hang down. We used more glu dots to hold them firmly in place.

Chinese New Year simple paper cup lanterns craft

You can find more Chinese New Year crafts for toddlers here:


The box of craft materials was provided to me free of charge by Bostik as part of the Tots100/Bostik Craft Bloggers Club.

Thursday, 29 January 2015

Chinese New Year paper plate dragon mask

This dragon mask is a really fun craft to make with children for Chinese New Year. The mask can be made using a coloured paper plate or circle of cardboard, and decorated with brightly coloured scraps of paper and card to make a personalised dragon for a child to hold and play with.

Chinese New Year simple paper plate dragon mask

I made the mask with Mia, and we had a really fun time!

Chinese New Year simple paper plate dragon mask


Materials:

Bostik foam pads (small)
Red paper plate (or you can use a plain white one, or paint it)
Strips of yellow tissue paper
Strips of orange tissue paper
Card - black, red, gold and white
Two yellow pom poms
Lollipop sticks
Glue and tape
Glitter

Instructions:

I found it easier to prepare all the pieces for the mask in advance. I used gold card to cut two flames, the red card to cut a pointy tongue, the black card to make two horns, eye brows and the pupils for the eyes and the white card to make eyes and teeth. You could use coloured paper instead of card, or you could just draw the elements on white paper and colour them in. There are so many different ways that you can make a dragon mask - I used Google images for some inspiration.

Chinese New Year simple paper plate dragon mask

I opted to make a mask that can be held in front of the face, but of course you could cut out eye holes so that it can be worn as a mask, with some elastic across the back to hold it across the face.

Then I sat down with Mia and we put the mask together. To stick the pieces on we used Bostik foam pads. These are small enough that they remain hidden, but because they are quite thick they make the stuck on parts of the mask really pop out. I found it easiest to place the sticky pads where she wanted the pieces to go, then she could stick them on. It worked particularly well for the flames at the bottom of the paper plate - I stuck on a row of little sticky pads and Mia stuck down the strips of tissue paper, it was a good opportunity for her to practice patterning as she alternated the colours.

Chinese New Year simple paper plate dragon mask

Using the sticky pads was great as it meant that we didn't need to wait for any glue to dry. However the glue did come in generous amounts so that she could add plenty of glitter!

Chinese New Year simple paper plate dragon mask

We finished the mask with a lollipop stick taped on either side. This means that the mask can both be held in front of the face, and also 'flown' around the room to scare people!

Chinese New Year simple paper plate dragon mask


You can find more Chinese New Year crafts for toddlers here:


The box of craft materials was provided to me free of charge by Bostik as part of the Tots100/Bostik Craft Bloggers Club.

Tuesday, 27 January 2015

Ladybird Tuesday - Learning to Sew

The Ladybird Book Learning to Sew was published in 1972 and is from my favourite Series 633 - Hobbies. The book contains a variety of sewing projects that a child can complete, beginning with a simple table mat and progressing on to little gifts like pin cushions and comb cases, as well as practical skills like sewing on a button and turning a hem.

Ladybird book Hobbies - Learning to Sew

I remember making simple table mats like this at school, in fact I think I still have a couple somewhere. The book has all sorts of different stitch designs, with examples of ways to use them in projects.

Ladybird book Hobbies - Learning to Sew


I'm not that good at sewing and I found the instructions for the projects quite vague in places without the step by step guides that I'm used to seeing on crafty blogs. I think that the book probably assumes that there will be a handy mother or grandmother on hand to help. While most of the projects in the book are quite traditional, I really like the last two. They are collage pictures made using all sorts of bits and pieces, for example nuts or washers from father's tool box!

Ladybird book Hobbies - Learning to Sew

If you love Ladybird books, do pop over and visit Ladybird Tuesday, where Being Mrs C is assembling a really comprehensive catalogue of Ladybird books and reviews.

Below you can find links to all my Ladybird Tuesday book posts.

Snow White and Rose Red
Hansel and Gretel
Ali Baba and the Forty Thieves
The Three Little Pigs
The Old Woman and her Pig
Little Red Riding Hood
The Ugly Duckling
The Railway Children
A Little Princess
A First book of Aesop's Fables

A Ladybird Book about Knitting
More Things to Make - For Special Occasions
Easy to Make Puppets
Learning to Sew
Stamp Collecting
Tricks and Magic

Prehistoric Animals and Fossils
Dinosaurs
Stone Age Man in Britain
Great Civilisations - Crete
Charles Dickens
Nelson
Lives of the Great Composers Book 1
Lives of the Great Composers Book 2
The Story of Music

Plants and How They Grow
The Ladybird Book of the Night Sky
Sea and Air Mammals
The Farm

The Story of Nuclear Power
The Motor Car
How it Works - The Computer
How it Works - The Rocket
The Story of Ships
The Postman and the Postal Service
People at Work - The Nurse

Understanding Numbers
Talkabout Clothes
Going to School
Teaching Reading

Stories of Special Days and Customs
Christmas Customs

Girls and Boys - A Ladybird Book of Childhood

Sunday, 25 January 2015

Tissue paper Valentine's Day collage photo frames

These simple Valentine's Day cardboard collage photo frames are a great Valentine's Day craft for toddlers. They are really easy to make, and all you need are a few bits from the craft box or recycling box. The craft is really simple even for very little ones, and would make a great gift for a loved one on Valentine's Day.

Tissue paper Valentine's Day collage photo frames

You need:

Card - while you can use something like a cereal box, sturdier card is better

Scraps of red and pink tissue paper, coloured paper, napkins and so on. I very rarely buy tissue paper, I save it up when I receive it in packaging!

PVA glue and spreaders

Any embellishments you want to add, for example we used heart shaped buttons

Instructions:

First prepare all your materials - I began by cutting my frames out of the cardboard. The frames are quite large compared to the size of the photograph, so there is plenty of room for collage and decorations. They measure about 20cm x 26cm. For the hole in the centre I placed my photograph on the back of the frame and drew around it, then cut the window out with a craft knife to make it slightly smaller.

Then I gathered a selection of red and pink tissue papers and tore them up into small squares. I laid everything out ready for Mia to get started.

Tissue paper heart frames Valentine's Day craft

We used plenty of white glue on the frames and stuck on the pieces of paper. I tried to cover the whole frame in a Decopatch fashion, and so Mia copied me, she did a really good job! When the glue was dry I folded over the larger pieces of paper and trimmed the edges to make them look neat.

Tissue paper heart frames Valentine's Day craft

The photographs are secured to the back of the frame using washi tape so they can be easily removed and changed. If you don't have washi tape, masking tape would work well too. They can then be hung with BluTak or you could thread some string through to hang from a nail.

Tissue paper heart frames Valentine's Day craft

We embellished the frames with a couple of heart shaped buttons each. Mia was so proud of her frame and there is no question of giving them away, she insists that they are going to be on display in her room! This activity made me realise that I don't often do crafty things just with Mia, we tend to wait until Harry is home as I don't want him to feel left out. But we had such fun together, that definitely needs to change!

Tissue paper heart frames Valentine's Day craft

You can find more Valentine's Day crafts for toddlers here - Valentine's Crafts for toddlers

Saturday, 24 January 2015

The new Fantasyland at Disney World Resort, Florida

In May 2014, the New Fantasyland area at Disney World Resort in Florida was completed. The expansion started in 2011, and on our previous visits to Disney World we've seen new areas of the park opened, and watched the building of the new roller coaster ride, the Seven Dwarfs Mine Train. On our recent visit in November 2014 we were excited to visit and see the whole of the New Fantasyland open.

Fantasyland at dusk

The Seven Dwarfs Mine Train opened in May 2014 and has been very popular. The new FastPass+ system at Disney World allows you to book your Fast Pass tickets 30 days in advance if you are staying off-site. Hotel Guests are able to book their tickets 60 days in advance, and as off-site visitors we found that by the time we were allowed to book, all the tickets for this ride had gone. With queues throughout the day of up to two hours, the only realistic way that we were able to ride was to arrive before park opening and when the gates opened speed walk to the ride to join the queue. We only managed this once, and our wait was about 20 minutes. Luckily, like all of the other newer rides, Seven Dwarfs Mine Train has a very well designed queuing area, with a few interactive games and activities for children to keep them entertained while you wait.

Seven Dwarfs Mine Train ride at Disneyworld

In fact, the new and improved rides in Fantasyland are all very well designed when it comes to waiting in line. The best queuing area is at Dumbo the Flying Elephant, where children can play in an indoor play area while you wait for your pager to buzz and announce your turn to ride. The Journey of the Little Mermaid and The Many Adventures of Winnie the Pooh also have excellent waiting areas with interactive games to play. Luckily we usually manage to plan our day with minimal waits but I can see how this would really make a difference to the queuing experience when you have little ones.

A new Fantasyland attraction that we hadn't managed to visit on our previous trips was Enchanted Tales with Belle, as again it is so popular that it has a very long wait within minutes of the park opening. This time we were able to visit as we had booked our Fast Passes in advance. You are taken through the attraction in small groups, and volunteers are chosen to play different parts in a simple story that is performed to Belle. At the end there is the chance to meet with Belle and have your photograph taken. We don't usually do the character meet and greets as they take up too much of the day, so it was a nice opportunity for the children to see a favourite character close up.

Children meeting Princess Belle

A picture of them together would have been nicer of course, but Harry was too nervous to approach Belle until he saw that she was handing out bookmarks, and luckily that was enough incentive for him to pose for a photo!

With small children we spend most of our time at Disney World in Fantasyland as the rides are just perfect for them, and so close together that you don't need to ask too much of them when it comes to walking around. If you arrive early and plan your day, especially if you take full advantage of the new Fast Pass system, you can really minimise the time that you spend waiting. I'm not enough of an expert to discuss it here, but this is an excellent guide DisneyWorld FastPass+ Overview, Tips and Advice (and I'd also fully recommend paying for the planning tools on that website, it's currently only $12.95 for a year and it has been brilliant for us, no affiliation just a genuine recommendation!)

Child at the Disney Castle, Orlando, Florida

I hope that you enjoyed my little glimpse into the New Fantasyland!

Tuesday, 20 January 2015

Ladybird Tuesday - Easy to Make Puppets

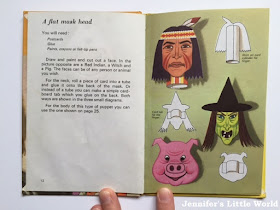
This week for Ladybird Tuesday I have another book from Series 633 - Hobbies. Easy-to-make Puppets was published in 1973 and features instructions for a variety of different puppets, as well as ideas for scenery, props and even a simple puppet booth.

Ladybird Hobbies Easy to Make Puppets

The book begins with a basic elephant puppet made from a thin sheet of card through which you post your finger to make the elephant's trunk. The book then carries on with ideas for a huge range of different puppets, made from household items including plastic bottles, handkerchiefs, apples and yoghurt pots. The designs are all simple, and yet some are really clever!

Ladybird Hobbies Easy to Make Puppets

The puppets increase in complexity as you progress through the book, finishing with papier mache moulded heads and handsewn glove puppets. You could put on a really professional style puppet show with some of these.

Ladybird Hobbies Easy to Make Puppets

The puppets in the book tend to focus on characters that featured in children's games and stories at the time, like Red Indians and robbers. Nowadays as well as traditional fairytales children would probably enjoy making puppets for their favourite Disney films and television characters. I know that my children love printing out pictures of their favourite characters and sticking them to lollipop sticks to make very simple puppets, and now I'm inspired to try something a bit more complicated!

If you love Ladybird books, do pop over and visit Ladybird Tuesday, where Being Mrs C is assembling a really comprehensive catalogue of Ladybird books and reviews.

Below you can find links to all my Ladybird Tuesday book posts.

Snow White and Rose Red
Hansel and Gretel
Ali Baba and the Forty Thieves
The Three Little Pigs
The Old Woman and her Pig
Little Red Riding Hood
The Ugly Duckling
The Railway Children
A Little Princess
A First book of Aesop's Fables

A Ladybird Book about Knitting
More Things to Make - For Special Occasions
Easy to Make Puppets
Learning to Sew
Stamp Collecting
Tricks and Magic

Prehistoric Animals and Fossils
Dinosaurs
Stone Age Man in Britain
Great Civilisations - Crete
Charles Dickens
Nelson
Lives of the Great Composers Book 1
Lives of the Great Composers Book 2
The Story of Music

Plants and How They Grow
The Ladybird Book of the Night Sky
Sea and Air Mammals
The Farm

The Story of Nuclear Power
The Motor Car
How it Works - The Computer
How it Works - The Rocket
The Story of Ships
The Postman and the Postal Service
People at Work - The Nurse

Understanding Numbers
Talkabout Clothes
Going to School
Teaching Reading

Stories of Special Days and Customs
Christmas Customs

Girls and Boys - A Ladybird Book of Childhood

Monday, 19 January 2015

Now We Are Six

Now We Are Six by A. A. Milne

When I was One, I had just begun. 
When I was Two, I was nearly new. 
When I was Three I was hardly me. 
When I was Four, I was not much more. 
When I was Five, I was just alive. 
But now I am Six, I'm as clever as clever, 
So I think I'll be six now for ever and ever.

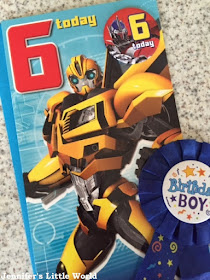
Today is Harry's sixth birthday, and at the weekend I copied this poem out into his birthday card.

When I was little I remember helping my Mum write the poem above by A. A. Milne into a friend's birthday card. I loved it so much that I insisted on having it in my own card when I turned six, and we had a copy on our noticeboard for years, so I've always remembered it.

Today it's Monday again, like the day that Harry was born. All through my labour that morning in the hospital I had the radio on, and in every news bulletin the day was referred to as the most depressing day of the year and although of course it's completely made up it has stuck in my mind!

Newborn baby in hospital

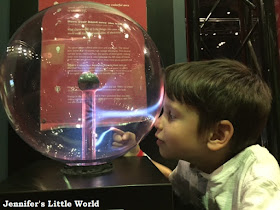
Harry wasn't a very contented baby, and I found the first few months hard. He just didn't like being a baby very much. As soon as he was able to talk and understand things he became so much more fun and he has grown up into such a lovely little boy. He's a sensitive little thing, funny and clever, and interested in everything.

Child at science museum

We had a little party for him on Sunday with some cake, then tonight we are going out for dinner, followed by a soft play party for his friends next weekend. Harry's birthday always seems to be spread out over several days! So Happy Birthday to Harry, my not so little boy!

Sixth birthday card and badge

Sunday, 18 January 2015

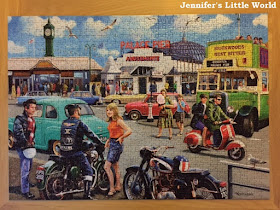
Review - Happy Days, Brighton jigsaw puzzle from Ravensburger

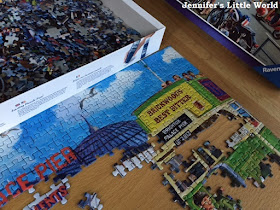
I've really been enjoying doing jigsaws over the last few weeks, and having finished my antique map puzzle I was ready for something a bit different, so the chance to try the Happy Days, Brighton jigsaw puzzle from Ravensburger was perfectly timed!

Ravensburger Happy Days, Brighton jigsaw review

I do love Brighton, and so the picture naturally appealed to me, and I love the bright, cheerful colours in the design. It's always a bit daunting starting a new jigsaw but also quite exciting, it really appeals to my organised nature to want to sort out all the pieces and fit them together!

Ravensburger Happy Days, Brighton jigsaw review

Because the colours are so lovely and vibrant it was pretty easy to make a start and there were plenty of different areas that were easy to work on. The bottom of the picture was a bit more difficult, but overall this jigsaw was at just the right level for me - challenging enough to be fun but not so difficult that I lost interest.

Ravensburger Happy Days, Brighton jigsaw review

Here's the finished puzzle, it kept me busy for a good few days. I'm ready to reclaim the dining table now after a few weeks of solid puzzling, but I know that I'll definitely be returning to this one at some point!

Ravensburger Happy Days, Brighton jigsaw review

I received this jigsaw to review.

Saturday, 17 January 2015

Ironing tips for Hama beads


Tips for ironing Hama beads


As you can probably imagine, I spend a fair amount of time ironing Hama beads (also known as Perler or melty beads). During that time I've picked up a few tips and tricks so I thought I would share them!

I'm afraid I have no advice when it comes to actual irons, as the only thing that gets ironed in this house is the Hama beads. We do have a half decent iron as it came free when we bought our washing machine, but I wouldn't have thought it makes much difference.


  • I use the medium setting on the iron (two blobs) for the more common midi beads. For the mini beads I use the lightest setting (one blob) as they are tiny and melt very easily.
  • It's best to iron the beads on a firm, flat surface - I use a cork heatproof mat placed on my kitchen work surface. 
  • Hama bead kits come with ironing paper, and you can also buy it separately. You don't need the special paper though as you can just use normal baking paper, and you can reuse the sheets quite a number of times. It's best to discard the paper once the surface has started to go white in places, as then it can start to stick to the beads. You do need to use paper when ironing, I can imagine it would be quite messy if you didn't!

Ironing Hama beads demonstration

  • I wait until the iron has heated up, then iron the design through the paper, moving the iron around as I go. As they melt, the colour of the beads starts to appear through the paper, and then you know that they are ready. If you iron too much it becomes very difficult to remove the beads from the pegboard. So if you want the design to be firmly fused together it's a good idea to remove it from the pegboard as soon as the beads have stuck together, and then iron again without the pegboard underneath.
  • Whether to iron the beads on both sides is a matter of personal preference. I tend to, as the children like to play with their finished creations and it makes them sturdier. When I am making a piece for display, like this Hama bead quilt inspired design, I iron quite a bit on one side and then just lightly on the side that will be shown, so that you can still clearly see the beads. This is the front side:

How to iron Hama beads

  • Larger designs in particular can warp as they cool. To prevent this, as soon as I've finished ironing a design I place it between two cork mats with a weight on top for several minutes. I find that this works very well to keep it flat.

The children and I love making things out of Hama beads, and we now have several shoeboxes filled with our creations. If you are looking for things to do with the Hama bead designs that you have made, I've written about some ways to display finished Hama bead projects. You can find all my Hama bead posts, including plenty of design inspiration, on my Hama beads page.

Thursday, 15 January 2015

Sponsored post - Do you have an unusual fear?

Most people are scared of something, and most fears are pretty common. But according to a new poll by Benenden, 61% of the population admit to having some sort of uncommon phobia, with only 2% of them feeling unaffected by their fear.

Most unusual fears that people have

People taking part in the survey admitted to all sorts of strange fears. Some of them are fairly logical, for example I can relate to a fear of scaffolding as I'm often nervous when walking underneath, and I think many people are wary around some types of insect or moths. But it must be difficult to live with a fear of one of your body parts, like wrists, ankles or collar bones! It's also quite a sad sign of modern times that 8% admitted to being afraid of losing their phone coverage, although I've become so reliant on my phone that I do worry about finding myself without a phone in an emergency situation, or when needing to be contacted by someone looking after the children.

89% of those polled have never sought treatment for their fear, although there are various treatments available. Perhaps because they don't think they will be taken seriously, or don't feel that it has a great impact upon their everyday life.

I don't really have any serious phobias, but I must admit that as quite an anxious person there are probably many things that I'm scared of that seem pretty silly to others! For example, I'm terrified of putting petrol in the car, and so I always leave it to my husband. (I'm one of the 57% of people taking part in the survey that avoids situations where they could be faced with their fear!)

We have a digital display in the car that tells us roughly how many miles worth are left in the tank, and as it was running low last week I arranged that I'd put some more petrol in. But I'm embarrassed to say that when I got to the petrol station I panicked, stalled the car, and ended up driving quickly away! Meaning that a few days later I had another very stressful drive to the petrol station watching the miles remaining counter ticking down faster and faster, before reaching the petrol station with just 4 miles left on the display.

Of course I managed to put the petrol in just fine, and now I'm more confident to do it next time, so perhaps the answer is to simply face these strange fears head on!

Do you have an unusual fear?

This is a sponsored post in associated with Benenden. The unusual fears poll ran for two weeks, and 771 people took part. 

Wednesday, 14 January 2015

Read 20 books recommended by others - Day Zero Project update

A bit of an update on my Day Zero Project list. I'm afraid that I've been slacking a bit lately. It was an ambitious list, and although when I started it back in November 2012 it seemed as though I had all the time in the world, I've suddenly realised that I only have until August this year to complete everything! I'm not sure how likely that is going to be, so I'm not going to beat myself up if I don't tick everything off, but instead reflect on how much I've enjoyed taking part in it!

The challenge to Read 20 Books Recommended by Others was one of the first that I started, knowing that it was a long term one. I asked for book recommendations across various social media channels, and ended up with a long list. I started reading ones that were easy to get hold of, and tracked down other ones that I liked the look of. I'll be honest that I did pick and choose the books, but I still read plenty that I wouldn't have otherwise. I've included in the list books that I was sent to review, in particular as part of the BritMums book club, as I felt that this falls into the scope of the challenge and I only have so much time in the day available to read.

I found some fantastic new books, and there was only one that I didn't get on with and couldn't finish. I also didn't get through the entire list of suggestions, so I have more waiting when I'm looking for inspiration to read!

So here are the books that I read:

1 - Shades of Grey - Jasper Fforde (Anna).

2 - Freakonomics - Steven D. Levitt and Stephen J. Dubner (Joanne).

3 - The Hundred Year Old Man Who Climbed out of the Window and Disappeared - Jonas Jonasson (Lucy)

4 - The Eyre Affair - Jasper Fforde (Cat)

5 - How to be a Woman - Caitlin Moran (Joanne)

6 - Room - Emma Donoghue (Sarah)

7 - The Night Circus - Erin Morgenstern (Merry)

8 - The Help - Kathryn Stockett (Sarah)

9 - Me Before You - Jojo Moyes (Kate)

10 - A Fine Balance - Rohinton Mistry (Cherry)

11 - The Secret Life of Bees - Sue Monk Kidd (Sarah)

12 - The Wasp Factory - Iain Banks (Aly)

13 - The Buddha in the Attic - Julie Otsuka (BritMums)

14 - The Passage - Justin Cronin (Alistair). This was the one that I couldn't finish unfortunately, although I gave it a very good go. It had an interesting plot but I just found it too long.

15 - My Animals and Other Family - Clare Balding (BritMums)

16 - Quiet - Susan Cain (BritMums)

17 - Above All Things - Tanis Rideout (BritMums)

18 - The Judas Scar - Amanda Jennings (BritMums)

19 - Peaches for Monsieur le Cure - Joanne Harris (Mum)

20 - Travelling to Infinity - Jane Hawking (review copy from publisher)

Do you set yourself reading challenges? I'm finding that I have more time for reading now that the children are older and so I'm wondering if I should come up with something new to challenge myself with.

Tuesday, 13 January 2015

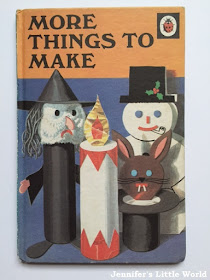
Ladybird Tuesday - More Things to Make - For Special Occasions

For this week's Ladybird Tuesday I'm looking at another of the crafty Ladybird books that my Mum bought me for my birthday. More Things to Make is from Series 633 - Hobbies. It is a sequel to the original Things to Make book, and the Hobbies series has to be my favourite Ladybird series. More Things to Make was published in 1973.

Ladybird Hobbies More Things to Make

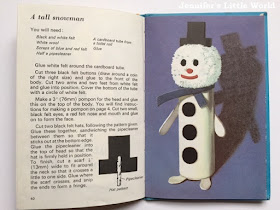
In total, the book features 24 different projects, with the majority themed around special occasions. There are a selection of cards and gifts for Mother's Day, some Easter crafts and some Christmas projects. The crafts use materials that are easily found around the home, for example toilet roll tubes, felt and pipe cleaners. A quick flick through resembles my Pinterest home page, with timeless children's crafting staples like tissue paper flowers and a pom pom cat.

Ladybird Hobbies More Things to Make

Most of the crafts are quite simple and could easily be completed by a child on their own. Some of them require a little more ability, for example hemming the edge of fabric, but the pictures are clear enough that even young children could use them as inspiration for their own ideas. I'm going to leave it around near Harry for him to browse through and see if he asks to make something from it, and if he does I will share it!

Ladybird Hobbies More Things to Make

If you love Ladybird books, do pop over and visit Ladybird Tuesday, where Being Mrs C is assembling a really comprehensive catalogue of Ladybird books and reviews.

Below you can find links to all my Ladybird Tuesday book posts.

Snow White and Rose Red
Hansel and Gretel
Ali Baba and the Forty Thieves
The Three Little Pigs
The Old Woman and her Pig
Little Red Riding Hood
The Ugly Duckling
The Railway Children
A Little Princess
A First book of Aesop's Fables

A Ladybird Book about Knitting
More Things to Make - For Special Occasions
Easy to Make Puppets
Learning to Sew
Stamp Collecting
Tricks and Magic

Prehistoric Animals and Fossils
Dinosaurs
Stone Age Man in Britain
Great Civilisations - Crete
Charles Dickens
Nelson
Lives of the Great Composers Book 1
Lives of the Great Composers Book 2
The Story of Music

Plants and How They Grow
The Ladybird Book of the Night Sky
Sea and Air Mammals
The Farm

The Story of Nuclear Power
The Motor Car
How it Works - The Computer
How it Works - The Rocket
The Story of Ships
The Postman and the Postal Service
People at Work - The Nurse

Understanding Numbers
Talkabout Clothes
Going to School
Teaching Reading

Stories of Special Days and Customs
Christmas Customs

Girls and Boys - A Ladybird Book of Childhood

Saturday, 10 January 2015

A collaborative crafting project with #CraftTheParcel

I was recently contacted and asked if I would like to take part in the #CraftTheParcel blogger challenge. Working with InPost, the idea was for a group of bloggers to come together to create a bespoke patchwork blanket or quilt, each blogger contributing a 12" square to the blanket. Using the InPost service, each blogger worked in turn on their square, collecting the blanket as completed so far, adding their square, and then posting the whole thing on to the next blogger.

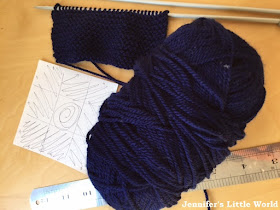
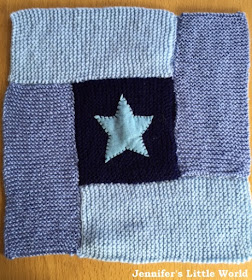
I was very eager to take part. I love collaborative projects, crafting, and the chance to try something new. I thought about various ways of making my square, and in the end I went with knitting. I'm not a great knitter but I knew that I could manage to produce a simple patchwork style design using a few complementary colours. I chose blue yarn in three colours, darker for the centre and lighter for the sides.

I began by making the centre square. Although I was aiming for a size of 4" it did turn out a little larger, but all I needed to do was adjust the sizes of my rectangles accordingly.

Knitting a square for a collaborative blanket

Having worked out the shapes and sizes that I then needed, I set to work with some furious knitting. I'm pretty slow at knitting, and if I make a mistake I need to unpick it all and start again, so I gave myself plenty of time to get it done. Fortunately I managed to not drop a single stitch, and it all knitted up a lot quicker than I was expecting.

Knitting a square for a collaborative blanket

Sewing together the pieces went pretty easily as well, I made sure that I left long ends of yarn when I cast on and off and so it all sewed up neatly.

Knitting a square for a collaborative blanket

I finished off the design by sewing a blue felt heart in the centre of the darker square. I'm really pleased with how the square turned out, it's the first time that I've attempted any kind of knitted blanket and I'm really chuffed with it. I found it quite encouraging that I was able to knit the square so successfully!

Knitting a square for a collaborative blanket

I'm looking forward to seeing the completed blanket, which will be donated to charity!

Knitting a square for a collaborative blanket

You can see a picture of the finished quilt at the link in the tweet below!
I received compensation towards materials, postage costs and my time.

Thursday, 8 January 2015

The new Wizarding World of Harry Potter area at Universal Studios, Florida

The Wizarding World of Harry Potter at Universal Studios, Florida


Since our last visit to Orlando, the Wizarding World of Harry Potter has expanded to the Universal Studios park. I wrote about our visit to the Wizarding World of Harry Potter at Islands of Adventure a couple of years ago which we really enjoyed, and as a fan of both the books and films I was very keen to visit the new Harry Potter area at Universal Studios.

So the Harry Potter world now features in both parks. While Islands of Adventure has Hogsmeade and Hogwarts (in an area that opened in summer 2010), Universal Studios now has London and Diagon Alley, with both parks being linked by the Hogwarts Express ride. This area opened in summer 2014, and in Diagon Alley you can find the entrance to the new ride, Harry Potter and the Escape from Gringotts.

Harry Potter London

The Wizarding World of Harry Potter at Universal Studios, Florida

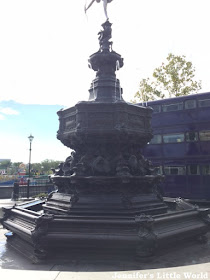
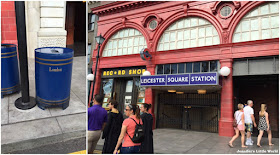
You are first welcomed to muggle London (you know it's London because the rubbish bins say so), or at least a very clean, sunny and traffic free London, filled with people dressed in lighter clothing than is usual in real London (although with quite a number in wizard's robes!) This area of the park was surprisingly quiet, and while it may not be exactly true to life it certainly evokes a sense of London, albeit a rather smaller version, with some lovely architecture and detailing.

Leicester Square Station at Universal Studios, Florida

Behind Leicester Square Station you will find the entrance to Diagon Alley, home of wizarding shops and delicious butterbeer.

Diagon Alley

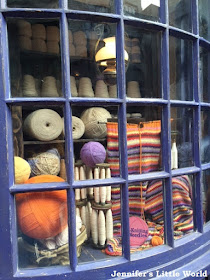
There is lots to see here, and plenty to keep fans of the books and films happy, I'm sure that we didn't even see half of it. There are loads of little shops, some are just fronts and some you can go inside. There is regular live entertainment, along with places to eat and drink. I loved the scarf that was "knitting" itself in the wool shop. Although it was busy, it's fairly spacious so there is room to move around and see as much as you want to.

Knitting shop in Diagon Alley, Universal Studios, Florida

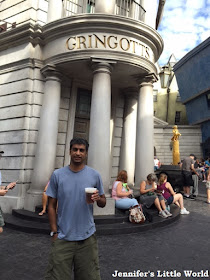
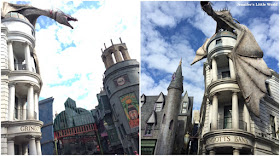
We all had some butterbeer, which we remembered fondly from our previous visit to Islands of Adventure, although personally I find it rather too sickly sweet and I can't manage an entire cup! You can buy other butterbeer variations, like frozen butterbeer and butterbeer ice cream, as well as a few British snacks like packets of crisps and chocolate bars. The dragon above Gringotts breathes real fire from time to time, so if you are hanging around for any reason it's worth waiting nearby to watch it!

Outside Gringotts Bank with Butterbeer

The new ride - Escape from Gringotts

Escape from Gringotts is the new flagship attraction at the Universal Studios Wizarding World of Harry Potter. It's a 3D roller coaster ride, but the attraction is more about the 3D projection screens along the way that really make you feel as though you are a part of the action.

Escape from Gringotts ride at Universal Studios

It took us several attempts to ride, and we only actually managed it once. The reliability of the ride isn't great, and as it seemed to be shut fairly often, the queues built up and were always long. Like Harry Potter and the Forbidden Journey at Islands of Adventure, a large part of the ride is actually the substantial queueing area which takes you through Gringotts Bank and past several theatrical presentations which are technically very impressive. You can still join the queue to experience this even if you don't want to actually go on the ride - we queued up as a family and then my Mum waited with the children in a special waiting area while the rest of us rode.

Inside Gringotts Bank

We enjoyed the ride, but didn't feel the need to ride it again. It's not really a roller coaster - although it does throw you about - it's all more about the special effects. So while it's fun to experience once, especially if you are a fan of the books and can appreciate the huge amount of effort that has gone into making it an authentic Harry Potter experience, it's not the same as a roller coaster that you would ride again for the thrill of it.

King's Cross station and the Hogwarts Express ride

The new Hogwarts Express ride links the two Harry Potter themed areas at the different parks. In order to board the train at one station you need to have a ticket for the other park, so you will need a two park ticket. The King's Cross station queuing area is huge, but it's really well themed so the wait doesn't feel too long. It takes a while to unload and load each train, but each one can accommodate a lot of people and they arrive regularly. There is supposed to be a cool special effect as you walk through the wall at platform 9 3/4 but we completely missed it, so if you are visiting then do keep a closer eye out!

Kings Cross Station at Universal Studios

You ride in a train carriage compartment with eight seats, a window on one side and then doors which shut you in on the other. The window is actually a screen which immerses you in your journey, and because the ride is different depending on whether you are departing from London or Hogsmeade you really need to ride it twice, once in each direction! The whole thing is very well done, and there are some clever tricks, like shadows of the characters passing along the train corridor outside and even tapping on your door.

Hogwarts Express journey at Universal Studios, Orlando

If you have a pushchair you need to fold it for the journey, and if your child is able to walk I'd recommend carrying it up and down the stairs at the stations rather than waiting for the lifts, as waiting can lose you quite a bit of time in the queue.

It's a bit disorientating to find yourself in the other park when you exit. Each Harry Potter area is at the far end of each park too, so if this is your last attraction for the day, as it was for us each time we rode it, you then have quite a walk back through the park to the main entrance and car park.

I'm really glad that I had the opportunity to visit, it's a fantastic new addition the park and definitely made our visit to Universal Studios worthwhile.