Over the last couple of weeks we've been having a lot of fun learning to use a stop animation kit from Hue Animation to make our own stop motion videos.
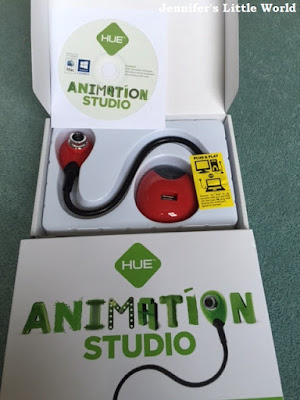
The Hue Animation Studio kit contains a USB camera with microphone (available in several different colours), the software that you need to install it, and a 60 page book packed with ideas and projects to start you off. Online you can find further resources to help you, including tutorials and a gallery of films created using the equipment, including all those that are featured in the book.
Harry is almost six years old, and I was amazed at how quickly he picked it all up. He watches a lot of stop animation videos online, and for some time he has been keen to try making some of his own. The kit was very easy to set up and install, and we found it super intuitive to use. We browsed the book for some ideas, although Harry had plenty of his own!
Harry's first video - Treasure Food
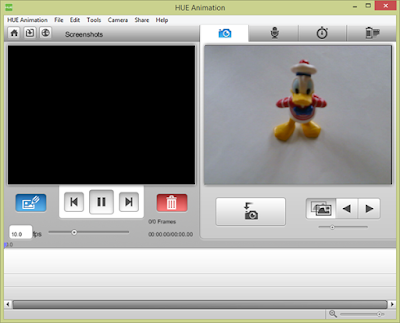
Harry decided that his first video would feature Donald Duck looking for treasure. When you open the software, this is what you see, with two main windows. The window on the left shows the video that you've made so far and the window on the right shows what the camera can see.
This is how Harry set up for his first video. It's taken on the dining room table, with a sheet of white paper for a background. The camera head is really flexible and sturdy so you can take videos from all angles.
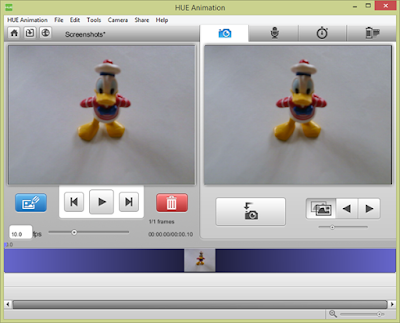
When you have set up your first shot you click the camera button on the screen, and the picture that you have taken will then appear on the left. You move your item very slightly then take another picture, and so on. Your previous image remains as a ghost image in the right hand window (you can see an example of this in my screenshot later in this post) which is really helpful as you can see how much you need to move the item. It also means that if something terrible happens and you knock the camera or your set up, you can recreate the shot easily. As you go along you can use the Play button to watch your video, and you can easily delete single or multiple shots if you make a mistake.
It's really quick and easy to do and Harry managed with ease! Once you have made your video you can add sound which is also really easy. To record your own sound you just click the red button and record your audio while the video plays, so you can easily time it. You can also add in a separate audio file, for example a song from your collection or music that you have downloaded. The audio track appears underneath the video track and because it is displayed graphically you can adjust it to match the video.
For his video, Harry chose to record himself speaking in a suitable Donald Duck voice and I think it works really well! Bearing in mind that he did it almost entirely by himself I think it's fantastic. Here is his finished video:
We connected the kit up initially to our desktop PC but I'm planning to put it on our laptop as it is a bit restricted. Harry is desperate to make a video where it looks as though he is flying (by taking a series of shots while he is mid jump) but that really needs to be done outside, so having it connected to a laptop will make it much more flexible.
Harry has been really creative with the kit so far, and he literally spent an entire morning playing with it. He moved it as far away from the PC as he could to make videos in the living room of his toys moving around, Duplo building itself, making a stuffed duck waddle across the floor and so on. He even ate all his lunch for once so that he could film it being eaten 'by itself'. He's had a brilliant time and I've loved watching all his videos!
Stop animation Hama bead heart
When the children were out of the way I had a go on my own, turning to my favourite Hama beads! I had an idea in mind before I started, and this was my setup:
The paper is stuck firmly to the table with BluTak and the pegboard is also stuck down in position. Next time I need to pay more attention to the lighting, I was working on a day with intervals of sunshine and cloud and I need to adjust the setup somehow to make it more consistent. I placed the beads on the pegboard, then I removed the heart to iron it before making it float away out of shot.
This screenshot was taken just after I ironed the heart. The picture on the left shows the last picture that was taken, with all the beads in position on the board. The picture on the right shows what the camera can currently see, my ironed heart. You can see the ghost image of the previous picture, enabling you to line up the object and make sure that it is in the exact same place.
Then I decided to add some music. I have just discovered the YouTube Audio Library, with a reasonable selection of free music that you can download and add to your video projects. The track that I used for the Hama bead heart video is called Rustled Feathers. The whole video took me about half an hour to make, including choosing the music, and I'm very proud!
We are looking forward to lots more fun experimenting with the software. I think it's great value for money, and I've loved watching Harry see how creative he can be.
We were sent the Hue Animation software in exchange for a review. The Hue Animation Studio kit currently costs £49.95.


No comments:
Post a Comment
I love reading your comments!