Since I started using Pinterest I've discovered so many different crafts and activities, and the following crafts with melted beads had all caught my eye. They were a great way of using up my stash of cheap beads, although of course you can use the branded Hama beads for these crafts too. We spent a really fun morning with the oven on trying these out. I've credited the place that I first saw the idea, although as they are all over Pinterest it's difficult to find the original source, if you know it then please do let me know so that I can credit accordingly!
By the way, I was a bit nervous about melting plastic in the oven so I had been putting off these crafts, but it was absolutely fine, no smell, no burning plastic, no flames and no ruined baking equipment!
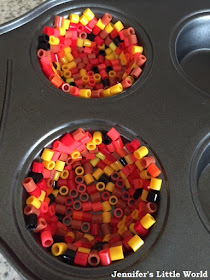
Melted Hama bead bowl
This was one of the first crafts that I saw on Pinterest a long time ago, unfortunately the link is no longer available. You just need to grease an oven proof container, we used a muffin tray, then fill with a single layer of beads so that they press up along the sides. Then bake in the oven for about five minutes at 200C and leave to cool before popping out.
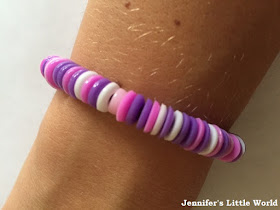
Melted Hama bead bracelet
It's so easy to do, just spread the Hama beads out on a baking tray making sure that they don't touch. With hindsight I should have followed the original instructions a little more closely and used baking paper underneath, although they did pick off the tray some of them were very firmly stuck. These beads were baked for two to three minutes at 200C, you need to keep an eye on the centres to make sure that the hole doesn't get too small. Then thread the beads together on elastic to make the bracelet.
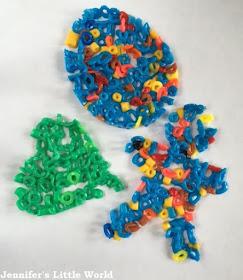
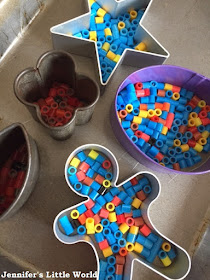
Melted Hama bead decorations or suncatchers
I first saw these on Simple Crafts, and these used up the rest of our cheap beads.
Again it was really easy, some cookie cutters placed on a greased baking tray (next time I'll grease the cutters too...) and fill them with the beads, either sorted or a mixture of colours. This was really fun for the little ones to help with. Make a single layer of beads and make sure that all the spaces are filled, it doesn't matter which way the beads are lying. Bake for four to five minutes at 200C then allow to cool before removing them from the cutters. I would think you can probably also leave them for longer so that they melt completely.
So thanks to Pinterest and other crafty people I've used up all my stock of cheap Hama beads, although I'm tempted to return to these crafts in the future as I think they all look really good!


No comments:
Post a Comment
I love reading your comments!