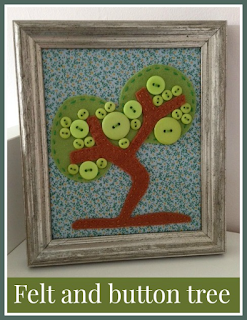
I love crafting with felt and buttons (see my felt and button embroidery hoop art here!), and having recently come into possession of a lovely new silver frame that I picked up in our local craft shop on the school run, I made this little button tree picture with a patterned fabric background.
Here's how I made it:
Materials:
Frame (mine has no glass)
Patterned background fabric
Green felt
Brown felt
Green buttons
Fabric glue
Scissors, needle, green thread, brown thread
Instructions:
I bought the frame in our local framing and stitching shop, they usually have a box outside with small frames for £1 each. It has no glass or backing to it, but that's fine for this project. You can easily buy cheap frames from Ikea or the large supermarkets.
The first thing to do is to plan the design for the button tree on paper by drawing around the frame and creating an outline for your picture. You also need to choose the buttons that you want to use and plan where they will be positioned. I decided to stick to round buttons in the same colour, but I found loads of inspiration on Pinterest with all different shapes and colour of button. When your design is completed, take a photograph that you can refer to later as you sew on the buttons.
Cut a piece of thick card to the same size as the frame. Then cut out the background fabric a couple of centimetres larger than the card. Iron if necessary.
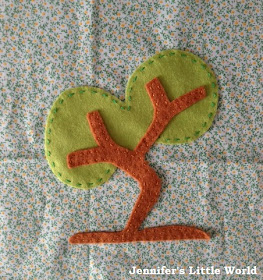
Use your paper drawing to trace templates for the felt pieces (the trunk and leaves) and cut them out. My one tip for cutting felt - buy some decent, sharp scissors and only use them for cutting felt and other fabric to keep them sharp. Use pins to secure the template to the felt when cutting. The tree trunk shape was quite fiddly to cut, I found it easiest to cut a little outside the template, and then neaten up once the paper template was removed.
Using the frame as a guide, position the felt pieces on the background fabric and secure in place with some small dots of fabric glue. Don't use to much as it will make it harder to sew through the fabric later.
Then stitch around the trunk and leaves. I used contrasting colours and large stitches because that's the way I roll, you could match the colours so that the stitches aren't visible.
Then it's time to sew on the buttons. You don't need to be as diligent as you do for buttons sewn onto clothes. Make sure that the buttons are all the same way up and decide how you want to align the centre holes, I went for random directions. I stuck pretty closely to my original design, but I did make a couple of changes.
Then you need to mount the fabric design onto your piece of cardboard. Check the positioning carefully, then fold over the edges and secure them with some long stitches across the back. Sew down the corners for extra security.
Then I found that my picture just rested neatly in the frame. If you have a more substantial frame you'll have a backing to hold it into place. I think it works better without glass as it's such a three dimensional piece. Here's the final piece!
I loved it so much that I went on to make a second button felt picture which you can see here - Brown and pink felt button tree picture. They both look great hung up on the wall just above my desk!


Glad you managed to link up as this is super cute :) #pintorials
ReplyDeleteSuper cute effect. I love the patterned background fabric you have chosen. Popping by from handmade in July
ReplyDeleteThis is so lovely Jennifer and really quite simple too, thanks for the inspiration. I must try a few things out. Mich x
ReplyDelete