This week I'm very excited to be joining in with The Mouse Who Ate the Moon Blog Tour. I'm the final stop on the tour, and you find links to the other blogs that have taken part at the bottom of this post.
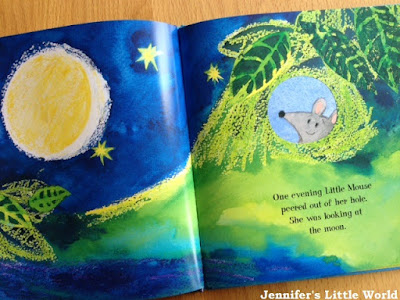
Written and illustrated by Petr Horacek, The Mouse Who Ate the Moon tells the story of Mouse, who would love a piece of the moon of her very own. She wakes up one morning to find that her dream has come true - outside her burrow she finds a piece of the moon that has fallen from the sky! She can't resist a tiny nibble, and before long she has eaten half of it! She's desperately upset, despite the reassurance of her friends, but of course you can't really eat the moon.
I've written before that I don't have much luck finding books that appeal to Mia, but something about this story really caught her attention. I sat down to read it to her, and not only did she sit still and listen, she demanded it over and over again!
Perhaps it's the way that the pages are cut away to add an extra dimension to the book, or the simple yet beautiful illustrations with their bright, cheerful colours. The story also has the repetition and rhythm that young children love and it's a pleasure to read aloud.
I thought we'd try out some different painting techniques, based upon the gorgeous illustrations in the book.
First we tried wax resist painting. You need a white candle or wax crayon and some watercolour type paint. Draw your design using the wax, making sure that make a thick layer on the paper. Then paint over the pattern. The wax will resist the paint, with a lovely feathery outline. You can use different colours of wax, paint and paper for different effects. I tried to encourage the children to make the moon and leaves, then Harry remembered that at the beginning of the book the mouse is in bed, so he drew a bed too. It's a great way to paint with children because it's very easy and they are fascinated by making the 'secret' drawings appear. For younger children you can make the pictures in wax yourself, and let them paint over to discover what you've drawn.
Then we tried some leaf stamping. I made the stamps in advance, but an older child could help make them. I use a strip of corrugated card, bent over to form a triangle, to make a really simple, disposable stamp. To make a leaf shape I glued string to the bottom of the stamp in a leaf outline. We used a green ink pad for stamping, but you could also use paint.
For more activities based around the book, you can download some free printable activity sheets.
Find all the other posts on the Blog Tour here:


No comments:
Post a Comment
I love reading your comments!