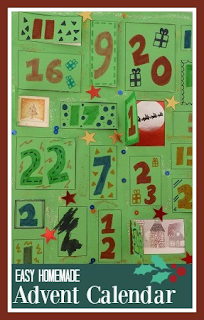
The template for the Advent calendar is made using Microsoft Word or similar. Firstly set up the page so that the margins are much smaller than usual, then use the drawing tool to make 24 rectangles in various sizes. Try and leave a reasonable gap between the boxes. Then print out two copies - I printed out one copy onto white paper and one onto green paper. The white piece is the background, so it needs to be strengthened by glueing it onto a sheet of thick card. The green piece will be the front.
Then you need to collect together some Christmas images. I mainly used my collection of cuttings from old Christmas cards, which I also use for gift tags. The cardboard meant that they made the Advent calendar a bit sturdier. You could also look for pictures on Christmas wrapping paper, Christmas catalogues and gift guides from shops, magazines with Christmas articles or just use Google images to search for Christmas pictures which you can print out.
Cut the pictures to the sizes of the different rectangles and stick them down on top. Try and let them overlap the sides of the boxes a little.
While they are drying, use a craft knife to cut out the windows on the top (green) sheet of paper. Make sure that you have both pieces of paper the same way up, and cut along the top, bottom and right hand side of each box.
Then glue the top piece of paper down onto the background. Only use a minimal amount of glue, you don't want the windows to end up glued down! Make sure that the windows are lined up with the pictures underneath.
When it's all dry, you can use felt pens to write on the numbers for the doors, and bling it up with some glitter glue and sequins. Harry loved helping with this bit, your child can really get involved with personalising their own Advent calendar. And it will still be a surprise when they open a door each day as they'll never remember all the pictures that they used!
If you have a wooden Advent calendar with boxes, don't forget to have a look at my post with ideas for gifts to fill a wooden Advent calendar!


Oh I love it! I came up with a cross-stich one the other day but it's a bit late in the year to get it done now. I may save it for next year...
ReplyDeleteThank you! A cross stitch one sounds lovely, I might look for one of those for a future year.
DeleteReally simple, but a great idea to create something really special and unique
ReplyDeleteLovely idea. My little boy loves flaps so would think thats amazing!
ReplyDeleteI know this post is from forever ago, but it's just what I needed! Thinking of having our 3yo create these as gifts we can send to love ones we can't be with this year, more interactive than just a card! By chance, does anyone have an easy to download version of the template they used so I can just print? Would be a huge time saver versus creating my own. Thanks again!
ReplyDeleteI'm so glad it was helpful! I'm very sorry I don't have a copy of the template, it was just something that I put together quickly!
Delete