Monday, 30 June 2014

A day out in London

On Sunday we had a last minute family day out in London. We've taken both children to London before for a couple of days, but this was the first time we attempted it all in one day. We tried something new - instead of taking the train which is quite a trek for us, we drove and parked in Westfield Shopping Centre (Shepherds Bush). They are currently running a promotion with PayPal where you can park all day at the weekend for just £3, a definite bargain and it worked really well. The tube station is right outside and you can easily get right where you want to be.

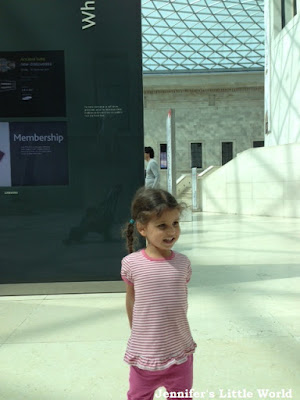
We started in The British Museum, which we've not visited before with children.

A day out in London with two small children

Although Harry was interested in the exhibits that we showed him, there wasn't really a lot there for Mia. It was very busy so we couldn't really let her run about, and there wasn't anything there for them to touch or interact with. Although there is plenty there to interest young children, I think that it helps if they are at an age where they can understand a little more about what they are seeing. Harry was fascinated by the mummies, Mia was disappointed because I think she was imagining something like a baby group filled with Mummies.

A day out in London with two small children

So then we went on to our old favourites, The Natural History Museum and the Science Museum. We have our route around them now. In The Natural History Museum we visit the dinosaurs, the mammal hall with the blue whale, and the escalator up through the giant Earth. The Volcanoes and Earthquakes gallery has been refurbished since our last visits and had some very interesting displays. Both children enjoyed the earthquake simulator which has now reopened. Harry is still fascinated with the David Attenborough programme that was on over Christmas, and he likes finding the exhibits which featured.

A day out in London with two small children

In the Science Museum we started off in the Garden area in the basement where there is lots to do for little ones, then moved upstairs to Launchpad. Previously we've visited during the week, and we were surprised by how much quieter it was on a Sunday. Admittedly it was a sunny day outside, which affected the visitor numbers, but we really thought that it would be much busier.

A day out in London with two small children

They both enjoyed spending time here. Harry wants to be a 'scientist' when he grows up, so he kept asking to see more scientist things. We stayed here until mid-afternoon and could have stayed longer, but we were conscious that we didn't want to be too late home. Harry did brilliantly with all the walking, he's a reluctant walker but he hardly complained at all.

We stopped for dinner at Pizza Hut on the way home and then they were both straight to bed despite sleeping all the way home in the car, so they were obviously exhausted! We had a great day and managed to fit so much in, definitely a day trip that we'll be thinking about repeating soon!

Friday, 27 June 2014

Summer crafts with Baker Ross

I love being a member of the Baker Ross Bloggers Network and having the chance to try out some of the products in their range. My most recent parcel was a big bundle of summer crafts.

I really like the simple craft kits that Baker Ross do. There are more than one in a pack, so I have one for each child, and I've found that they are geared to just the right level for us - Harry (5) can just about complete them by himself and Mia (3) can help me to make them up and enjoy decorating them herself.

These two kits - the Wooden Sailboats Kits and the Watering Can Desk Tidy Kits are perfect examples, and each was a nice after school activity. I also like that they each have a use, the wooden boats went in the bath (although the felt pen that we used to colour them didn't survive!) and the desk tidies look lovely on their bookshelves holding their favourite pencils.

Summer crafting with Baker Ross

Another sweet and simple craft were the Crinkle Butterfly Decorations. I needed to help with folding the tissue paper but both children were able to decorate their butterflies themselves. Although the kit made four butterflies there was lots of tissue paper left over and plenty of decorations which we will be able to use for a future project.

Finally, I really like the Mini Plastic Buckets. The children have seen them but I've stashed them away. All they want to do is to play going to the beach with their teddies, but I have different plans for them which I will share in a future post!

I think that these little buckets would make lovely party bag alternatives, perhaps filled with sweets or a small toy. I was also sent a pack of Waterbird Whistles which I've tucked away for that very purpose, and Baker Ross sell a great range of party bag fillers. I particularly think the craft kits would be lovely gifts to include in a party bag, especially as usually larger quantities are available to purchase - all the craft kits above can also be purchased in packs of ten or more.

I received these products as a member of the Baker Ross Bloggers Network.

Thursday, 26 June 2014

Learning about the Titanic with young children

Harry has lately developed a bit of a fixation with the story of the Titanic. He enjoys watching Lego videos on YouTube, and it all started when he came across a video recreating the sinking of the Titanic in Lego. He was amazed when I told him that the Titanic was a real ship, and found him some photographs of the ship at sea and the wreck photographs.

Learning about the Titanic with Twinkl

The next day, left alone for a short while with his box of Lego, he managed to craft a rather impressive model of the Titanic and an iceberg to go with it. His model even breaks apart in the middle, just like the real one did.

Learning about the Titanic with Twinkl

I know that I need to be very careful how we nurture his interest, after all he's only five and he doesn't need to know all the details. But I do think it's really important to try on build on a subject that he has expressed an interest in. After looking through some photographs online my next stop was Twinkl. I'm constantly impressed by their vast selection of teaching resources on such a huge variety of topics, and a search for Titanic materials didn't disappoint. Although some of the resources are only available to Premium members with a subscription, there is plenty available for free.

We were sent a lovely bundle of writing materials by Stabilo, and having fun with these resources was a great way to try them out.

Harry was keen to start with a Titanic wordsearch (Twinkl subscriber resource). He chose to use these gorgeous EASYcolors colouring pencils. They have notches down the length of the pencil to make it easy to position the fingers correctly and they wrote smoothly in lovely bright colours.

Learning about the Titanic with Twinkl

I gave Mia a set of crayons called the WOODY Wallet - six chunky pencils which colour like crayons and can also be used wet. Again, the colours were bold and bright and they were easy for her to hold. Her Ice Berg picture is one of the Titanic Colouring Posters (free download). She picks up so much of what is going around her, and she can easily recognise the Titanic now when she sees a picture of it!

Learning about the Titanic with Twinkl

I also wanted to stretch Harry a bit, so I printed out a Titanic Acrostic Poem (Twinkl subscriber resource), which Harry used in conjunction with a Titanic Word Mat (Twinkl subscriber resource). I love the Twinkl word mats, they are available for almost every topic you can think of and are a great way to increase vocabulary. He had to come up with a word to describe the Titanic for each letter, and although I did give him quite a bit of help with thinking up the words I think that he did really well.

Learning about the Titanic with Twinkl

For his writing he tried out the Stabilo EASYergo 1.4. It's a mechanical pencil so you don't need to sharpen it, and it also comes with a couple of replacement leads which are stored inside it. Harry had never seen anything like this and he was fascinated - this pencil definitely appealed more to him than a normal one! I was also very impressed by how comfortable it was to use. I must admit at this point that I have a terrible pencil grip, it was never picked up on at any point, and because I think that my writing is quite neat I'm reluctant to try and learn how to hold a pencil properly. But this mechanical pencil did give me an idea as to how I should really be holding a pen.

I've mentioned a few of the Twinkl Titanic resources that we used above, and below are the others that I found useful at Harry's level (Early Years/Reception). Twinkl also have all sorts of Titanic materials aimed at older children, including plenty of role play and literacy activities.

Even very young children would enjoy using the Titanic Playdough Mats (Twinkl subscriber resource) and could practice cutting and ordering skills with the Titanic Size Ordering (Twinkl subscriber resrouce) sheet.

Harry is a fairly confident reader, and he enjoyed the Titanic Word and Picture Matching Worksheet (Twinkl subscriber resource). You could help younger children by reading the words for them and helping them match the word to the picture. Finally Harry very much enjoyed looking at and colouring this Titanic Cross Section Template (free download), which is best used in conjunction with the Titanic Cross Section Poster (Twinkl subscriber resource).

We received these Stabilo products in exchange for a review. I have also kindly been given a Premium subscription to Twinkl in exchange for past review posts, but the resources are so great that I regularly write about them of my own accord!

Wednesday, 25 June 2014

How to make a lion tamer costume

I might appear quite crafty, but the thought of having to come up with a themed costume for a school event always fills me with dread. There's a huge difference between buying a costume on eBay and spending hours coming up with a lovingly handcrafted effort, and I'm not sure where on the scale I fit in.

I cheated a bit for Harry's 'Fairytale Day' by dressing him as a Prince - making him a crown and sending him in wearing his formal suit. I also played it safe for 'World Book Day', going with a Charlie Bucket costume that involved jeans and a plain top. I did go to a little more effort with the Shepherd's Nativity costume, but generally I've kept it simple.

So I thought I could make a bit more effort for 'Circus Day' and come up with something original and yet not requiring too much time or expense. After a bit of brainstorming with family members, my Dad suggested a Lion Tamer. A quick Google for ideas gave me a starting point (as well as a few very unsuitable ones!)

I decided to make Harry more of a Lion Trainer, so instead of a whip we made him a little tin for 'Lion Treats', which he filled with coloured sweets that he drew and cut out.

I took our hula hoop and added flames by cutting shapes out of red and yellow paper and taping them around the top edge. Then he wore his smart trousers and waistcoat with a t-shirt. I would have liked to add a moustache but he refuses any kind of face paint. A lion was an essential part of the costume, and fortunately we have a stuffed Simba.


Even though it was the morning of the Britmums conference and I was almost off duty, I went along to the school to see all the other children dress up (and pick up some ideas for when it's Mia's turn in a couple of years). One really original costume that I saw was a plate spinner, with a paper plate taped to a stick. There were also a few strongmen and plenty of clowns. Most of the girls were in tutus, so that's something that I should be able to manage!

What Harry really liked about this costume was the opportunities that it gave him for role play. Although I don't think that they put on any kind of performance at the school, he had a great time at home playing lion tamers, teaching his toy lion to jump through the hoop and do other tricks before being rewarded with a sweet.

What sort of costumes have you had to produce for your child?

Monday, 23 June 2014

Britmums Live 2014

This weekend I spent a fantastic couple of days at Britmums Live 2014. I booked my ticket just hours after returning from from Britmums Live 2013, and I think that it's safe to say that I won't be waiting long to book a ticket for Britmums Live 2015.

I was a little braver this year, and didn't line up a buddy to accompany me into the conference. Nonetheless I was rather relieved when I went into the Premier Inn to check my room arrangements to recognise fellow cross stitcher Ruthy from Minibreak Mummy sitting in reception. I persuaded her to accompany me to All Bar One where I knew that some bloggers were meeting beforehand, and I was very glad that I had found her, because when we arrived I couldn't immediately see anyone that I recognised!

Once inside, it wasn't long before I discovered the Lindeman's stand giving out free wine, and my blogging buddy Swazi from Chocolate is not the Only Fruit knew exactly where to find me. It was also lovely to catch up over the conference with Kath from Dreaming of a Craft Room, and she introduced me to the equally lovely Ella from Purple Ella.

Britmums Live 2014

As well as meeting new people and seeing familiar faces, a main focus of the event for me was the sessions, and once again I've come away with a notebook bulging with ideas and inspiration.

My first session was Writer's block and unlocking the creative process with published authors, and I was excited to see that one of the panellists was Amanda Jennings, having just received The Judas Scar to review for the Britmums book club. I've talked before about how I don't feel that I have a book in me, and that hasn't changed, but I was really inspired by how these three women (also speaking were Hannah Beckerman and Rowan Coleman) had managed to write not just one but multiple books, with less free time than I think that I have. They all had different ways of working, but what really stuck out was the fact that they had each found the time to write, whether it was capturing odd moments throughout the day or setting aside dedicated blocks of time. It really made me think about how I could use my spare time more constructively.

I also really loved my second session - Design tips to make your blog look gorgeous with Lucy Heath from Capture by Lucy. I'm well aware that my blog is in need of a makeover, and now that I'm more confident with customising Blogger I'm going to go right back to the beginning with a blog mood board and do my best to come up with a new, more professional design.

On the Friday evening it was the Brilliance in Blogging (BiBs) Party. I was so thrilled to be shortlisted again this year, and all the finalists truly deserved to be there. As well as enjoying some more free wine with Swazi I also spent time talking to Heather from Pret-A-Mummy and social media representative at Twinkl Resources. (You may have noticed that I'm always going on about Twinkl on my blog as I think it's such a fantastic website if you want to find educational resources for your children.)

Britmums Live 2014
Photo thanks to Swazi!

The second day of the conference can be quite intensive, as there are lots of sessions. After the very moving keynote speech from Benjamin Brooks-Dutton from Life as a Widower, I took a break and made some time to visit some of the sponsors of the event.

Then I attended the Pinterest session, which was presented by Lizzie Sibley, UK Community Marketing Manager for Pinterest. I love using Pinterest for myself (insert gratuitous link to my Pinterest profile) but I'm pretty useless at using it to promote my blog, so I picked up lots of tips. In particular I was very interested to learn that 75% of Pinterest usage is via a mobile device, so it's really important to make sure that your blog looks good on a mobile.

The Collaboration session was also very helpful. I've never really thought about asking other bloggers to join me in anything, despite having seen it work very successfully for others. It's a really good idea to locate and contact other bloggers in your niche that have been blogging for a similar time or are at a similar place in terms of traffic and followers, and work with them so that you can build on each other's strengths.

I also attended the Travel Blogging session. I was worried that it might be too similar to last year's session, but I did want to see Simon Calder and I picked up lots of useful tips, in particular, to include the children's point of view as I write about places that we visit. The trouble is that I'm torn between being a 'Travel Blogger' writing interesting posts written from an alternative angle, and just keeping it simple with a straight diary style, after all this blog is really about keeping a record of my memories.

After lunch came a session which I only decided to attend at the last minute thanks to Louse from A Strong Coffee, and I'm so glad that I did. YouTube with Greg Brand from Travizeo was packed with so much useful information. I've been using YouTube for a little while (insert gratuitous link to my YouTube channel) but I've slacked off a bit lately, even though some of my videos actually do quite well. I've learned a few things that I can add to my videos, like how to add associated website annotations, and it's given me the push to get up and running with the video again.

My final session was Tech Knowledge with Ruth Arnold from GeekMummy. I found that I was already doing many of the things mentioned, but it was really valuable to have some reminders about things like regular blog backups. I also learned a bit more about Google Analytics. Although I have it installed I don't find it particularly easy to use, so I'm going to make the effort to try and get to know it a little better.

I did spend a short while wandering about on my own which made me feel a bit lost for a time. I don't know why it didn't occur to me that I could actually leave the venue for a bit and take some time for a quick walk outside by myself!

I made more of an effort to talk to the sponsors this year, although I don't find it easy. I introduced myself to the representatives from Butlins, having applied for their ambassador programme this year, and I also met the ladies from Parragon books. I've been a book buddy for a year now, and I'm looking forward to helping Harry take part in their "Summer with Gold Stars" challenge to continue his learning throughout the summer holiday.

I love talking about family travel and I had a great chat with Carnival (who were giving away some fantastic sand toy sets), although I did feel a bit disrespectful talking about our cruises with other companies! Rangemaster were also handing out some lovely baked treats and there was plenty of delicious food in the Morrison's lounge.

Britmums Live 2014

Many of the stands wanted you to pose with various props for a photo. I normally shy away from that, but actually it's quite nice to have some silly photos (even if they did then have to be shared all over Twitter!)

Britmums Live 2014
Pictures thanks to Picota Jerte, Acuvue, Wyndham Vacation Rentals
 (I'm with Minibreak Mummy) and Port Aventura

BritMums 2014 ended with the keynote speeches - twelve bloggers reading out their own, always very moving, blog posts. Then we were treated to a short musical performance by The Good Enough Mums Club which I really enjoyed and it was a great way to end the conference, with catchy songs and plenty of humour.

Britmums Live 2014

I was feeling pretty emotional at the end, a feeling I remember very well from last year. It's a combination of having been completely overwhelmed, tiredness, emotions brought on by the bloggers' keynote readings, and of course having missed the little ones and being ready for home.

But I'm very much hoping to return for Britmums Live 2015!

Friday, 20 June 2014

Me and my phone

On our recent holiday to Ibiza we made the decision not to purchase wi-fi at the hotel. Instead we mostly left our phones in the safe in the hotel room and managed without. I'm really glad that we made that decision, because it made me think a lot about how much I use my smart phone.

The trouble is that I feel I need to be contactable - by my husband, by the school or nursery. I also use my phone for lots of things - as a camera, a clock, shopping list, calorie counter, housework organiser. So I tend to carry it about the house with me.

With instant notification of a new e-mail or social media mention, I feel obliged to check it straight away. If I'm occupied and can't respond immediately, I start to feel anxious. If I'm halfway through responding and I'm interrupted, I become irritable.

But on holiday it was different. A couple of times during the week I checked my e-mails, but because I wasn't watching them as they came in I didn't feel that I had to respond immediately. In the end, there were only a very few e-mails that actually needed a response.

I took a small notebook away with me, and I found myself jotting things down - ideas for blog posts (like this one!) and also random thoughts. I do like writing, and so the notebook became my blog substitute. With all that time to think instead of mindlessly scrolling on a phone screen, I found myself reminiscing happily to myself about previous holidays that I've enjoyed, and then talking about those memories with the children. I also managed to read three books, mainly using those short periods of spare time when I would have been on my phone.

Pen and notebook

Since coming home, it's really made me think, and I've been trying very hard to leave the phone on the side, where I can still hear it ringing but can ignore the other noises that it makes. Because of course the real impact of being constantly on the phone is on the rest of the family.

The children are growing up in a world where they are surrounded by smartphones, tablets and all the technology that is yet to come. They do need to use and be familiar with it, and their childhoods are going to be very different to mine. I also gain a lot from using my phone - there is always someone to chat to on-line and I've found plenty of thought provoking and informative content to read.

But children learn by example, and I can see a scenario in a few years time where we are all sat around physically in the same room but interacting with a screen instead of each other. In fact I can already see it happening sometimes now. So I'm now going to try very hard from now on to set a good example.

I'll leave you with this video, you've probably already seen it but it definitely deserves repeated viewing!

Wednesday, 18 June 2014

How to make a Hama bead hair clip holder

How to make a Hama bead hair clip holder

We make so many Hama bead creations in this house that I'm always looking for ways that we can show off the results. I have written a whole post on ways to display finished Hama bead projects, and this Hama bead hair clip holder is another great way to put some of those mini pieces of art to a practical use.

Hama bead hair clip holder craft

Mia was born with plenty of hair, and she's needed hair clips to hold it out of her face since she was quite little. We have lots and lots, and now that she's a bit older they stay around for longer before she loses them. I wanted a way to store them to keep them on display, and also to have a way of keeping pairs together. Hair clip holders using ribbons are all over Pinterest, and I thought that a Hama bead design would be perfect for my Hama bead obsessed daughter, as well as being a nice weight for the hair clip holder - light enough to hang easily on the wall yet heavy enough to keep the end of the ribbon weighted down.

It was a super simple project to put together, and I didn't even need to do any actual Hama beading. I just raided our shoebox of finished pieces for a couple of pretty ones! I have a huge stash of ribbon and I don't think that I've ever purchased any, this ribbon was around some pyjamas that I received for Christmas.

I cut a fairly long length of the ribbon and attached it to the Hama beads by sewing it firmly in place. Hama beads are easy to sew to because of the holes, and you just need a few stitches to secure it in place. The flower has stitches at the top and the bottom to keep it straight, the rainbow at the bottom just has one set of stitches.

Sewing ribbon to Hama bead craft

I folded the top of the ribbon over and sewed securely down each side. This forms a pocket which will hang over the hook when it's on the wall.

Hama bead hair clip craft

I have hung it up on the wall next to Mia's bed (that's her felt name picture also by her bed, an old project now but still on display!). She's pretty fascinated with it at the moment and keeps reorganising her clips, I'm hoping that the novelty will wear off after a while!

If you like this Hama bead project you might also like my Hama bead hanging hearts decoration. I also have an entire page of Hama bead crafts!

Monday, 16 June 2014

Book review - The Cat who Came in off the Roof

Book review - The Cat who came in off the Roof

The Cat Who Came in off the Roof by Annie M. G. Schmidt is a chapter book aimed at independent readers. It tells the story of Tibble, a reporter at his local newspaper who struggles for inspiration when his editor complains that all his articles are about cats. Until one day he helps to rescue Minou, a young woman who has become stuck up a tree after being chased by a dog.

To his surprise, Tibble soon learns that in fact Minou is a cat who has been changed into a woman. She still behaves a lot like a cat though, and can still talk to them, which comes in very handy when he is on the hunt for insider information about local goings on.

The Cat Who Came in off the Roof was first published in Dutch as Minoes in 1970, and author Annie M. G. Schmidt has won numerous awards for her writing - by her death in 1995 she was regarded as the Queen of Dutch Children's Literature. I know that I can remember reading her Jip and Janneke stories when I was little. This is the first time that the story has been published in English translation, which is fantastic as it's such a great book.

I read the book myself, but I'll definitely be adding it to the pile of longer chapter books that I read to Harry at bedtime. I know that he'll really enjoy it! 

This translation by David Colmer was published by Pushkin Press on 3rd July 2014.

I received a copy of the book to review, Amazon links are affiliate.

Friday, 13 June 2014

The Fiesta Hotel Cala Nova, Ibiza review

On our recent holiday to Ibiza we stayed for a week at the Fiesta Hotel Cala Nova in Es Canar. I thought I'd blog a quick review of the hotel in case anyone is looking to book a holiday there!

Review of the Fiesta Hotel Cala Nova, Ibiza

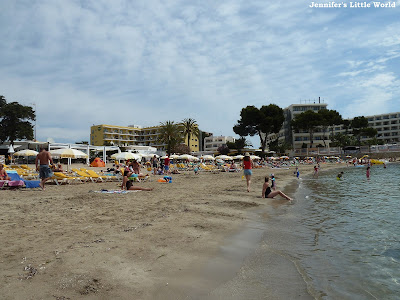
The Fiesta Hotel Cala Nova hotel is situated on Cala Nova beach in Ibiza, and within a short walking distance of Es Canar beach. The town of Es Canar is quite small, but has plenty of small shops and bars and a good sized beach.

Es Canar beach, Ibiza

You can also easily take a bus from Es Canar bus station to Santa Eulalia, about fifteen minutes drive away. Santa Eulalia is a lovely town in itself - lots going on and a large, clean beach - and from here you can transfer to buses which will take you all over the island.

Overall the Fiesta Hotel Cala Nova was a good hotel, and certainly suitable for us as a family. The location was excellent, Cala Nova beach is literally right there and Es Canar beach with supermarket, small shops and places to eat and drink a very short and pleasant walk away. It wasn't too crowded when we visited, even though it was May half-term. We always found somewhere to sit by the pool, and there was plenty of space to play on the beaches.

We were half-board, so breakfast and dinner were included. Food is served via a buffet, which was spacious and well arranged so there was never really a queue. However we are vegetarians and we did find that the dinner selection wasn't that great. Although there were vegetables cooked to accompany the main meals and there were always several cold salads, there wasn't always a specifically vegetarian main dish. There were always chips, and plenty of fruit and bread, but a bit more choice would have been nice.

We had rooms on the first floor at the front of the hotel. We booked two inter-connecting rooms, and we felt quite happy to have the children sleeping in one room while we slept in the other, keeping the door wide open at night. Each room had a balcony too, and so we had plenty of space. We did find that our room was quite noisy. There was a steady stream of buses outside our window dropping off and collecting guests, as well as daily early morning rubbish collection and deliveries day and night. A room at the back of the hotel might have been a bit quieter.

Fiesta Hotel Cala Nova, Ibiza

We didn't pay for wi-fi in the hotel, but we found that all the bars and cafes along the beachfront in Es Canar offered an hour's free wi-fi if you bought something there, so we made use of this a couple of times.

The hotel has a small children's pool with a few little slides. It's very shallow and children can play there quite happily. There is a larger pool too which we didn't use but it seemed to have plenty of room for swimming and there were quite often activities taking place there, like a huge inflatable slide or other organised games.

Fiesta Hotel Cala Nova, Ibiza

By the pool there are also a few mini golf holes (you can borrow clubs and balls for a small deposit), a couple of swings and some see-saws. It's not a huge playground, but nice to have it right there in the pool area and in easy view of the sun loungers. There is also a games room with various arcade machines, air hockey and pool (all for an extra charge).

Children on swings in Ibiza

There wasn't a dedicated children's club as such, but there was a children's entertainer by the pool every afternoon and she was doing a brilliant job. There were a few organised activities for a couple of hours, and then every evening at 8.30pm was the Mini Disco which our children absolutely loved. It was pretty much the same every night, a selection of action songs in various languages with the entertainer on stage leading the dancing and all the children joining in. A couple of times Goofy even made an appearance! We generally took the children to bed after the disco, which was followed by Bingo and then a show or music act. The only evening entertainment that we stayed up for was a bird show with trained parrots, perhaps not the most professional show to a grown up's eye but the children loved it!

We had a really lovely holiday, which you can read more about here - Our family holiday in Ibiza.

Wednesday, 11 June 2014

Patterned paper week to view wall calendar

This week my crafting has been inspired by a lovely book which I've been sent to review. Petit Collage by Lorena Siminovich (affiliate link) is packed with easy craft projects to brighten up your home. My first project from the book was this dry erase week to view calendar.

Dry erase week to view calendar craft project

We use Google calendar on-line to keep our family diary in sync, which works very well, but I find that I also like to have a visual plan of the upcoming week to help keep me organised. I used a cheap glass clip frame (two for £2 in Asda) and some pretty patterned paper (Spring Patterned Card and Paper Pack from Baker Ross, which I also used for my Ikea wooden drawers). The project is adapted from the Dry-Erase Dinner Planner in the book.

Dry erase week to view calendar craft project

I made the calendar A4 size. I began by choosing and cutting out my rectangles of paper. In the original project the days are arranged underneath each other, but I wanted a bit more space to write so I divided the calendar up into eighths, leaving a final rectangle for extra notes. I tried to choose paper with a small pattern so that it wouldn't detract from the writing over it.

Although I tried my best, for some reason I'm just not very good at measuring! Fortunately that didn't matter, as I was able to use some thin washi tape to mark out the boundaries between sections. I finished it off with the initial letters for the days of the week, using the template included with the book. Then I clipped it into the frame and mounted it on the wall.

Dry erase week to view calendar craft project

Luckily I had a dry-erase marker to hand. For now the pen is stuck to the wall beside the calendar, but I may look at purchasing a magnet to affix and stop it getting lost. Here is the finished calendar in situ in the kitchen, as you can see we have an exciting week, and it's proving very handy!

Dry erase week to view calendar craft project

Tuesday, 10 June 2014

Open Farm Sunday at Goodwood Home Farm, Sussex

Open Farm Sunday takes place every year, a fantastic project which sees farms across the country opening their doors, usually for free, to visitors that want to learn more about farming. It's a chance to find out more about where your food comes from, and there are usually plenty of extra activities and events taking place based around the individual farm.

This year, for the first time, we decided to visit Goodwood Home Farm, the largest lowland organic farm in the UK, situated in the Goodwood Estate, West Sussex. The farm shop, selling dairy, ales and meat products, is open most days, but Open Farm Sunday was a chance to see a bit more of the farm and learn about the way that these products are made.

Open Farm Sunday at Goodwood Home Farm, Sussex

We had a wonderful time at the farm, and we were so impressed by how much effort had gone into organising the day. We arrived at noon as the farm opened and headed straight for the tractor ride, knowing that it would be popular. We were driven a short distance across a field and started our tour of the farm at the dairy. Goodwood Home Farm dairy produces milk, cream and cheese, all made right there on the farm. We sampled some of the milk and cheese, which was delicious, and then the children helped to make butter which we ate on crackers, it was fantastic for them to learn a little bit about where these things come from.

Open Farm Sunday at Goodwood Home Farm, Sussex

In a small copse nearby there were some forest school type activities set up. We toasted marshmallows on a campfire, and I allowed Harry to lead me around a blindfold rope course. Fortunately I was sensible enough not to trust him completely and made sure that I was peeking a little bit, otherwise I would have been steered into numerous trees and brambles! Mia made a nature crown and Harry hunted for bugs with an insect jar. All the staff were so friendly and welcoming, and the children had a great time.

Open Farm Sunday at Goodwood Home Farm, Sussex

We took the tractor back to the main farm, and arrived just in time to watch a sheep shearing demonstration, followed by a visit to a barn where ladies were spinning sheep's wool into yarn and weaving. We finished at the crops exhibit, where the children were able to grind their own wheat grains into flour to take home.

All such simple activities and yet really enjoyable, and not just for young children. We all learned a lot, and the day was organised so well, we got such a lot from it. I'd definitely recommend keeping an eye out next year for a farm close by to visit!

You can find out more about Open Farm Sunday here, it's already in the calendar for next year!

Did you visit a farm this year?

Sunday, 8 June 2014

Recipe - Baked chocolate brownie cheesecake

For Mia's birthday I baked a dessert that I've been meaning to try for a long time - chocolate brownie cheesecake! The recipe comes from my brother who has impressed me with it in the past. It does take quite a few ingredients, but I found it pretty easy to make (and I had never made a cheesecake before).

Baked chocolate brownie cheesecake recipe

The cheesecake works best if you make it the day before and refrigerate overnight, so it's great if you are making it for an occasion where you want to prep as much as you can in advance. The brownie base can also be used to make standalone brownies, in fact I used this brownie recipe for my delicious cookie and brownie petit fours.

Ingredients:

Brownie base

130g dark chocolate, roughly chopped
130g unsalted butter
170g icing sugar
2 eggs
75g plain flour

Cheesecake topping

400g cream cheese (I used full fat Philadelphia)
150g icing sugar
1/2 teaspoon vanilla extract
2 eggs

Method

Start by making the brownie base. Melt the chocolate in a bowl. In a separate bowl, cream the butter and sugar together then beat in the eggs. Mix in the flour and the melted chocolate until you have a smooth mixture, then pour into a circular baking tray (mine measures 26cm in diameter which is about the minimum size I'd recommend using, but you could easily use one a few centimetres larger).

As I had the oven on anyway, I placed the brownie base into the oven (180C) for about five minutes just to make it a little firmer before putting on the topping.

Then make the cheesecake topping. Cream together the cream cheese and icing sugar then mix in the eggs. Spoon the mixture on top of the brownie base, making sure that it is spread evenly across. Smooth over with a knife. Bake in a pre-heated oven at 180C until the top has browned slightly and it is golden around the edges. I found that it took about 45 minutes. Leave to cool completely, then refrigerate overnight.

Baked chocolate brownie cheesecake recipe

Saturday, 7 June 2014

Review - ThermoMorph - Mouldable plastic for crafting

I was recently asked if I would like to try out some Thermomorph in my crafting. I hadn't heard of Thermomorph before, but I love trying out new ways to craft and a quick look on-line suggested that it looked like a really fun and versatile crafting material.

Crafting with Thermomorph

Thermomorph is made from polymorph granules - small pellets of plastic which melt together when added to boiling water to form a mouldable substance. You have a few minutes to mould the plastic before it sets and becomes too stiff to handle. You can make your own shapes, push it into moulds, or shape it by pressing against other textured surfaces. Although I was asked to review it as a crafter, I can see that it would have many other uses around the home, particularly for DIY projects if you are trying to fix or replace small plastic parts.

I had a few ideas for ways that I could use the ThermoMorph in my crafting, and once I got started I kept thinking of more crafts! I'll start with a quick introduction to ThermoMorph.

How to use ThermoMorph

Making crafts with Thermomorph

It's really easy to get the ThermoMorph ready to use. I used a little pyrex jug and poured a small amount of boiling water into the bottom. Then I spooned in a few teaspoons of granules at a time. The granules start to melt almost immediately, and you know that they are ready after a minute or two when they have become transparent and clump together. Then you can remove them with a spoon and squash it all together, and although hot the ThermoMorph is ready to handle almost immediately.

It cools very quickly to a temperature that I was happy to even allow the children to touch (obviously I kept them well away from the hot water). You can tear it easily into smaller clumps. You have a couple of minutes to manipulate it before it starts to become cloudy and solidify too much to use. It has set pretty much solid after about ten minutes.

I found that the water only stayed hot enough for me to melt one batch at a time, so ideally you need to work somewhere with access to a kettle and sink so that you can replenish the hot water. If you run out of time and the plastic has become too solid you can re-melt it by popping it back in hot water (but you will lose any shape that you've already moulded).

1 - Moulded shapes with ThermoMorph

The most obvious place for me to start was making shapes using moulds. I found that the best types of mould were silicon moulds, but I did manage to use plastic chocolate moulds too. For the plastic moulds it's important to wait until the ThermoMorph has cooled quite a bit, press it into the mould and remove it straight away. Hot plastic into a plastic mould does not end well. I made some pretty seashells using a plastic Wilton chocolate mould (which I bought in the US but similar ones are available in this country).

The Star Wars shapes are made using silicon chocolate moulds which I borrowed from a friend. The plastic shapes would make good game pieces or counters, and I can imagine making something like a themed chess or draughts set. They would also be lovely keyrings or magnets, as little gifts or keepsakes. They could easily be painted too.

I'm intending to paint these like the moulded snowflakes which you can see below.

Thermomorph moulded seashells

2 - Child's fingerprint keepsake magnets

After using the ThermoMorph for a while I was confident enough to let the children get involved. It's only really hot when you first remove it from the water, and it very quickly cools to a temperature that is very safe to touch. I made some round balls and then let the children press their fingers into them to create an imprint.

When the plastic had fully set I used a cotton bud to rub some black stamping ink and then some silver stamping ink over the fingerprint detail. It picked up the fingerprint really clearly.

Thumbprint keepsakes


Then I painted the back and around the edges using silver acrylic paint. It needed a few coats to produce a nice finish and I was really pleased with how well the silver paint worked (I just used Hobbycraft own brand acrylic paint). The stamping ink produced a nice effect on the ThermoMorph too.

Thumbprint keepsakes


Finally I glued a small magnet to the back of each. When making the original mould you could also make a hole in the plastic so that you could use it as a pendant or a keyring (see the ThermoMorph beads below for how to make a hole in the ThermoMorph as it's setting). I also wrote the child's name and the date on the back in permanent marker - as it turned out that both fingerprints were almost the same size!

3 - Stamp bases

Originally I wanted to try and carve the ThermoMorph itself into a stamp, but I don't have any experience with carving and my lino cutters didn't work, so instead I used the stamp handle that I had made as a holder for a stamp outline. I moulded a lump with a handle in the top, shaped exactly to match my fingers, then pressed it against a flat silicon sheet (I used the base of a square silicon cake tin) while it set to create a nice flat base. Then when it was set I glued string to the stamp to make a leaf shape. It was easily washed off once I'd finished so that I can make new designs.

Using Thermomorph for stamping


4 - Thermomorph beads for threading

I've tried and failed to make salt dough beads, so I thought I'd have more success with the ThermoMorph. I cut a drinking straw into small segments about 15mm long, then wrapped the melted ThermoMorph around it, making sure to keep the ends of the straw clear. The children helped with these too, rolling and shaping them to create some very unique beads. Originally I was going to keep the straw inside the bead, but when the ThermoMorph was nearly set I found that I was able to easily remove the pieces of straw using a pair of tweezers.

This time I tried painting the ThermoMorph with nail varnish, and it was very successful. The beads still needed two coats, but because the nail varnish dries so quickly it didn't take long to do, and I'm lucky enough to have quite an extensive brightly coloured nail varnish collection. Then I finished them off with a generous coat of silver glitter paint.

Using Thermomorph to make beads

Although I made these beads quickly with the children for them to play with, I can see that with a bit more time and thought you could come up with some beads that would be stylish enough to wear as actual grown-up jewellery. You could make some lovely chunky pendants or earrings.

Child wearing Thermomorph bracelet

5 - Painted snowflake decorations

The children made these pretty snowflakes using a silicon chocolate snowflake mould. I made the ThermoMorph into small balls and placed them in the centre of the mould, then the children pressed them down to fit the shape. The mould is quite deep, so they didn't fill it to the top, they just covered the very bottom which is enough to imprint the pattern.

Thermomorph snowflakes


The next day we painted the snowflakes. Like the fingerprint keepsakes, we used a couple of coats of silver acrylic paint, then finished off with some silver glitter paint. They will make lovely Christmas decorations or would also work well as embellishments for Christmas cards as they are fairly thin. They could be used as Christmas tree decorations, either by making a hole before the plastic has set or just by gluing ribbon to the back.

Thermomorph snowflakes


And as well as all this crafting, I also used ThermoMoprh to build a replacement part for our broken laundry basket!

I really enjoyed playing with the ThermoMorph. And it's great for experimenting with, because if you make a mistake or you aren't happy with your creation, you can just pop it back into the boiling water and start again! A little goes a really long way, even though some of our creations seem quite large I still have plenty left. A 500g tub currently costs £19.49 on Amazon, not a bad price at all considering how far it will go.

I was sent a tub of ThermoMorph in exchange for this review.

Friday, 6 June 2014

Blog Book Tour - The Mouse Who Ate the Moon

This week I'm very excited to be joining in with The Mouse Who Ate the Moon Blog Tour. I'm the final stop on the tour, and you find links to the other blogs that have taken part at the bottom of this post.

The Mouse who ate the Moon - review and craft

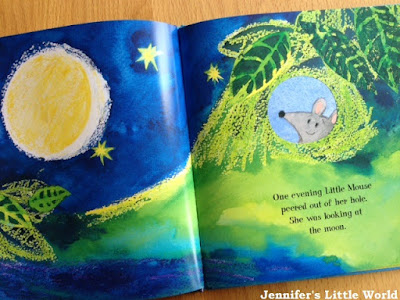
Written and illustrated by Petr Horacek, The Mouse Who Ate the Moon tells the story of Mouse, who would love a piece of the moon of her very own. She wakes up one morning to find that her dream has come true - outside her burrow she finds a piece of the moon that has fallen from the sky! She can't resist a tiny nibble, and before long she has eaten half of it! She's desperately upset, despite the reassurance of her friends, but of course you can't really eat the moon.

The Mouse who ate the Moon - review and craft

I've written before that I don't have much luck finding books that appeal to Mia, but something about this story really caught her attention. I sat down to read it to her, and not only did she sit still and listen, she demanded it over and over again!

Perhaps it's the way that the pages are cut away to add an extra dimension to the book, or the simple yet beautiful illustrations with their bright, cheerful colours. The story also has the repetition and rhythm that young children love and it's a pleasure to read aloud.

I thought we'd try out some different painting techniques, based upon the gorgeous illustrations in the book. 

First we tried wax resist painting. You need a white candle or wax crayon and some watercolour type paint. Draw your design using the wax, making sure that make a thick layer on the paper. Then paint over the pattern. The wax will resist the paint, with a lovely feathery outline. You can use different colours of wax, paint and paper for different effects. I tried to encourage the children to make the moon and leaves, then Harry remembered that at the beginning of the book the mouse is in bed, so he drew a bed too. It's a great way to paint with children because it's very easy and they are fascinated by making the 'secret' drawings appear. For younger children you can make the pictures in wax yourself, and let them paint over to discover what you've drawn.

The Mouse who ate the Moon - review and craft

The Mouse who ate the Moon - review and craft

Then we tried some leaf stamping. I made the stamps in advance, but an older child could help make them. I use a strip of corrugated card, bent over to form a triangle, to make a really simple, disposable stamp. To make a leaf shape I glued string to the bottom of the stamp in a leaf outline.  We used a green ink pad for stamping, but you could also use paint.

The Mouse who ate the Moon - review and craft

The Mouse who ate the Moon - review and craft

For more activities based around the book, you can download some free printable activity sheets.

Find all the other posts on the Blog Tour here:


I received a copy of the book to review.